

I’m having a few issues with my blog platform at the moment, which means you’re receiving my drafts. I’m really sorry about that and I apologize. I’ll try to fix it quickly, but in the meantime, here’s this week’s post!
This week’s project is probably the craziest one I’ve done so far (even more challenging than the Ikea armchair, I think…). This post is fairly long, but I encourage you to read it to the end, because I’m going to try to, how can I put it… let you into my brain, so you have everything you need to understand how I experienced this project, and how I went about finding/learning all the skills needed to see it through.
I’ll start right away by telling you clearly that, for this project, every part of my body was called upon: my guts, my five senses, all my nerve cells, my nerves, my arteries, and everything else. Honestly, my whole self was on edge for two weeks. Two weeks when every evening I’d come home from work like a madwoman, throw myself at the jacket and make progress for at least two hours before going to bed; two weeks when I completely stepped out of my comfort zone. I’m telling you, girls: since I started this project, I slept little, I was stressed, totally consumed by it, glued to my sewing machine. I was buried in YouTube, binge-watching tutorials on my lunch break—especially the one on attaching the lining to the back vent… I didn’t want to drink, eat, or talk until I’d figured it out… Basically, the start of a real madness! But I want to point out that I was the one putting this pressure on myself. And for good reason: I was paying off a big debt. A real debt, because for years he’d say:
– “You’ve never sewn anything for me.”
And to shut him up, I’d reply:
– “You’ll see—when I make you something, it’ll be REALLY something!”
So yes, this jacket, even though it was still just a concept, stirred up strong emotions on both sides. But to be honest, if I’d been holding back on this project until now, it’s because technically I didn’t feel ready at all.
Let’s talk technique…
Sewing is a set of techniques that, when combined, results in a beautiful garment if—and only if—those techniques are known and mastered. So the fewer techniques involved, the easier/more beginner-friendly the project. Likewise, the more techniques, the more difficult the project is considered. That’s exactly the case with this jacket. If this pattern had been a République du Chiffon or an Aime comme Marie (to name just those), I would have jumped in without thinking—blindfolded, hands tied, and with my fingers up my nose. But here we’re talking Burda… To be honest, I didn’t even try to read or understand the instructions provided in the magazine. What I did do, however, was first try the Françoise jacket from RDC, which I made here as a suit set. I knew that by making it I’d better understand the logic of preparing the pieces as well as assembling a tailored-style jacket. However, the techniques I was missing were mainly attaching the lining to the back vent, making the sleeve vents, and joining those to the lining as well. Otherwise, if I try to recap the different techniques I used for this jacket, here’s the list of the 5 useful techniques, along with the corresponding tutorials (some are in English but the pictures speak for themselves):
- Making a tailored jacket, especially the tailored collar – The step-by-step for the Françoise jacket. Take your time with step 1 (applying the fusible interfacing). To line the patch pockets properly, I used the explanation from the Gérard coat, but I cut the pocket lining on the bias (both are RDC patterns).
- Making welt pockets and “paysanne” pockets – Still using the tutorial from LastReelCinema’s channel, and if you want to make a version with a flap, watch the video by Diane Deziel (I always combine the two, because Diane’s method seems even more pro in terms of finishes).
- Assembling the lining – The step-by-step for the Michelle jacket (RDC pattern)
- Attaching the lining to the back jacket vent – QUTFashionStudio
- Making sleeve vents – with the video by QUTFashionStudio
- Setting in sleeves with sleeve heads and shoulder pads – stiff-collar.com
I think that if you’re more or less OK with these techniques, the jacket will go through your machine like a dream!
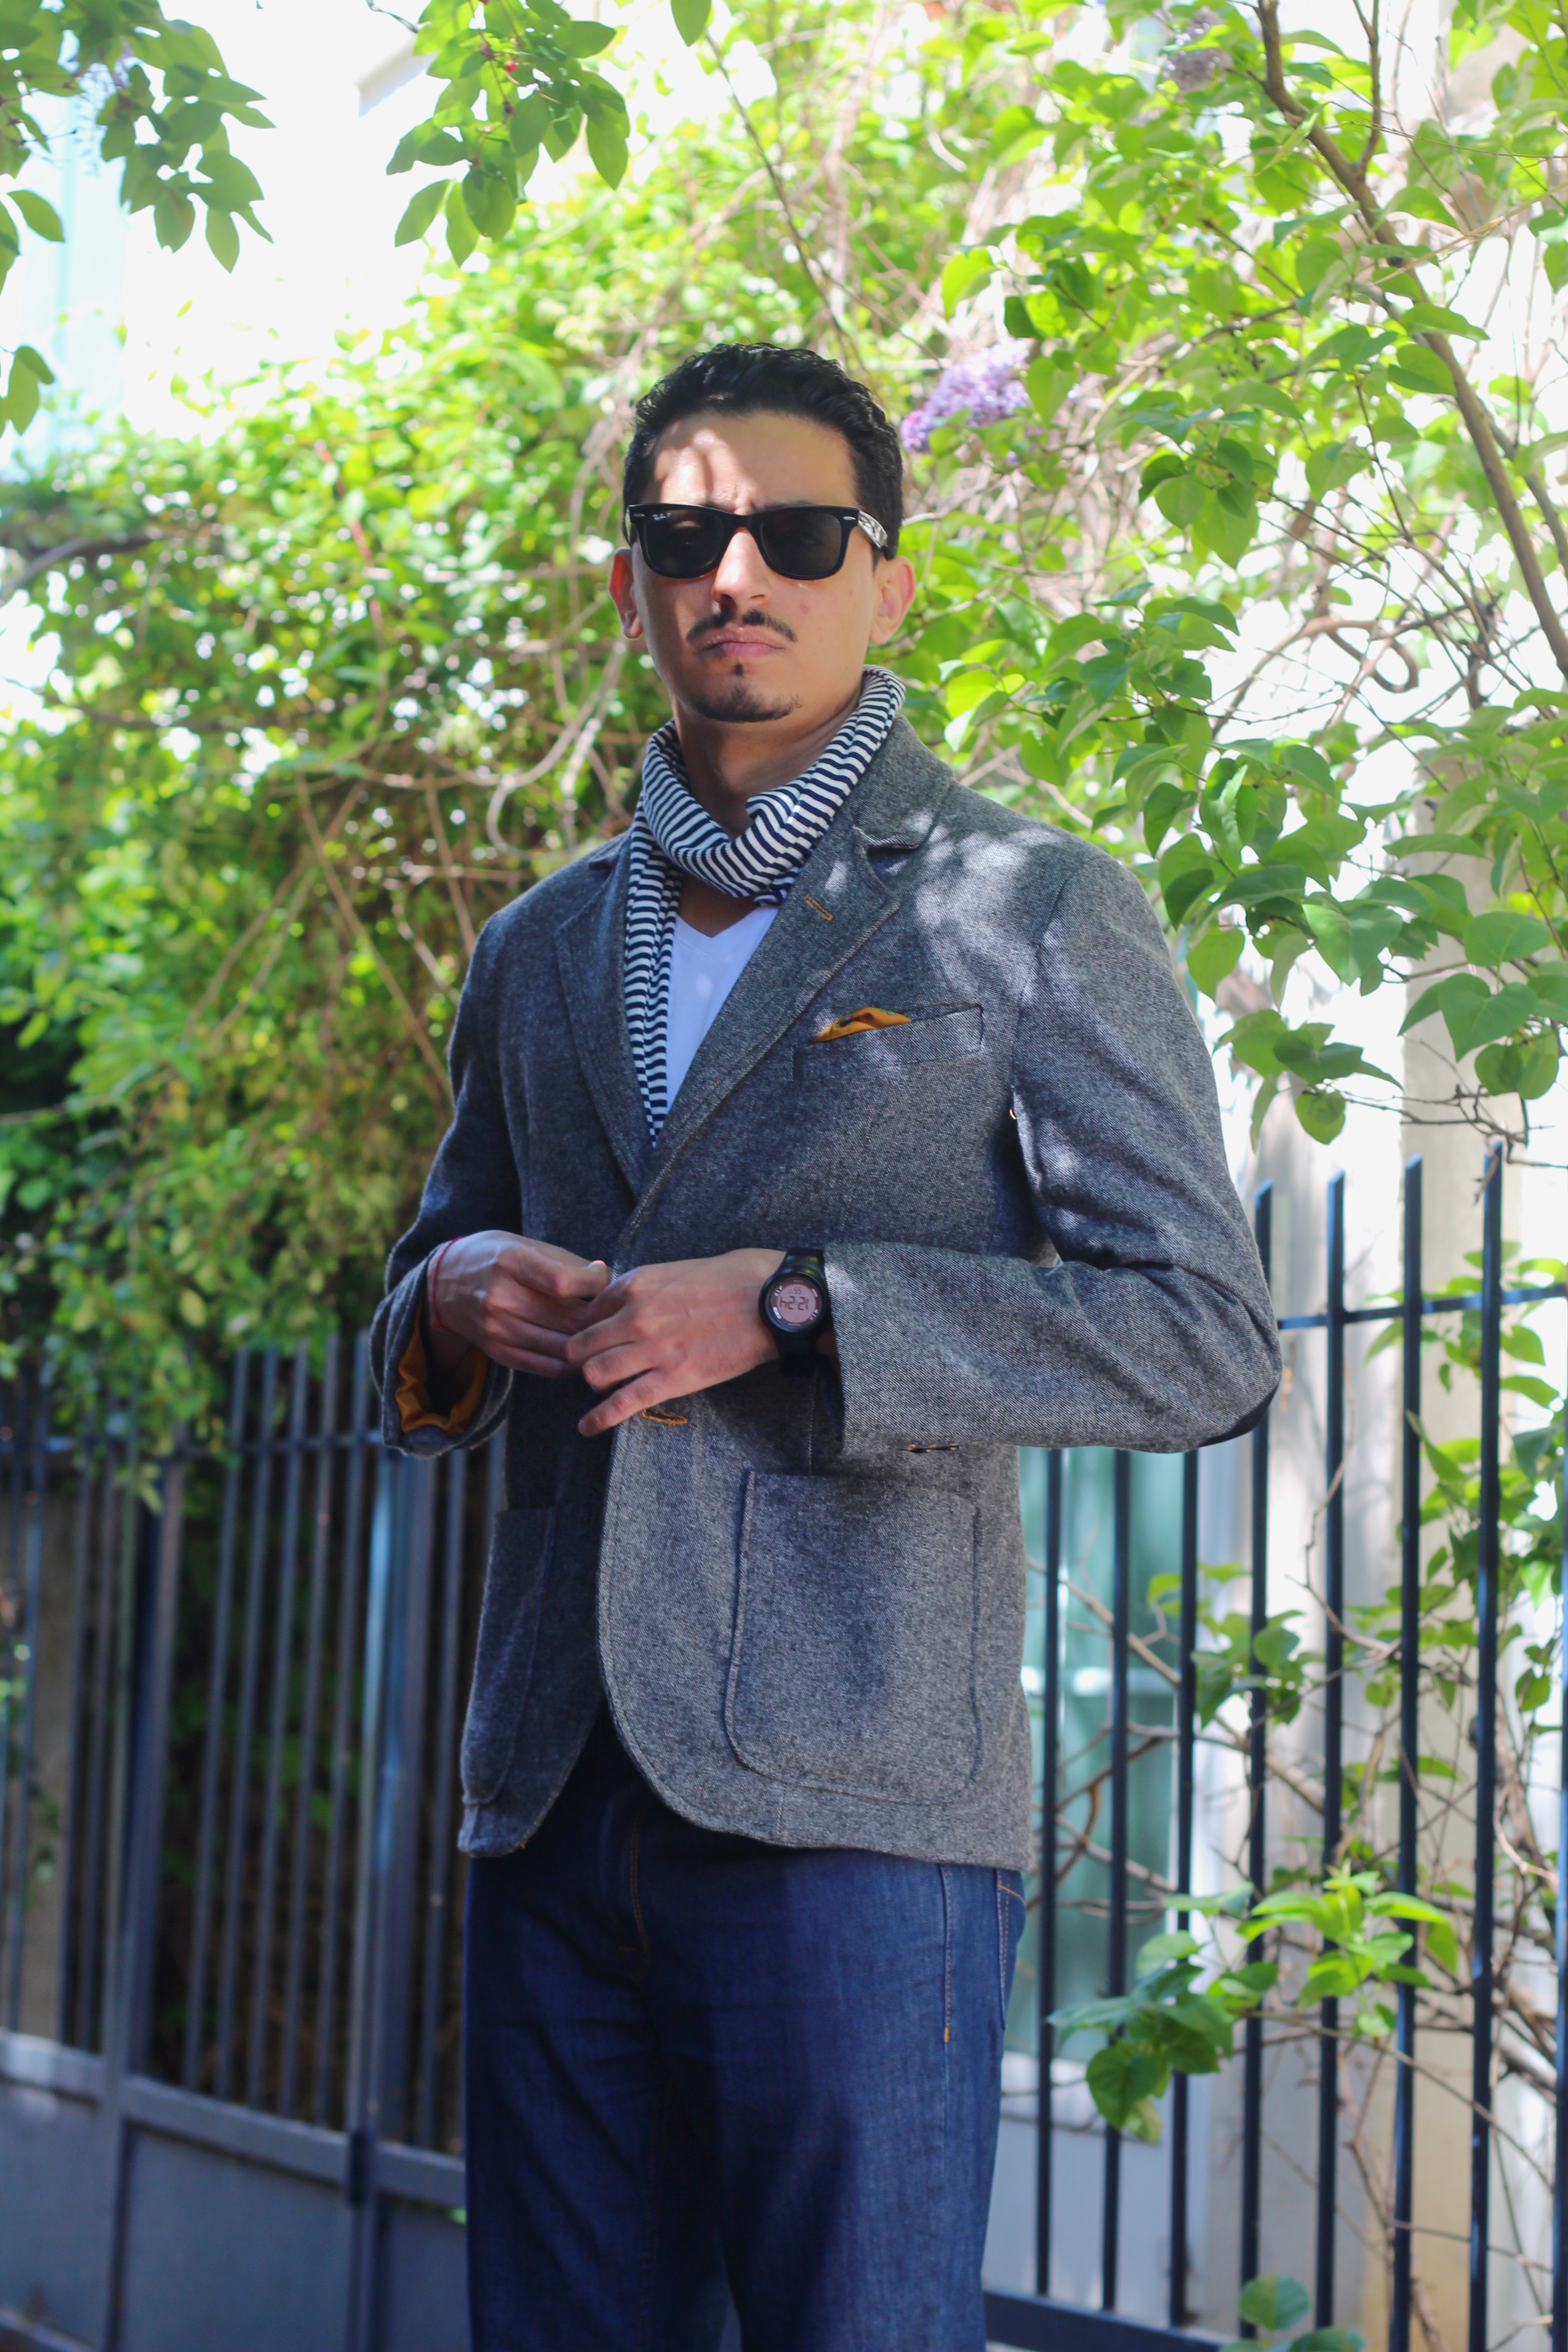
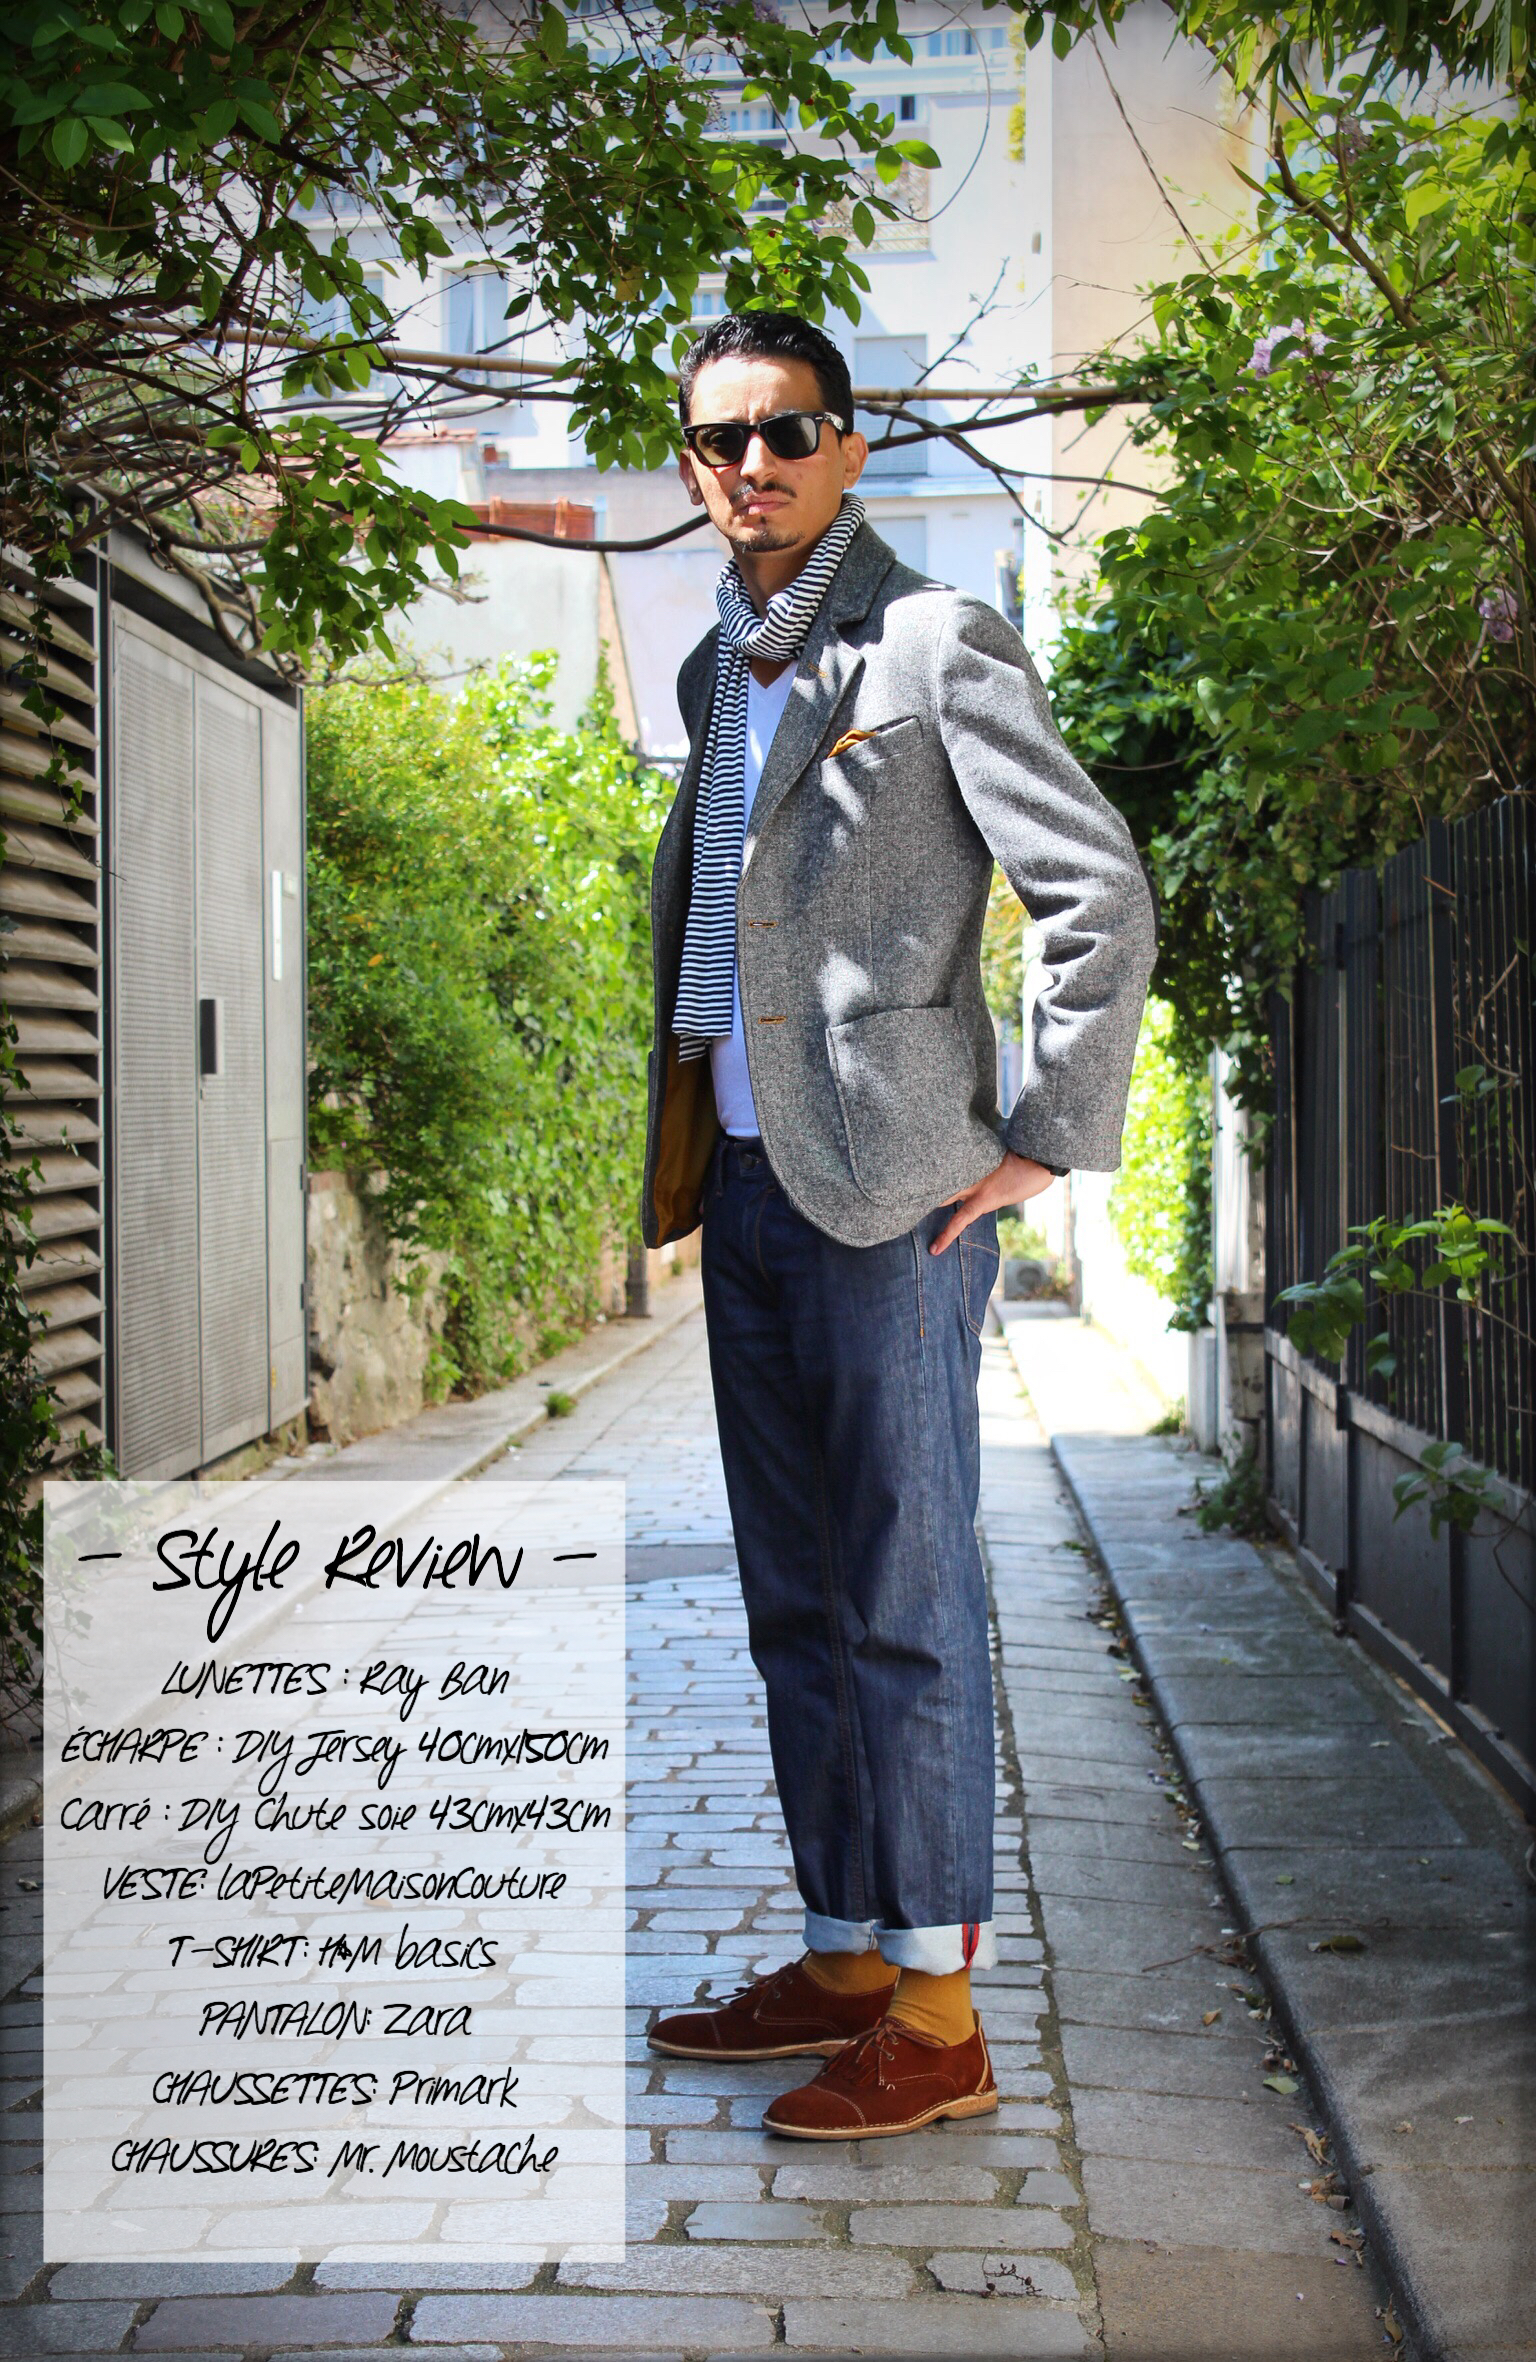
Fabric and pattern
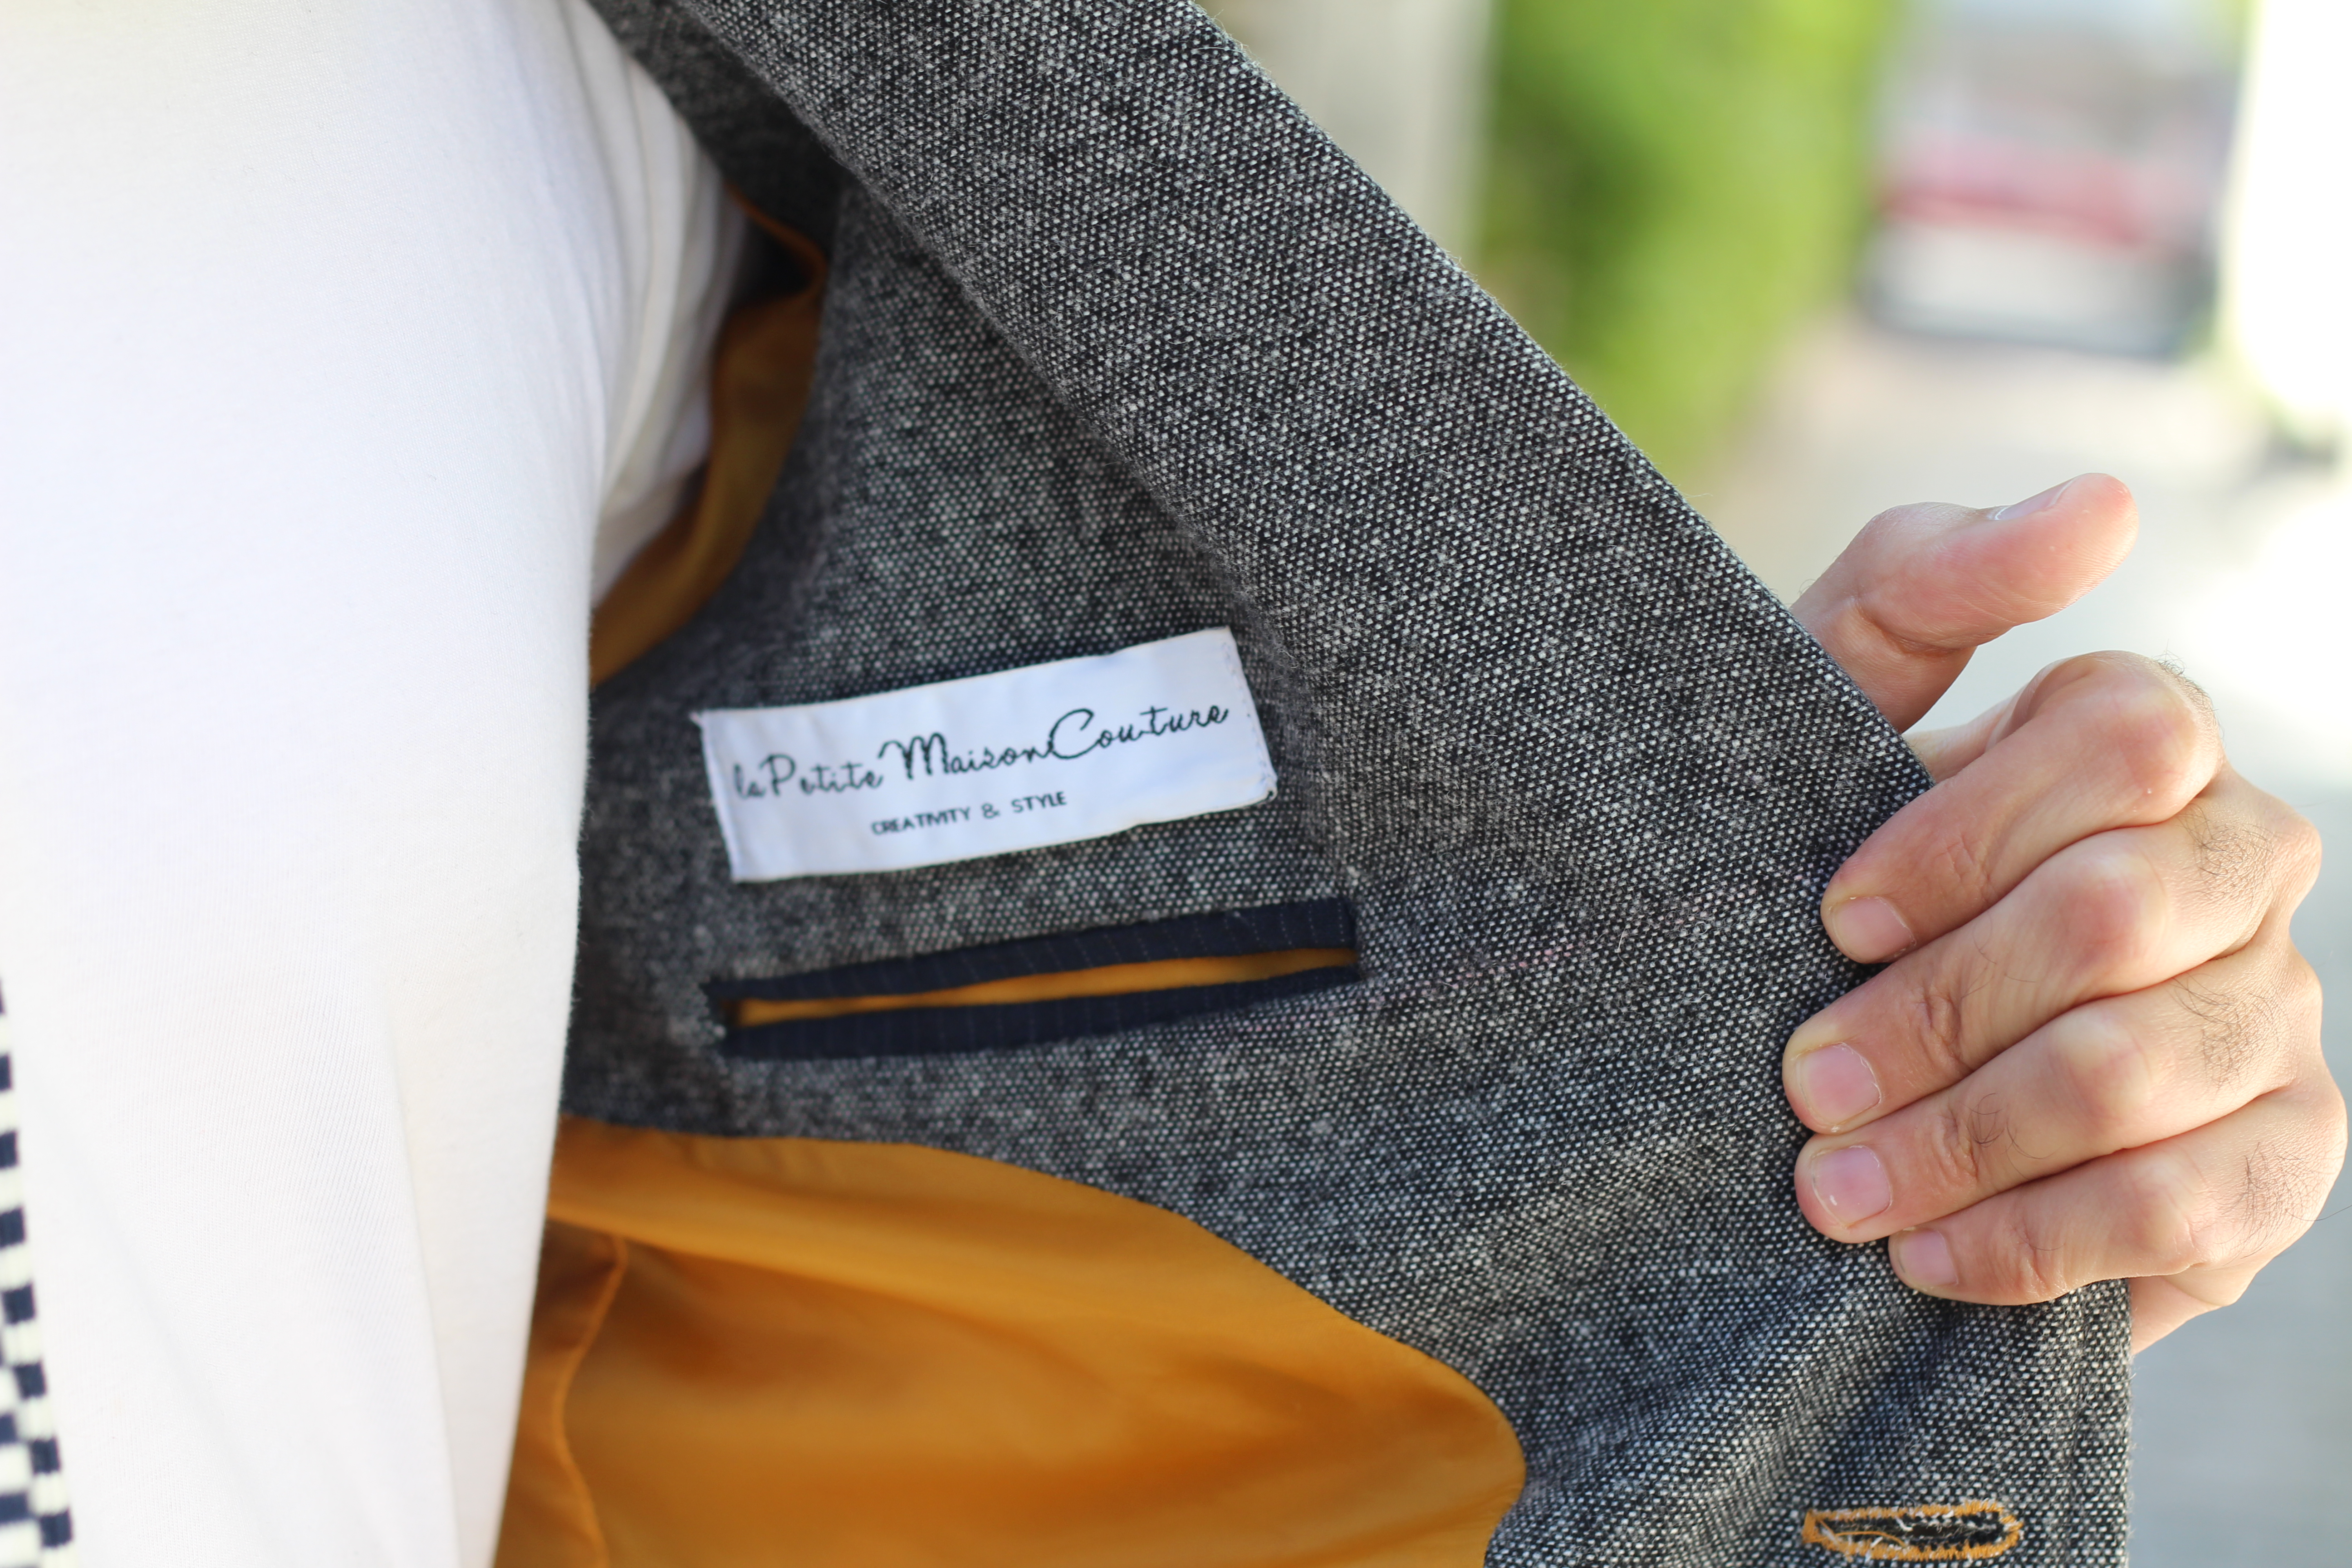
The pattern for this jacket is Burda #138 from 02/2016, in size 48. We may criticize Burda, but we always come back to it, don’t we? This magazine really is an inexhaustible well for creative, daring souls. The thing with Burda is that you can almost always find a pattern you can adapt to any project—but I’ll come back to that in a later post. As for the jacket’s cut, nothing to complain about. Just that next time, if I change anything, it’ll be at the sleeve hems: I’d narrow them a bit, but that’s just my personal taste. For sleeve length, I’d advise you to measure the wearer’s arms to adjust the sleeve length (better to cut too long than too short. On men, short sleeves are unforgiving). The pattern didn’t include a full lining, so I traced the lining based on the jacket pattern itself. As for the fabric, I found a 3 m piece at Sacrés Coupons: a beautiful wool blended with cotton, with a heathered effect. A lovely mix of fibers, ideal for spring.
Those little details that make all the difference…
When I say those little details that make all the difference, I’m thinking in particular of the following elements:
- Choosing a quality fabric. Even if I like the color, it’s always the fiber content that decides. Here we have 60% wool, 30% cotton, 10% cashmere.
- Pressing systematically after EVERY seam. I first press the seam I’ve just sewn to set it, then I open the seam allowances and press again, this time right along the seam.
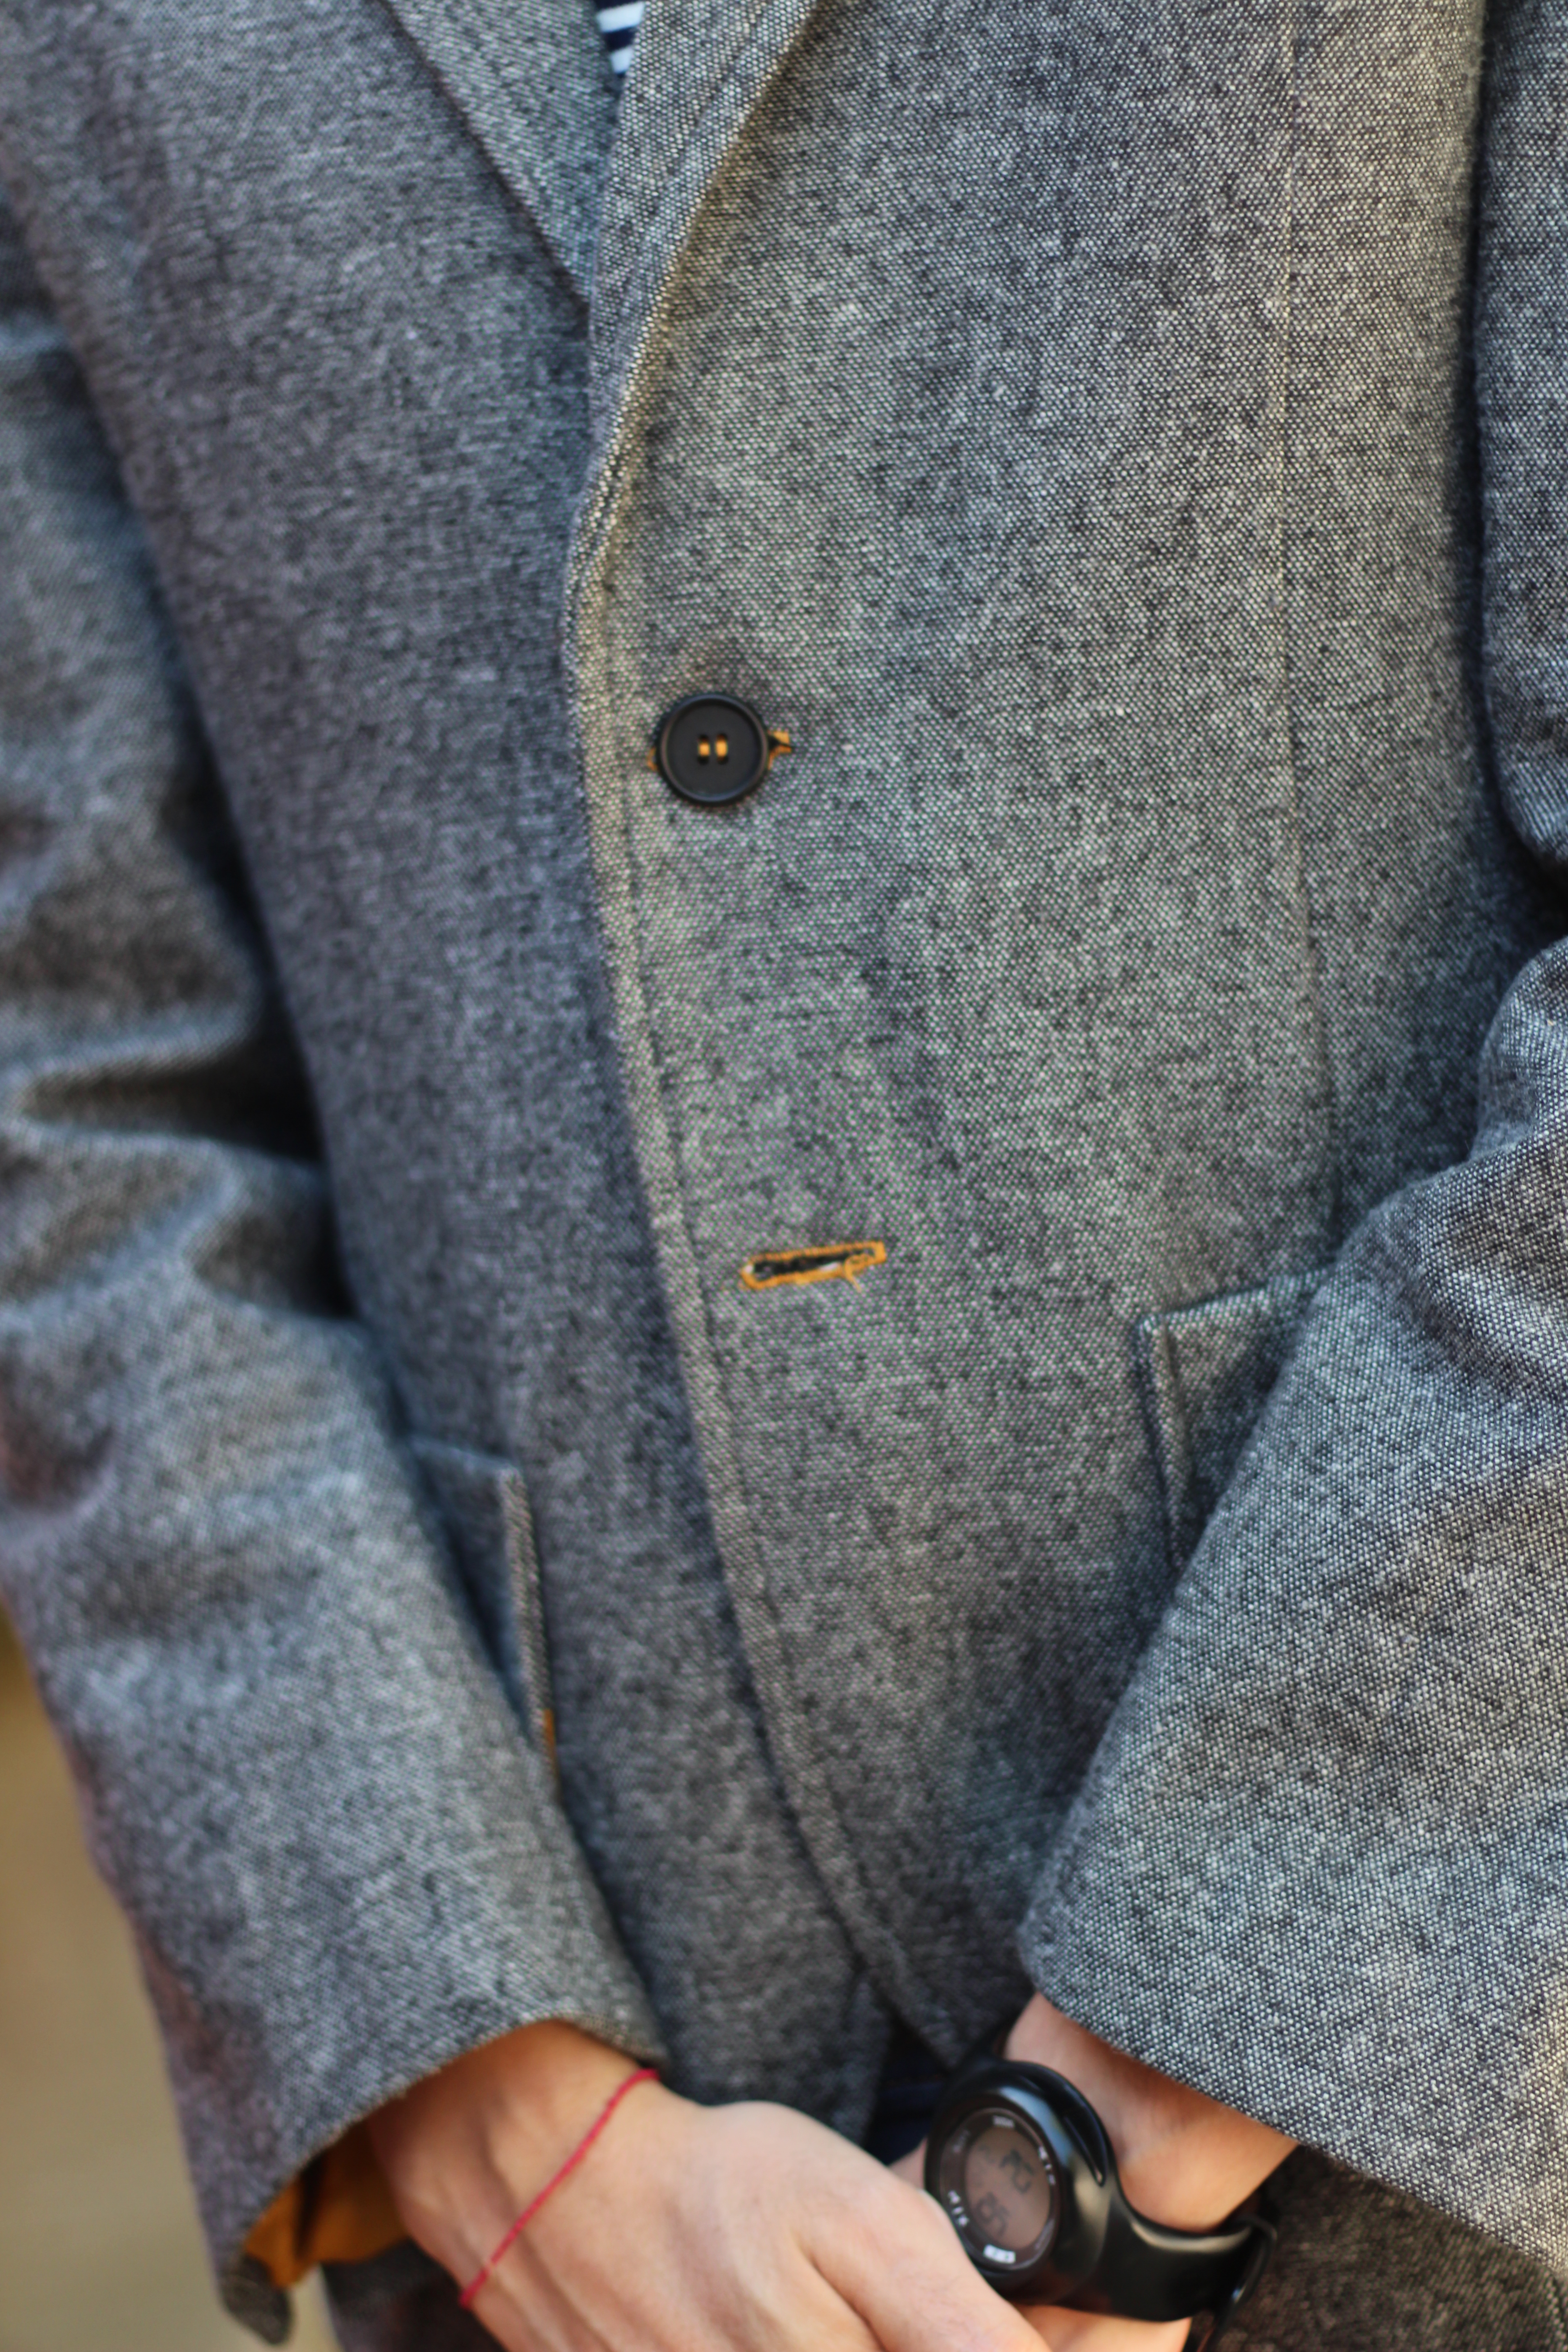
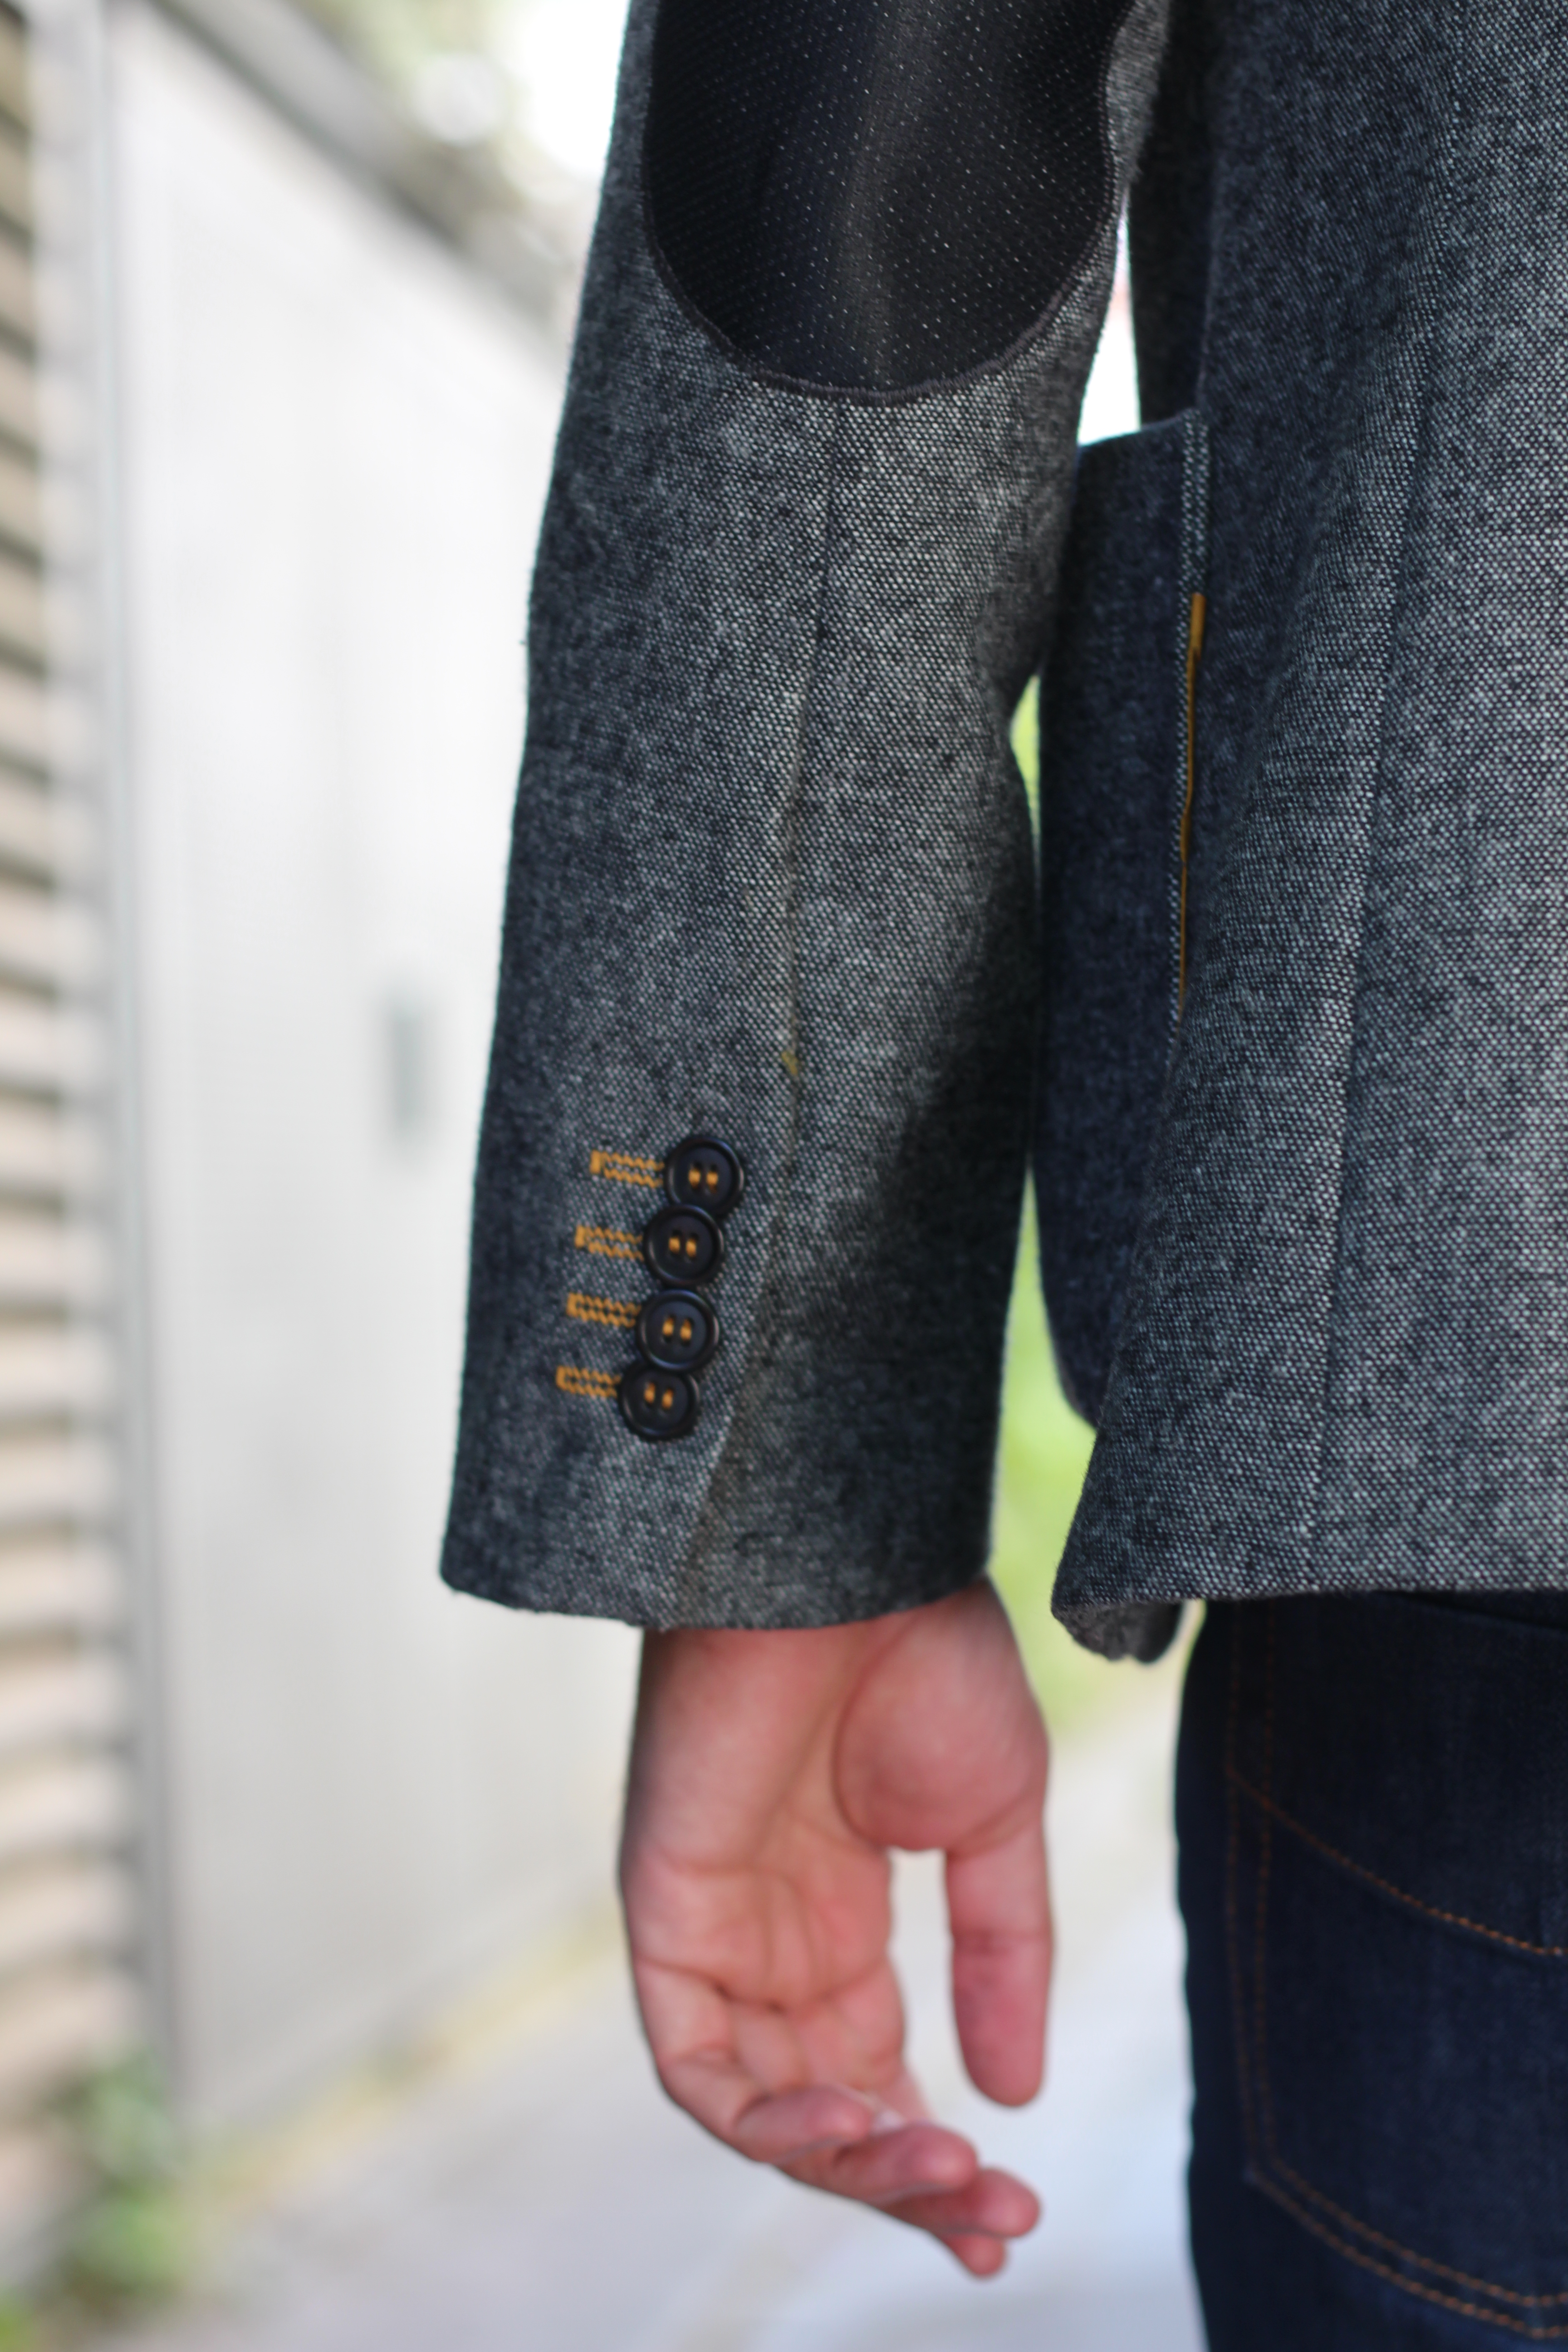
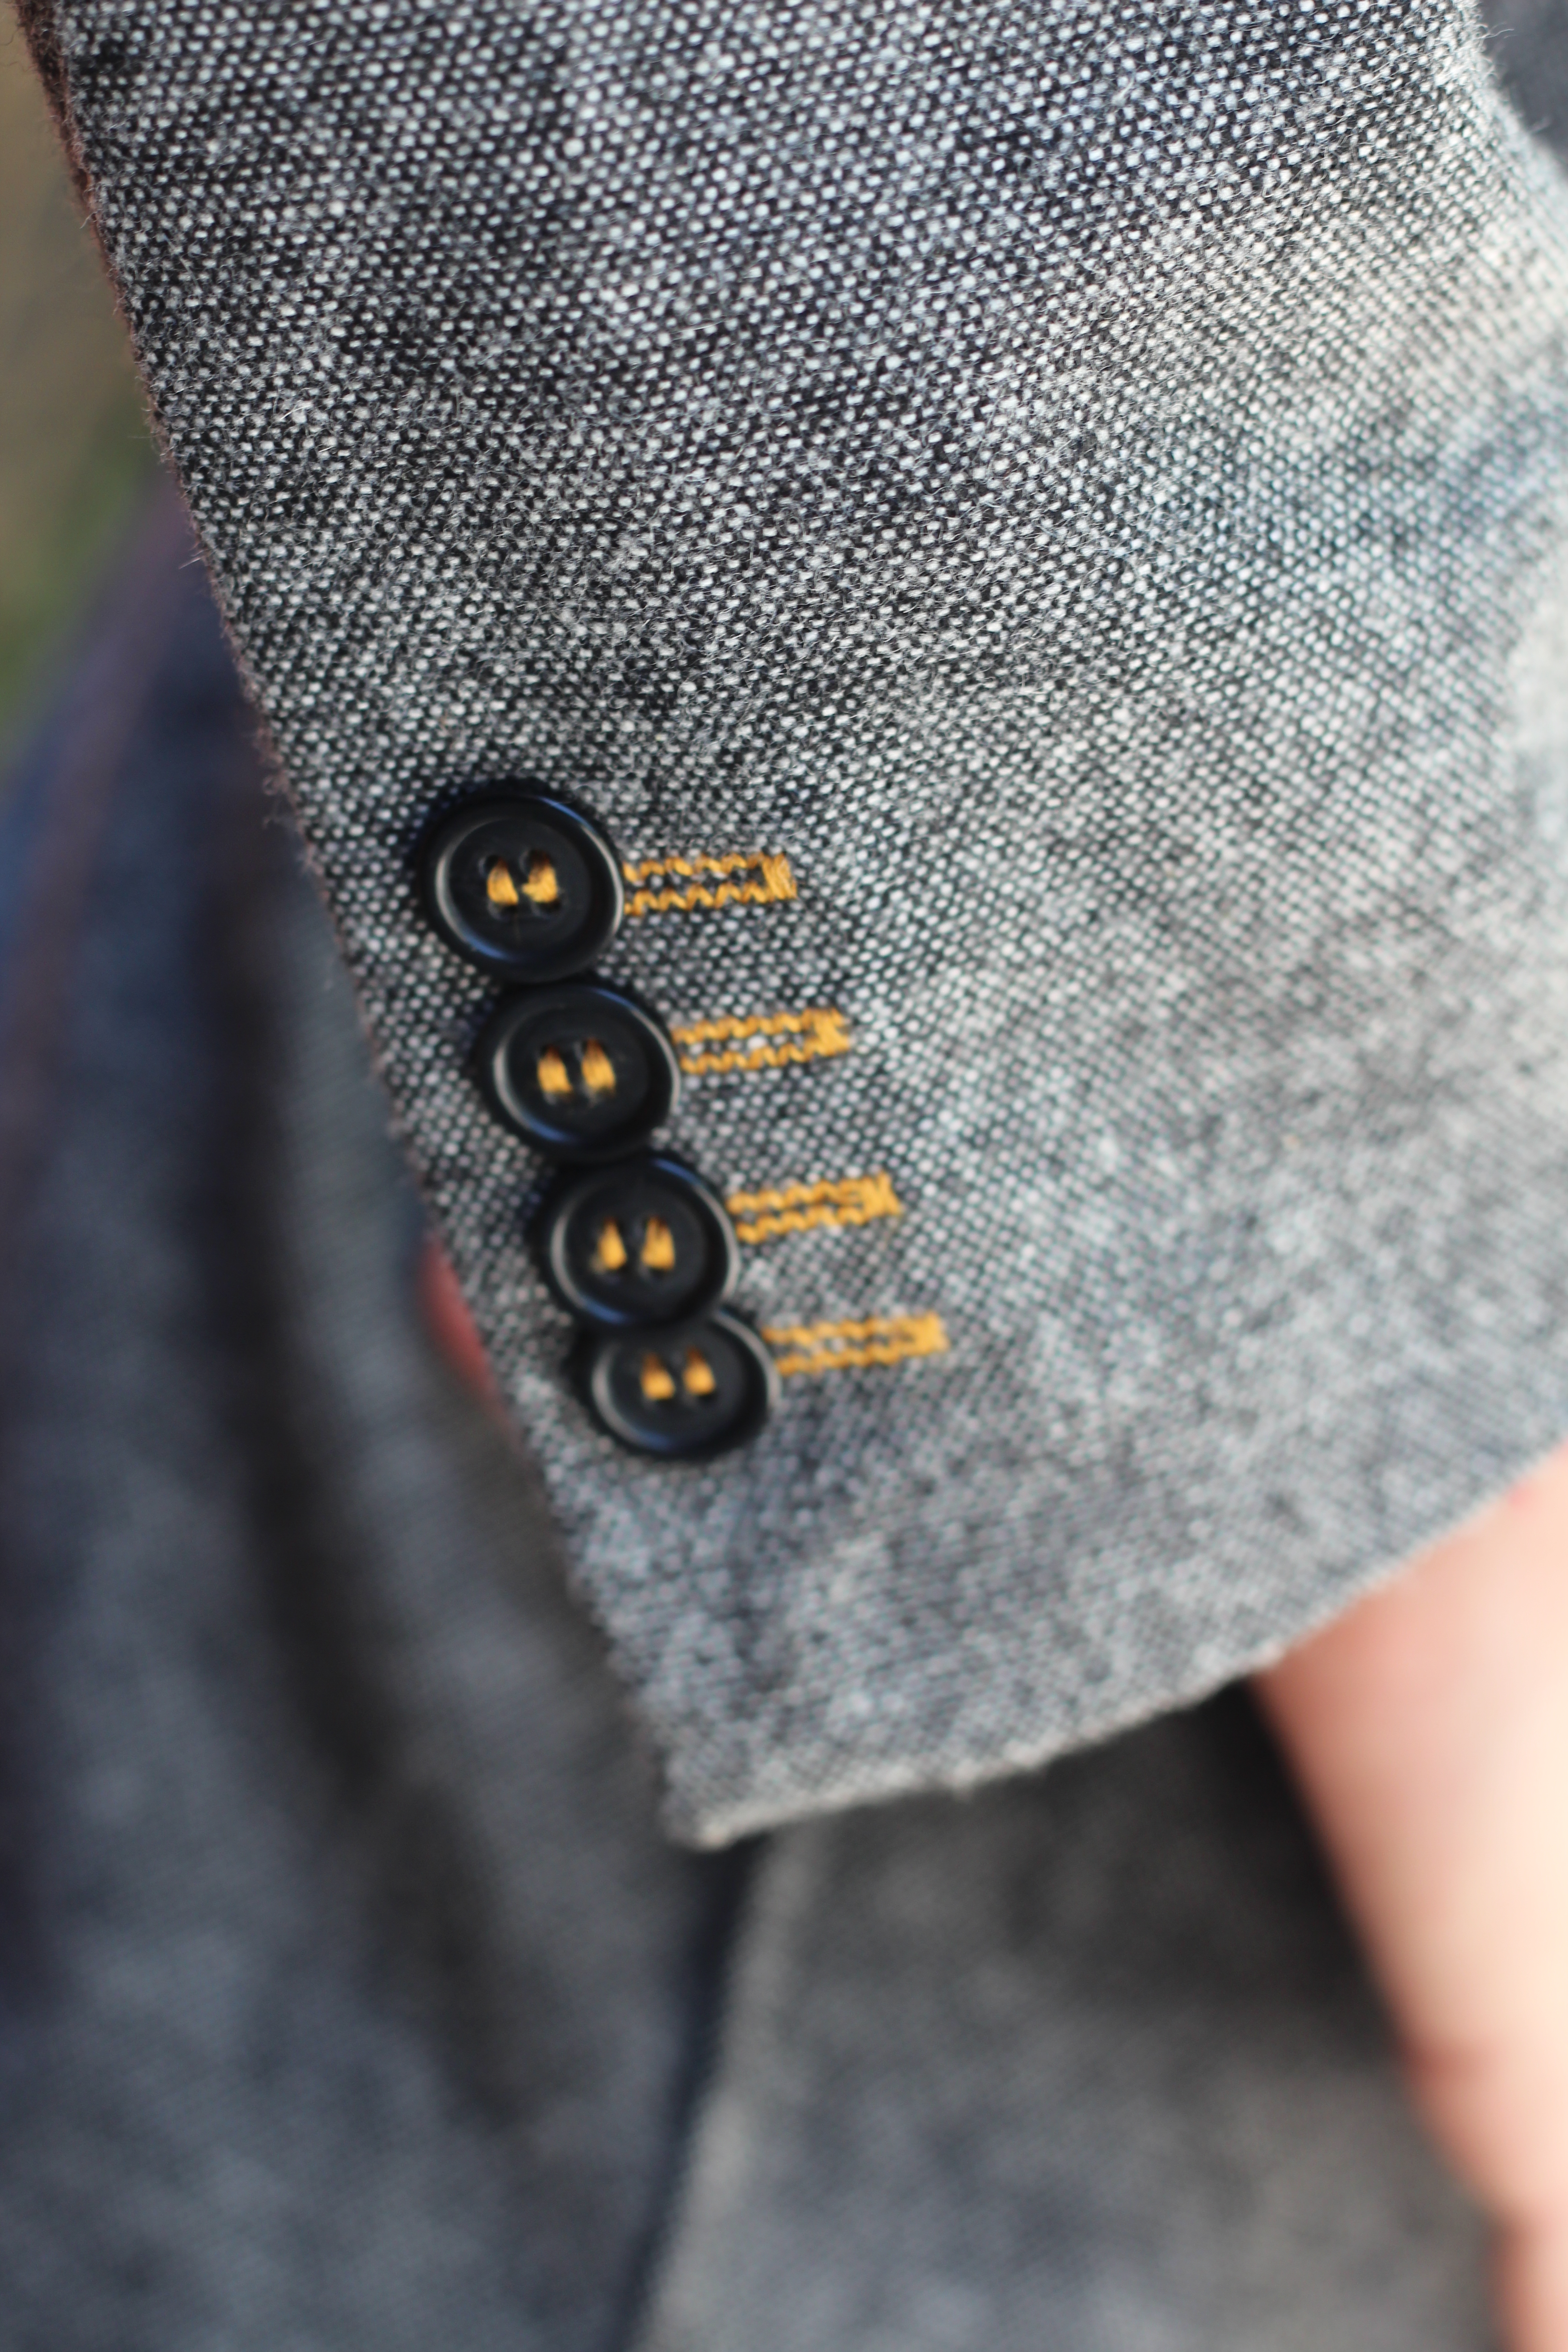
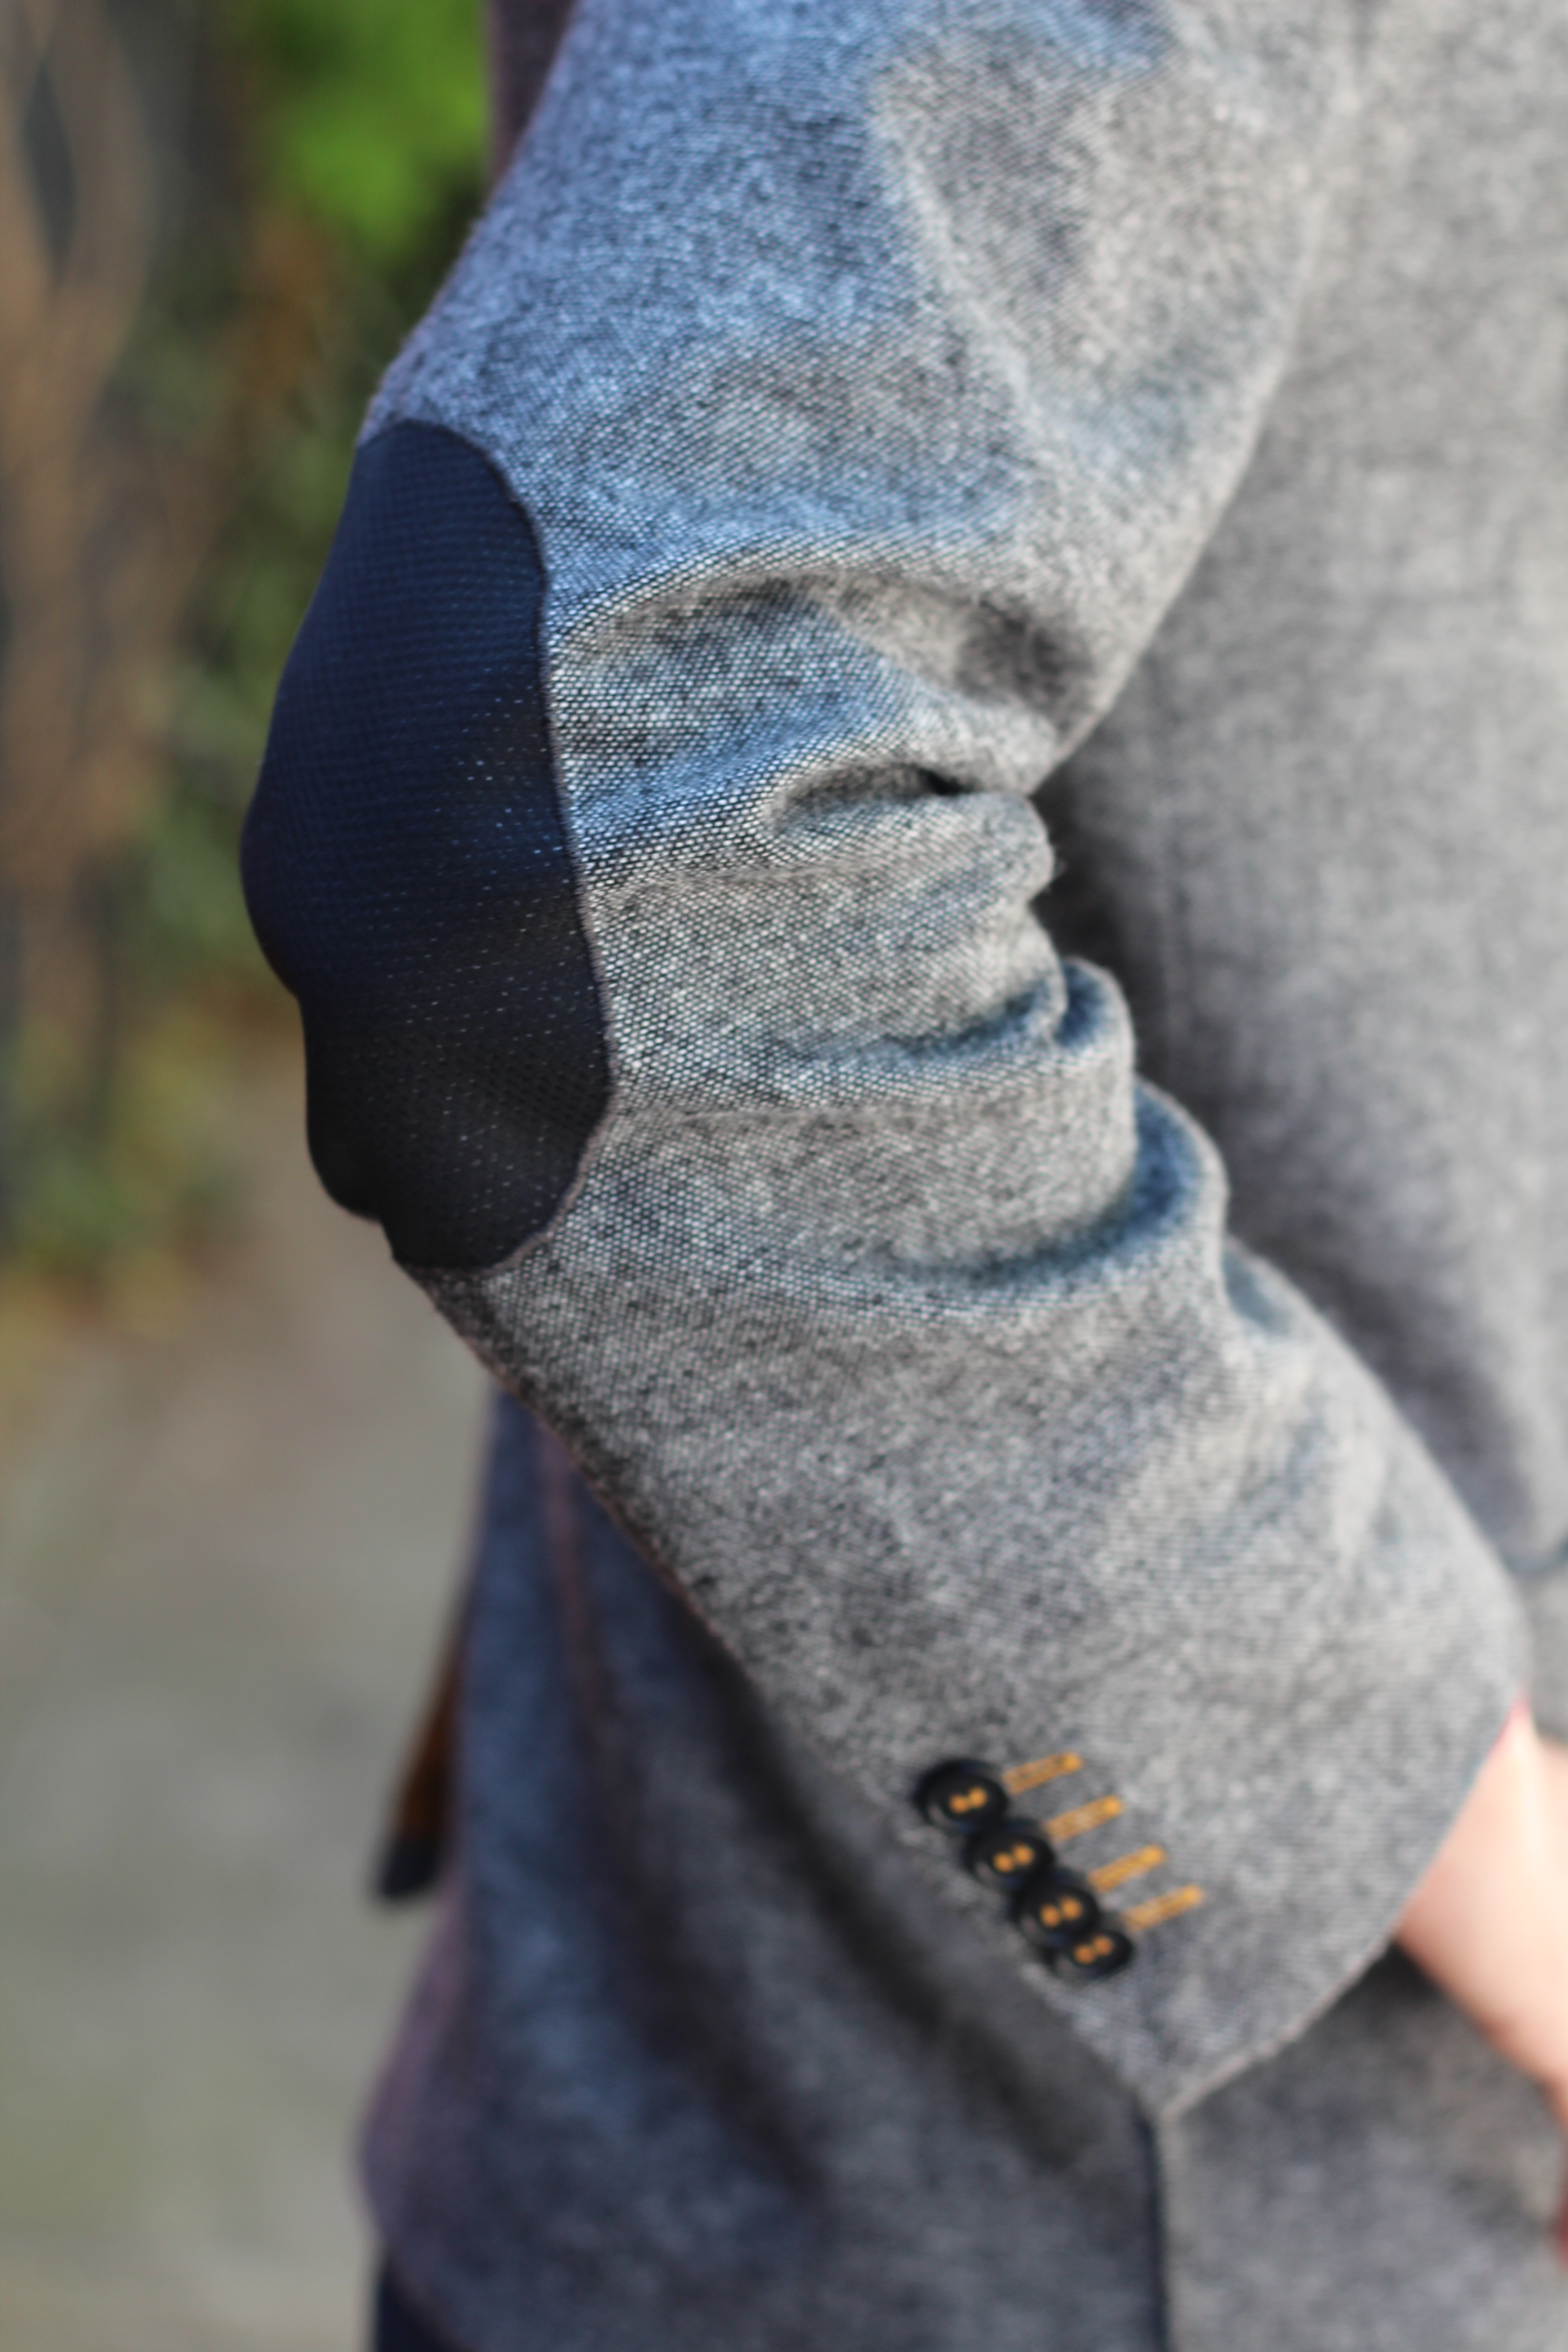
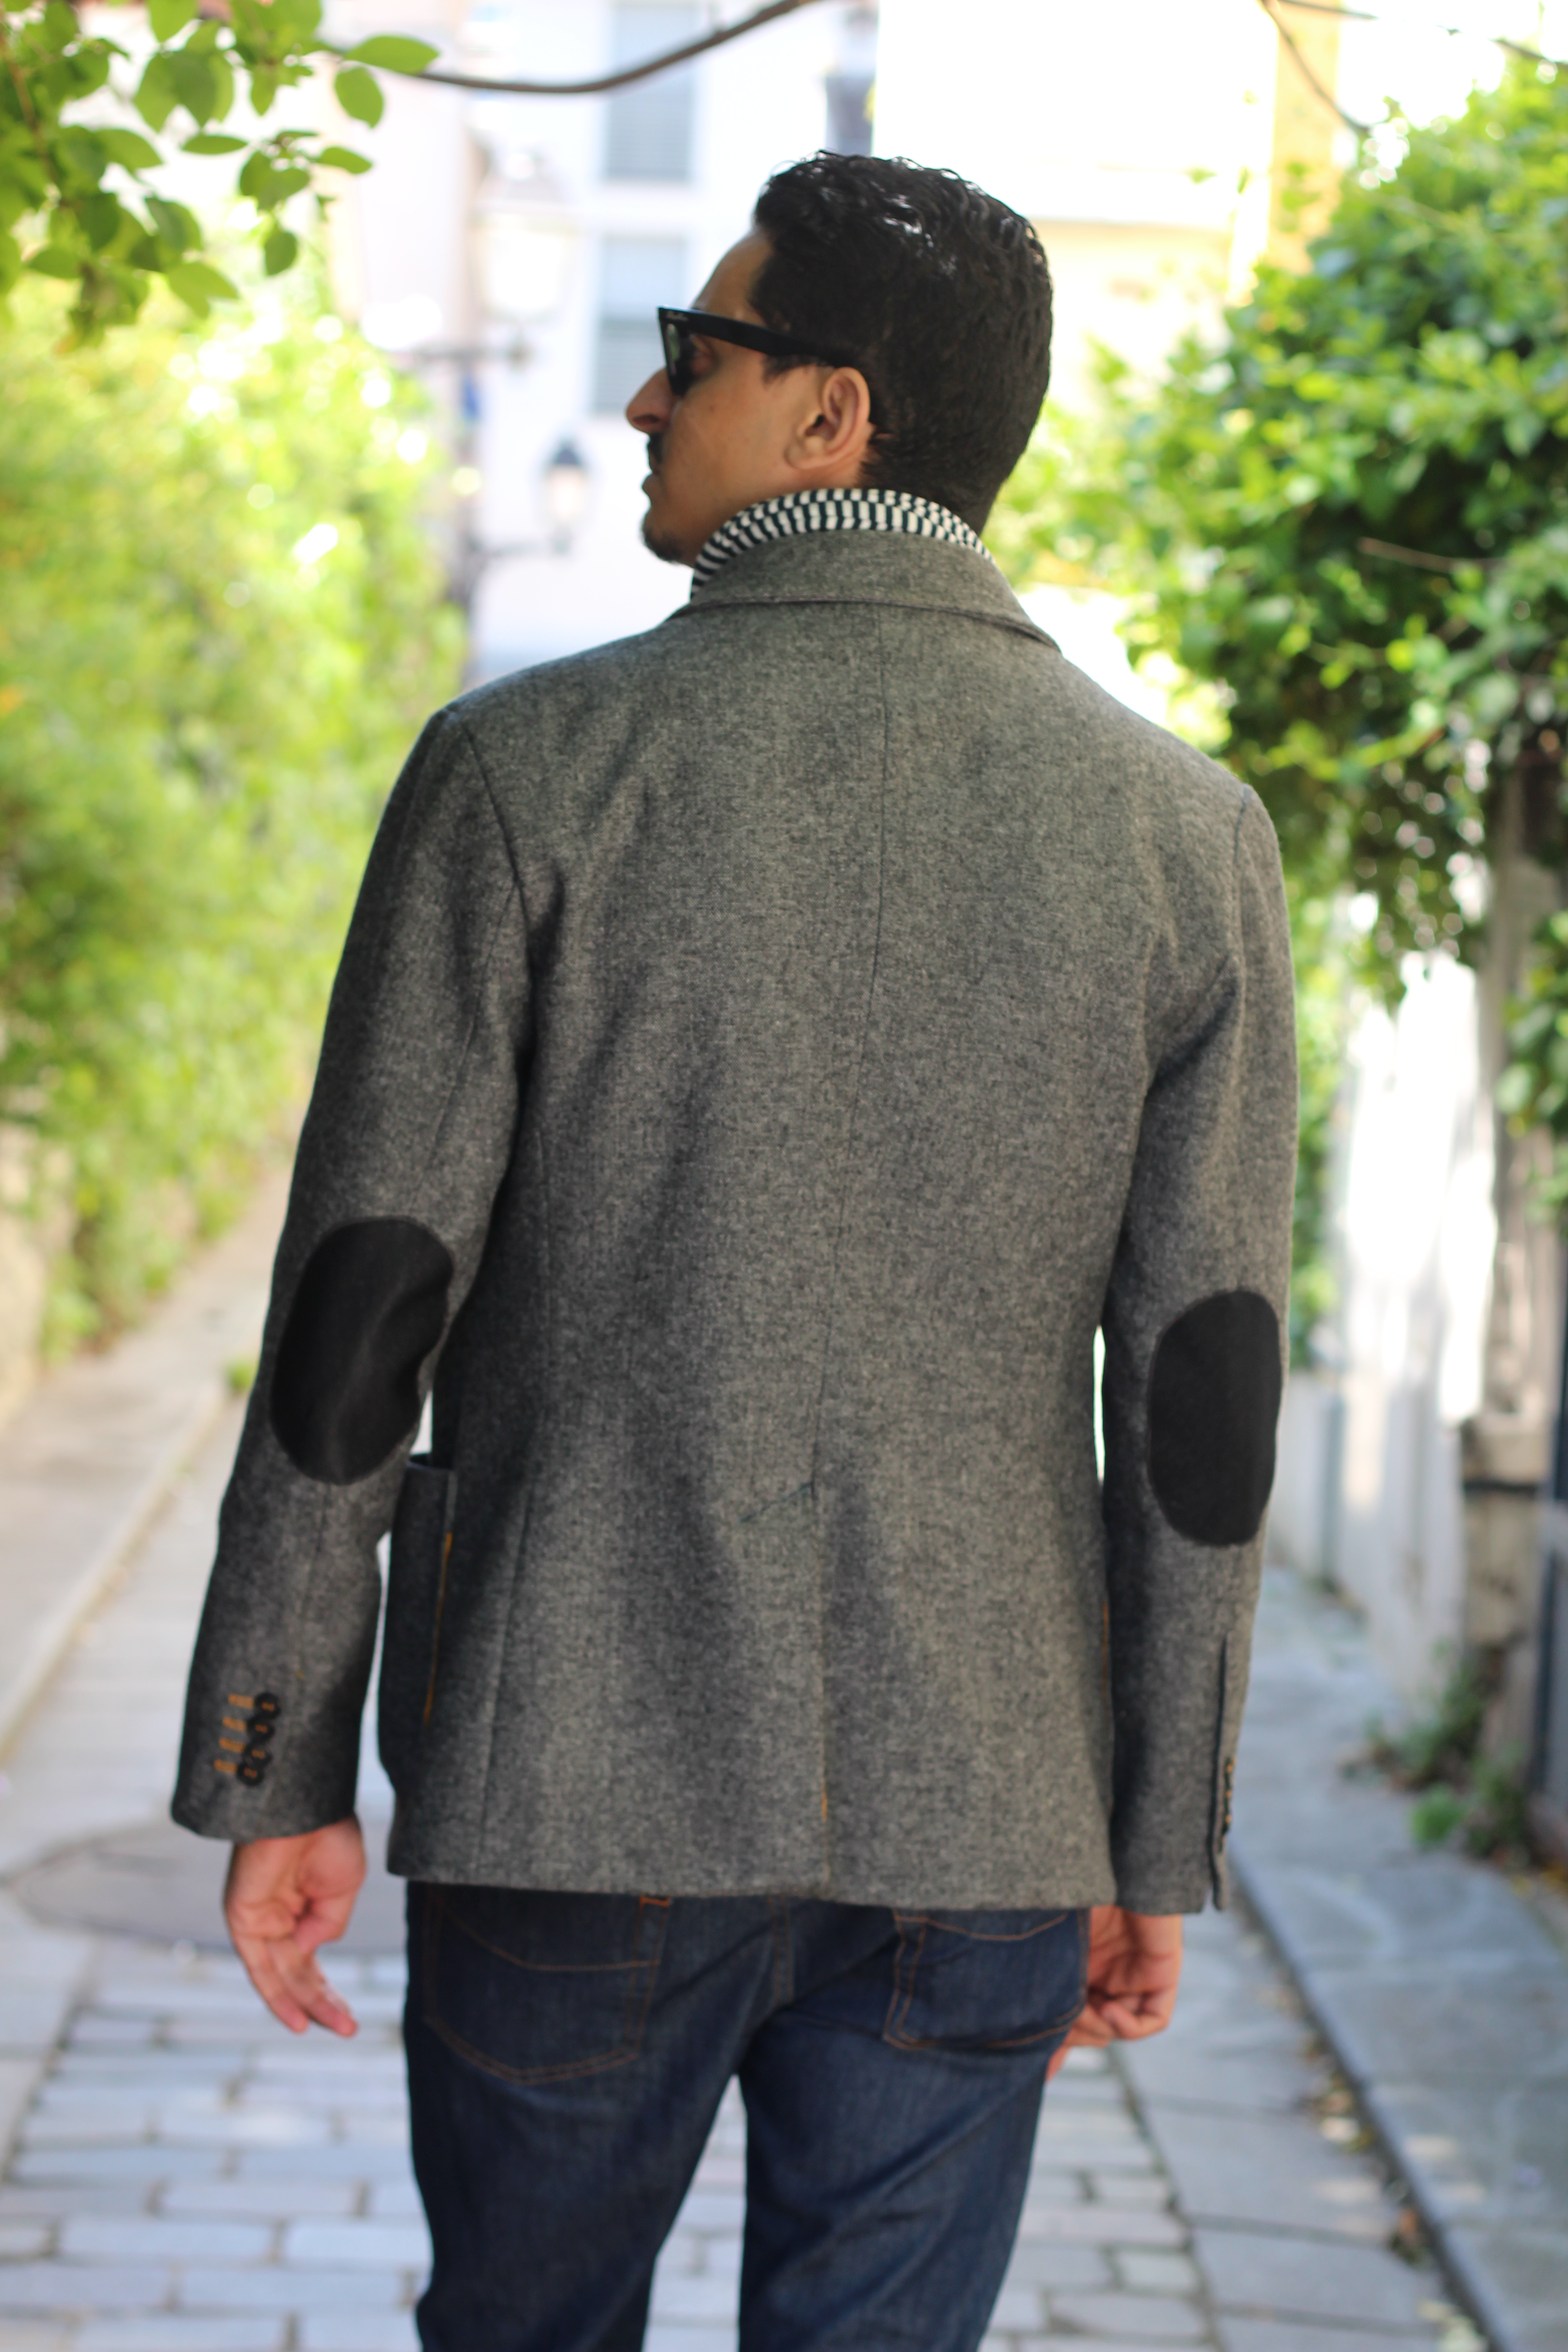
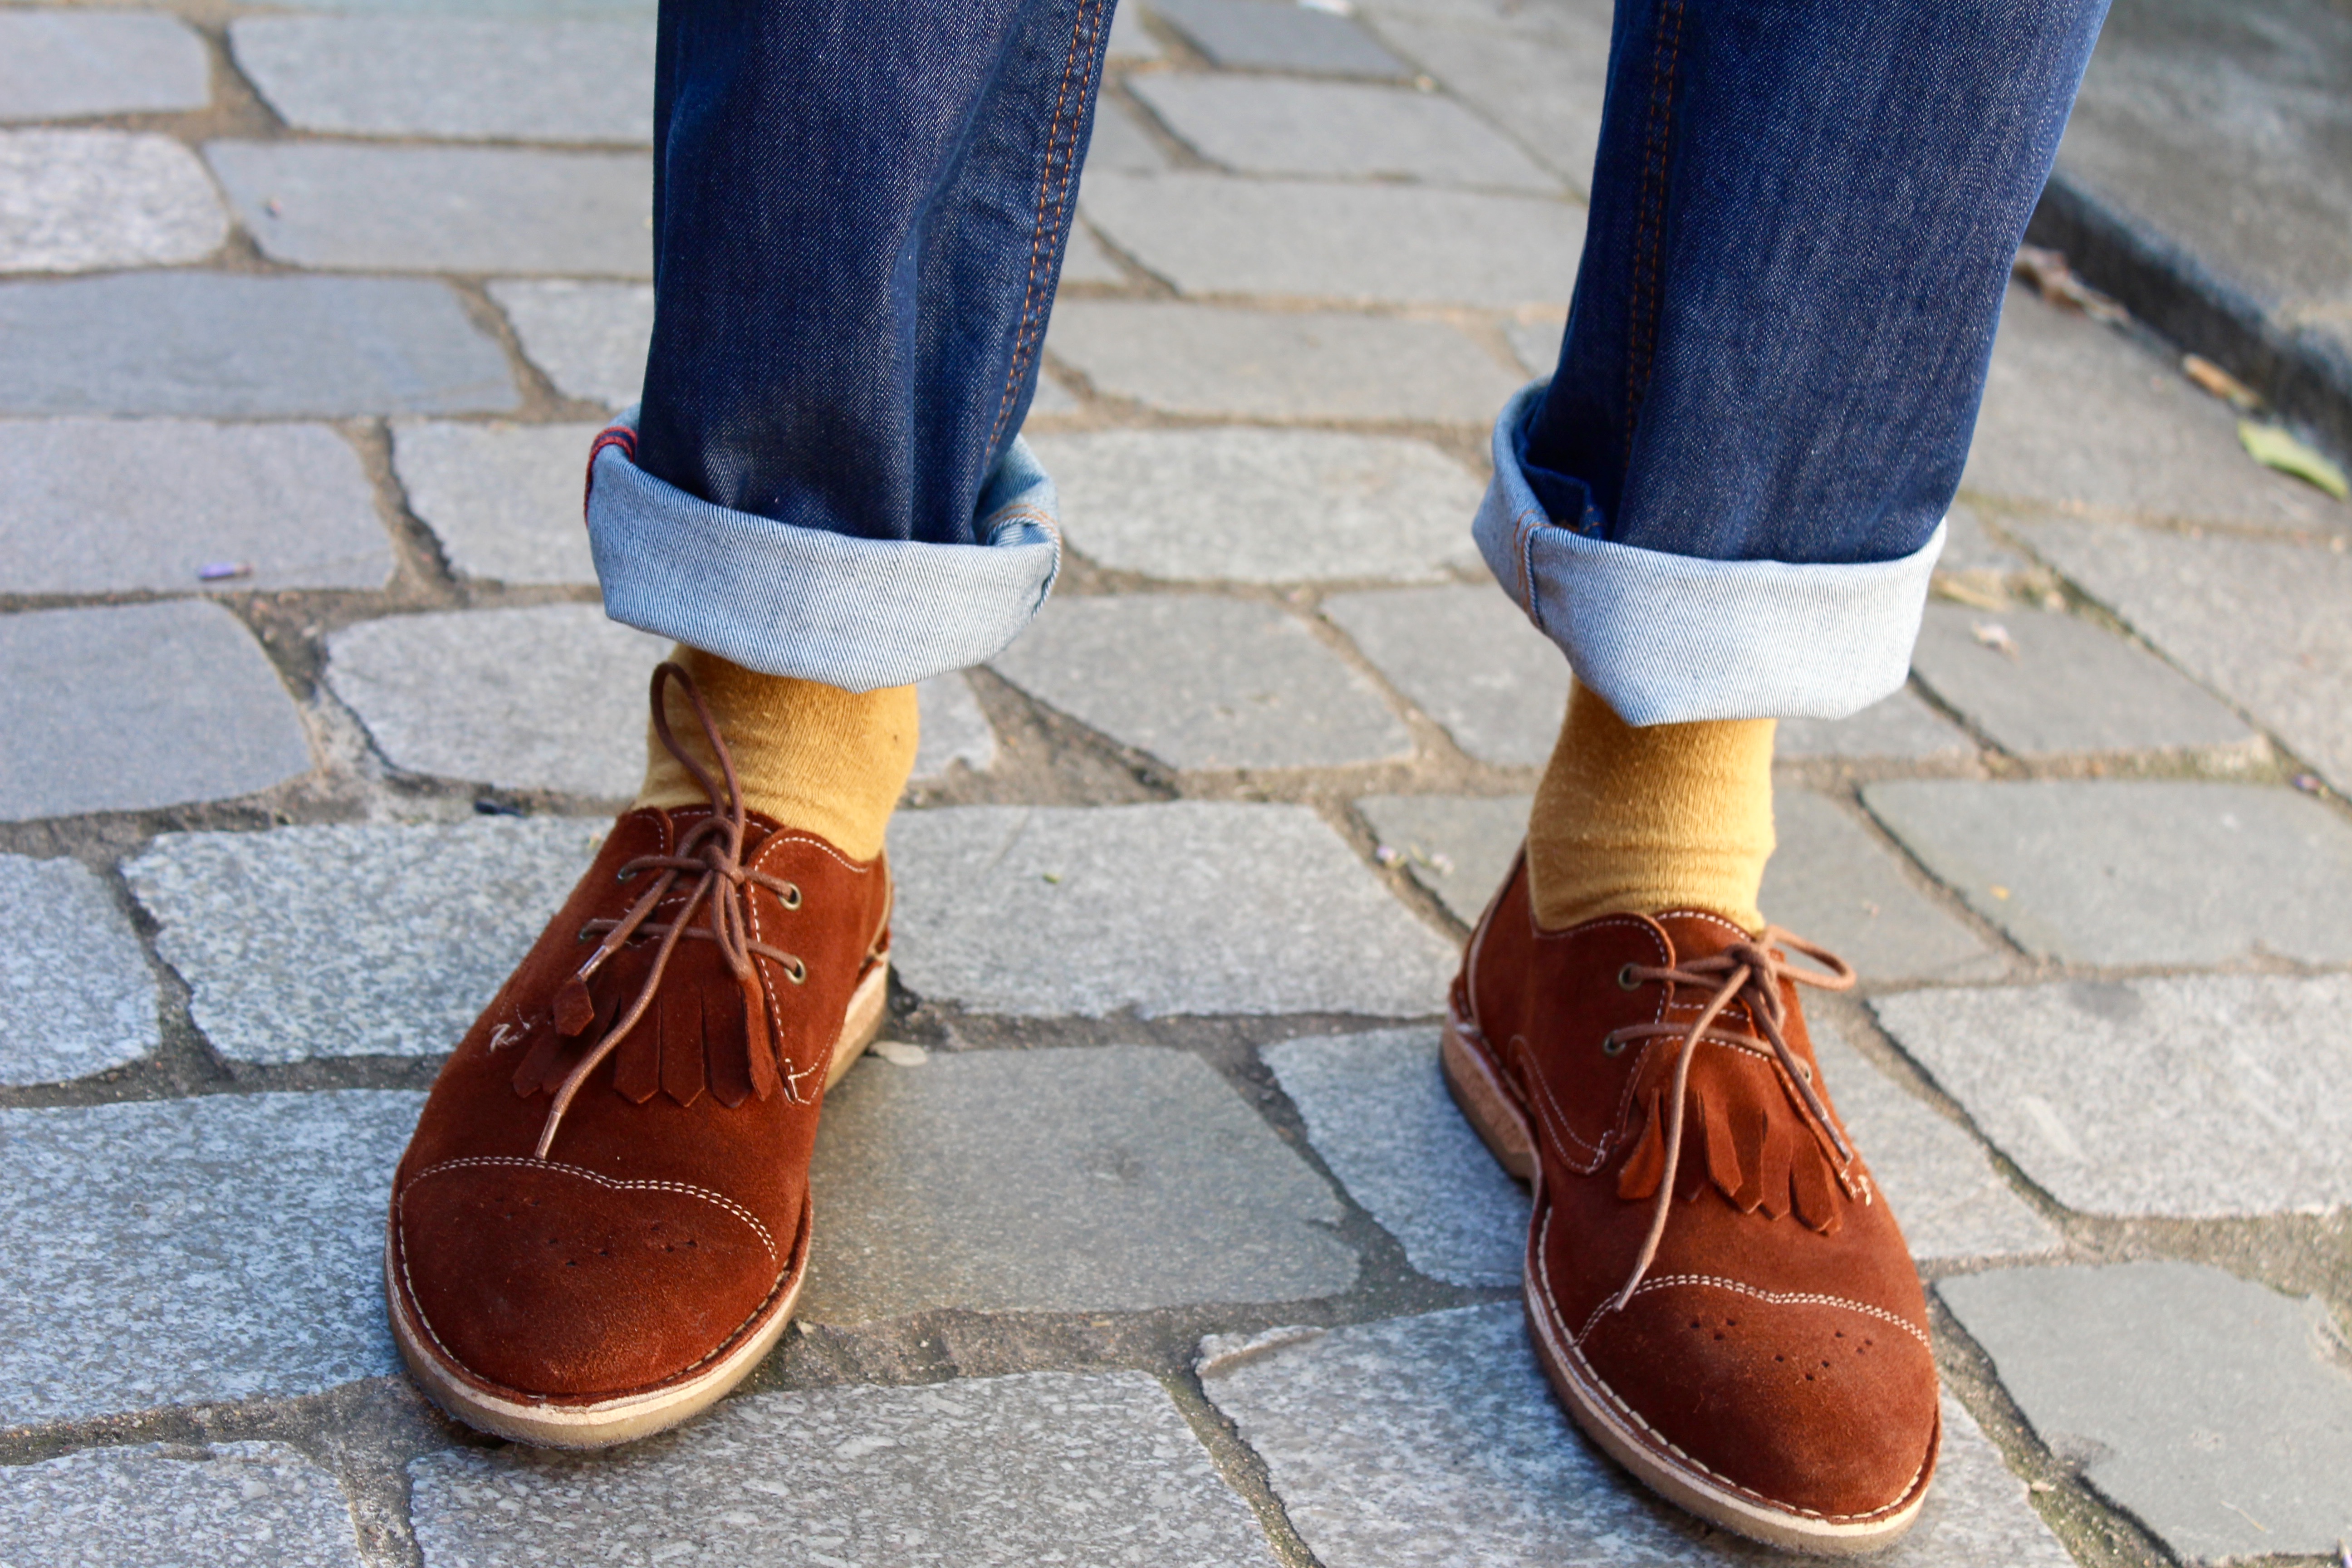
- Decorative buttonholes made in a mustard yellow that echoes the lining.
- Elbow patches made from a template downloaded for free here, but I increased the size. I used the wrong side of the main fabric for the elbow patches 🙂 (often you don’t have to look far).
- For men tall or short, don’t hesitate to use your fabric scraps to make accessories such as scarves, neckerchiefs, pocket squares, etc.
So, will I do it again? YES—with great pleasure, but with less stress 😉

I hope you’ll find this post useful—feel free to share your thoughts. Bee made also made this jacket with a “So British” vibe for her husband. I’m sure you’ll like it too.