

I’m super excited today to share this little post with you. A little DIY post, a DIY that won’t cost you anything in terms of pattern because the top is a free pattern from Goldfinch & Eagle downloadable here. And as for the skirt, well, DIY my friends!
The fabric for my outfit today is from Atelier Brunette it’s a super comfortable gauze and a great friend for hot weather. You can also use double gauze to make this and maybe viscose that’s not too thin because the drape won’t be the same. Gauze can often be transparent but when it has patterns like here, the transparency is considerably reduced. The fabric reference used here is Terrazzo Night from Atelier Brunette’s SS 2017 collection.
So are you ready for this DIY that only wants the best for you? Well, let’s go!

The Top
I don’t think it’s necessary to dwell on the top since the pattern comes with instructions. However, I’ll simply add that I lengthened and widened the sleeves a bit more (I had already sewn this top 5 years ago, actually my very first sewing project!). If you find the top too short, lengthen it. I added bias binding to the neckline. For this outfit, I think it’s important to get the perfect top length so that the waistband line and the beginning of the pockets are clearly visible. If you have any questions about this part, don’t hesitate. I’ve made this top 3 times hehe!
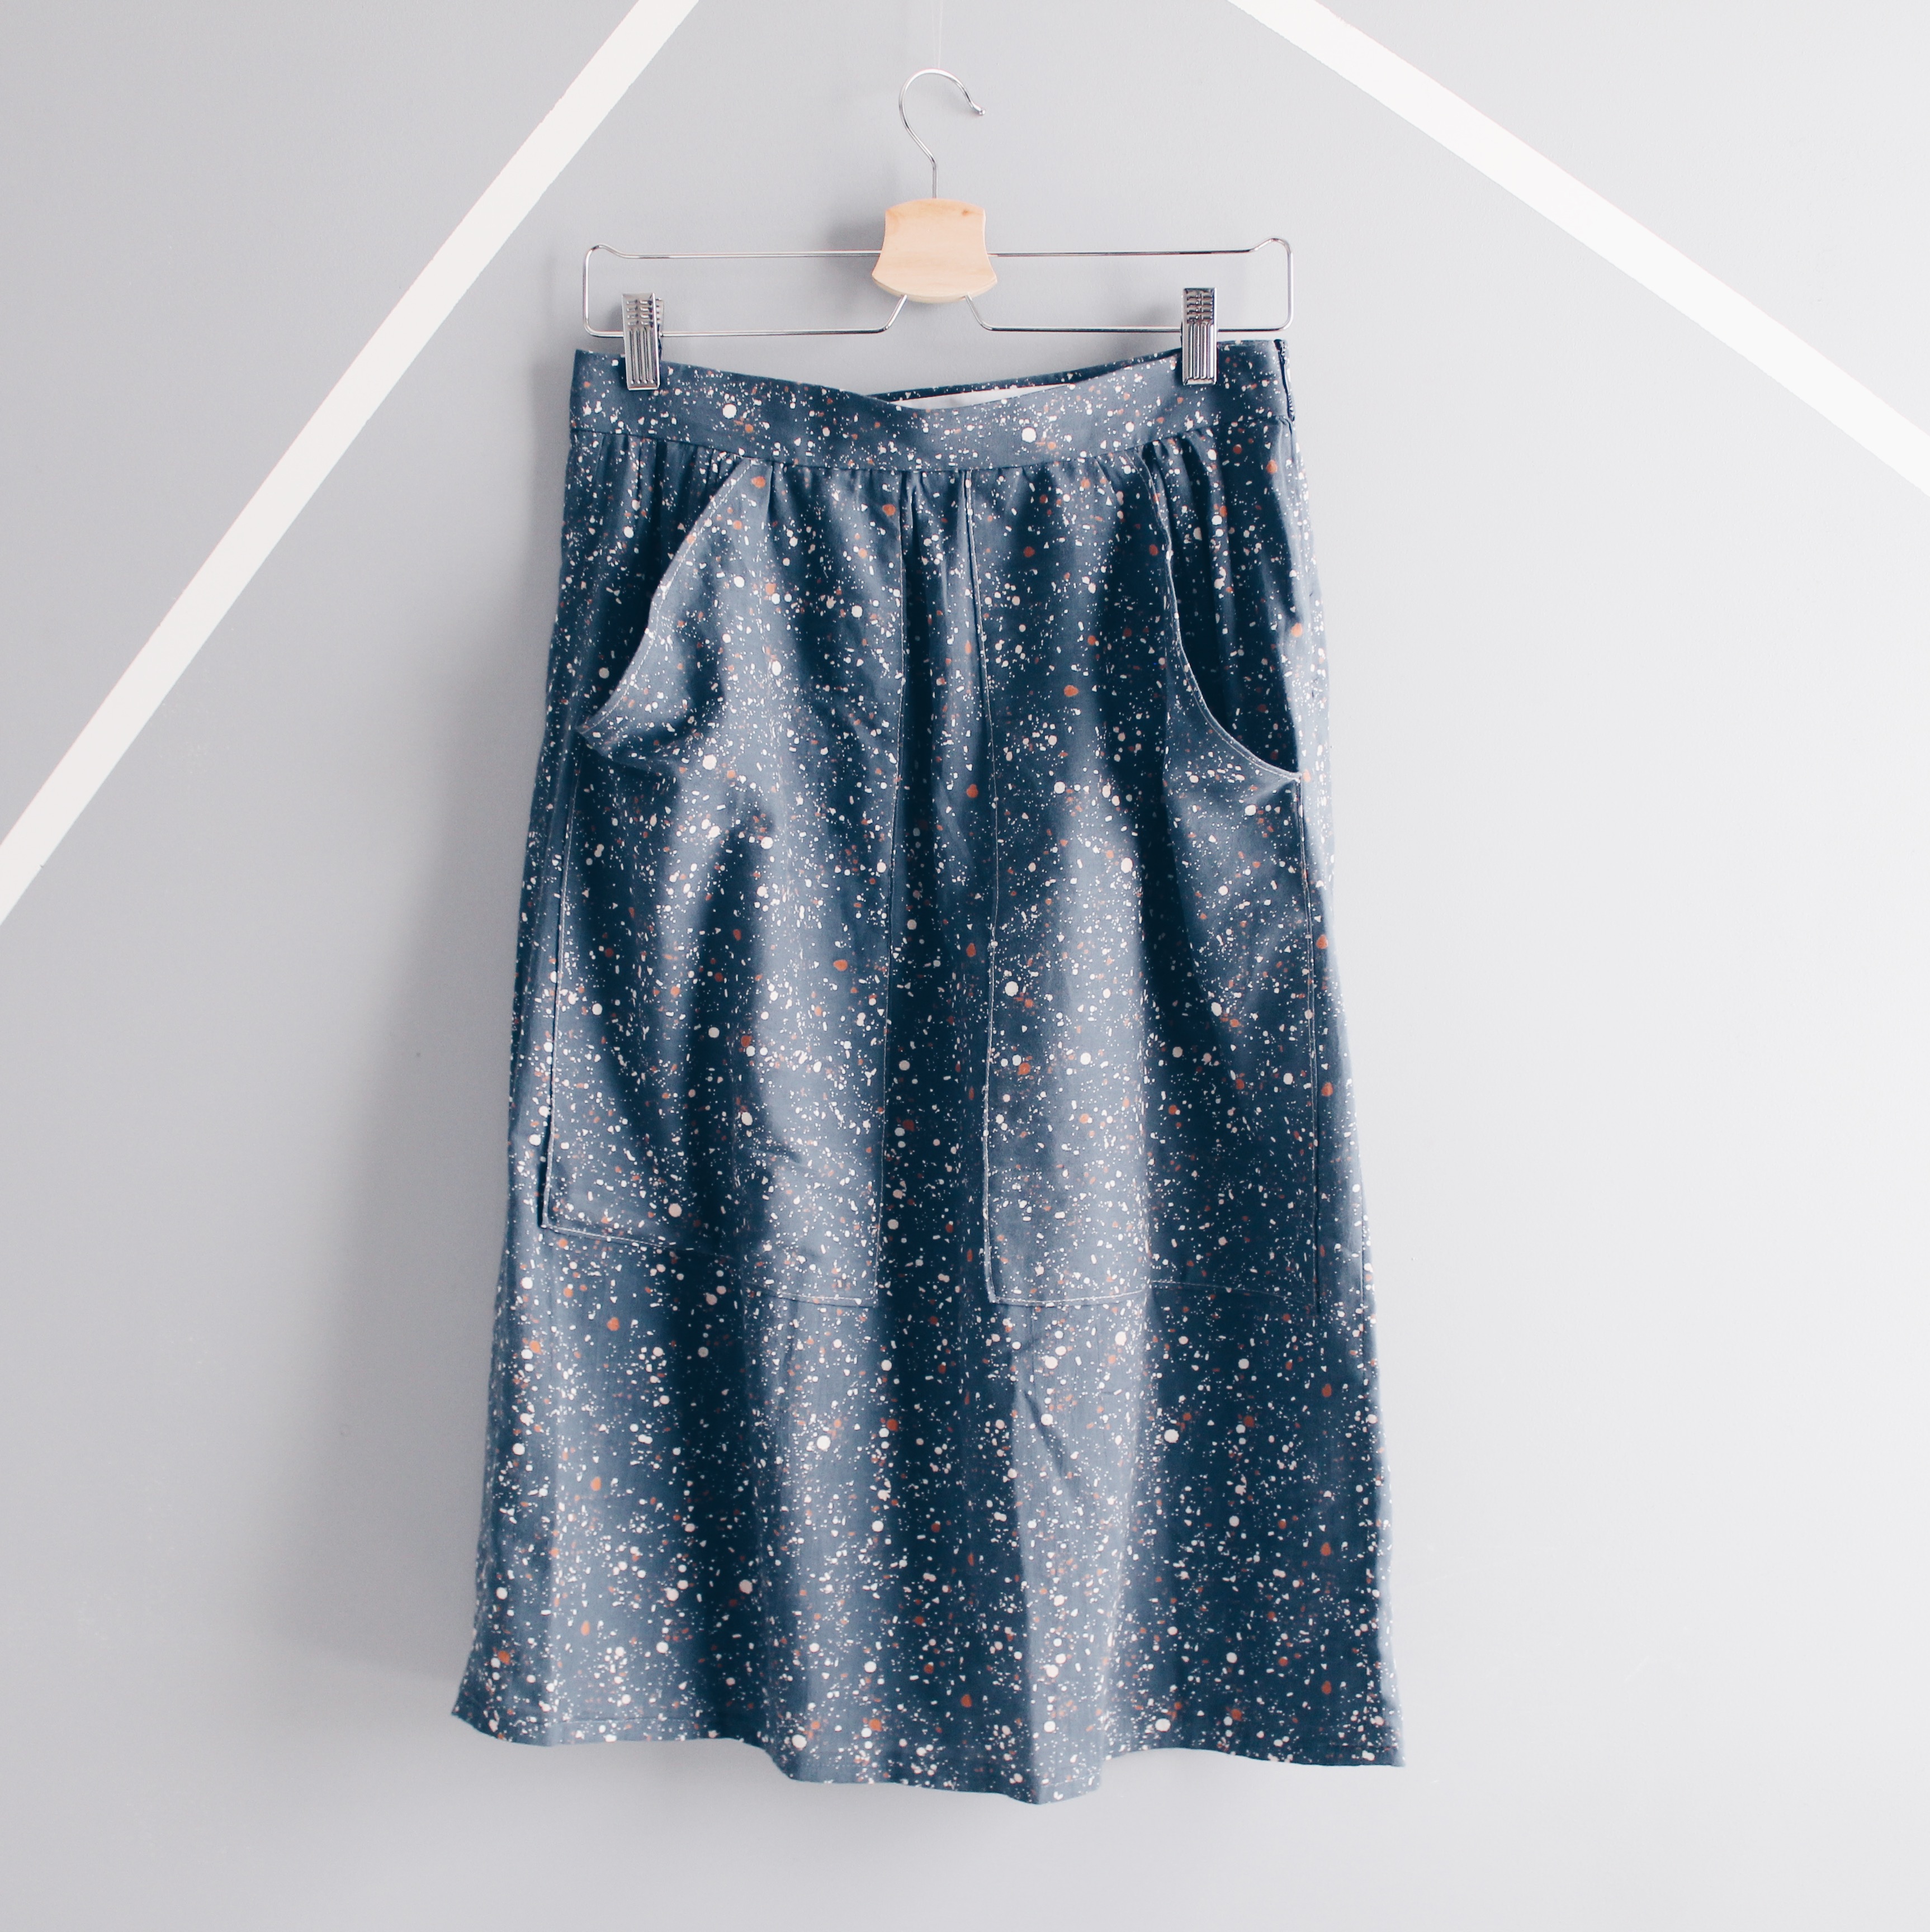
The Skirt
The skirt is simple to make. The only little challenge is installing an invisible zipper. I learned how to do it on YouTube by watching a 3-minute video.
I recommend drawing the pieces on paper first, then pinning them to the fabric before cutting.
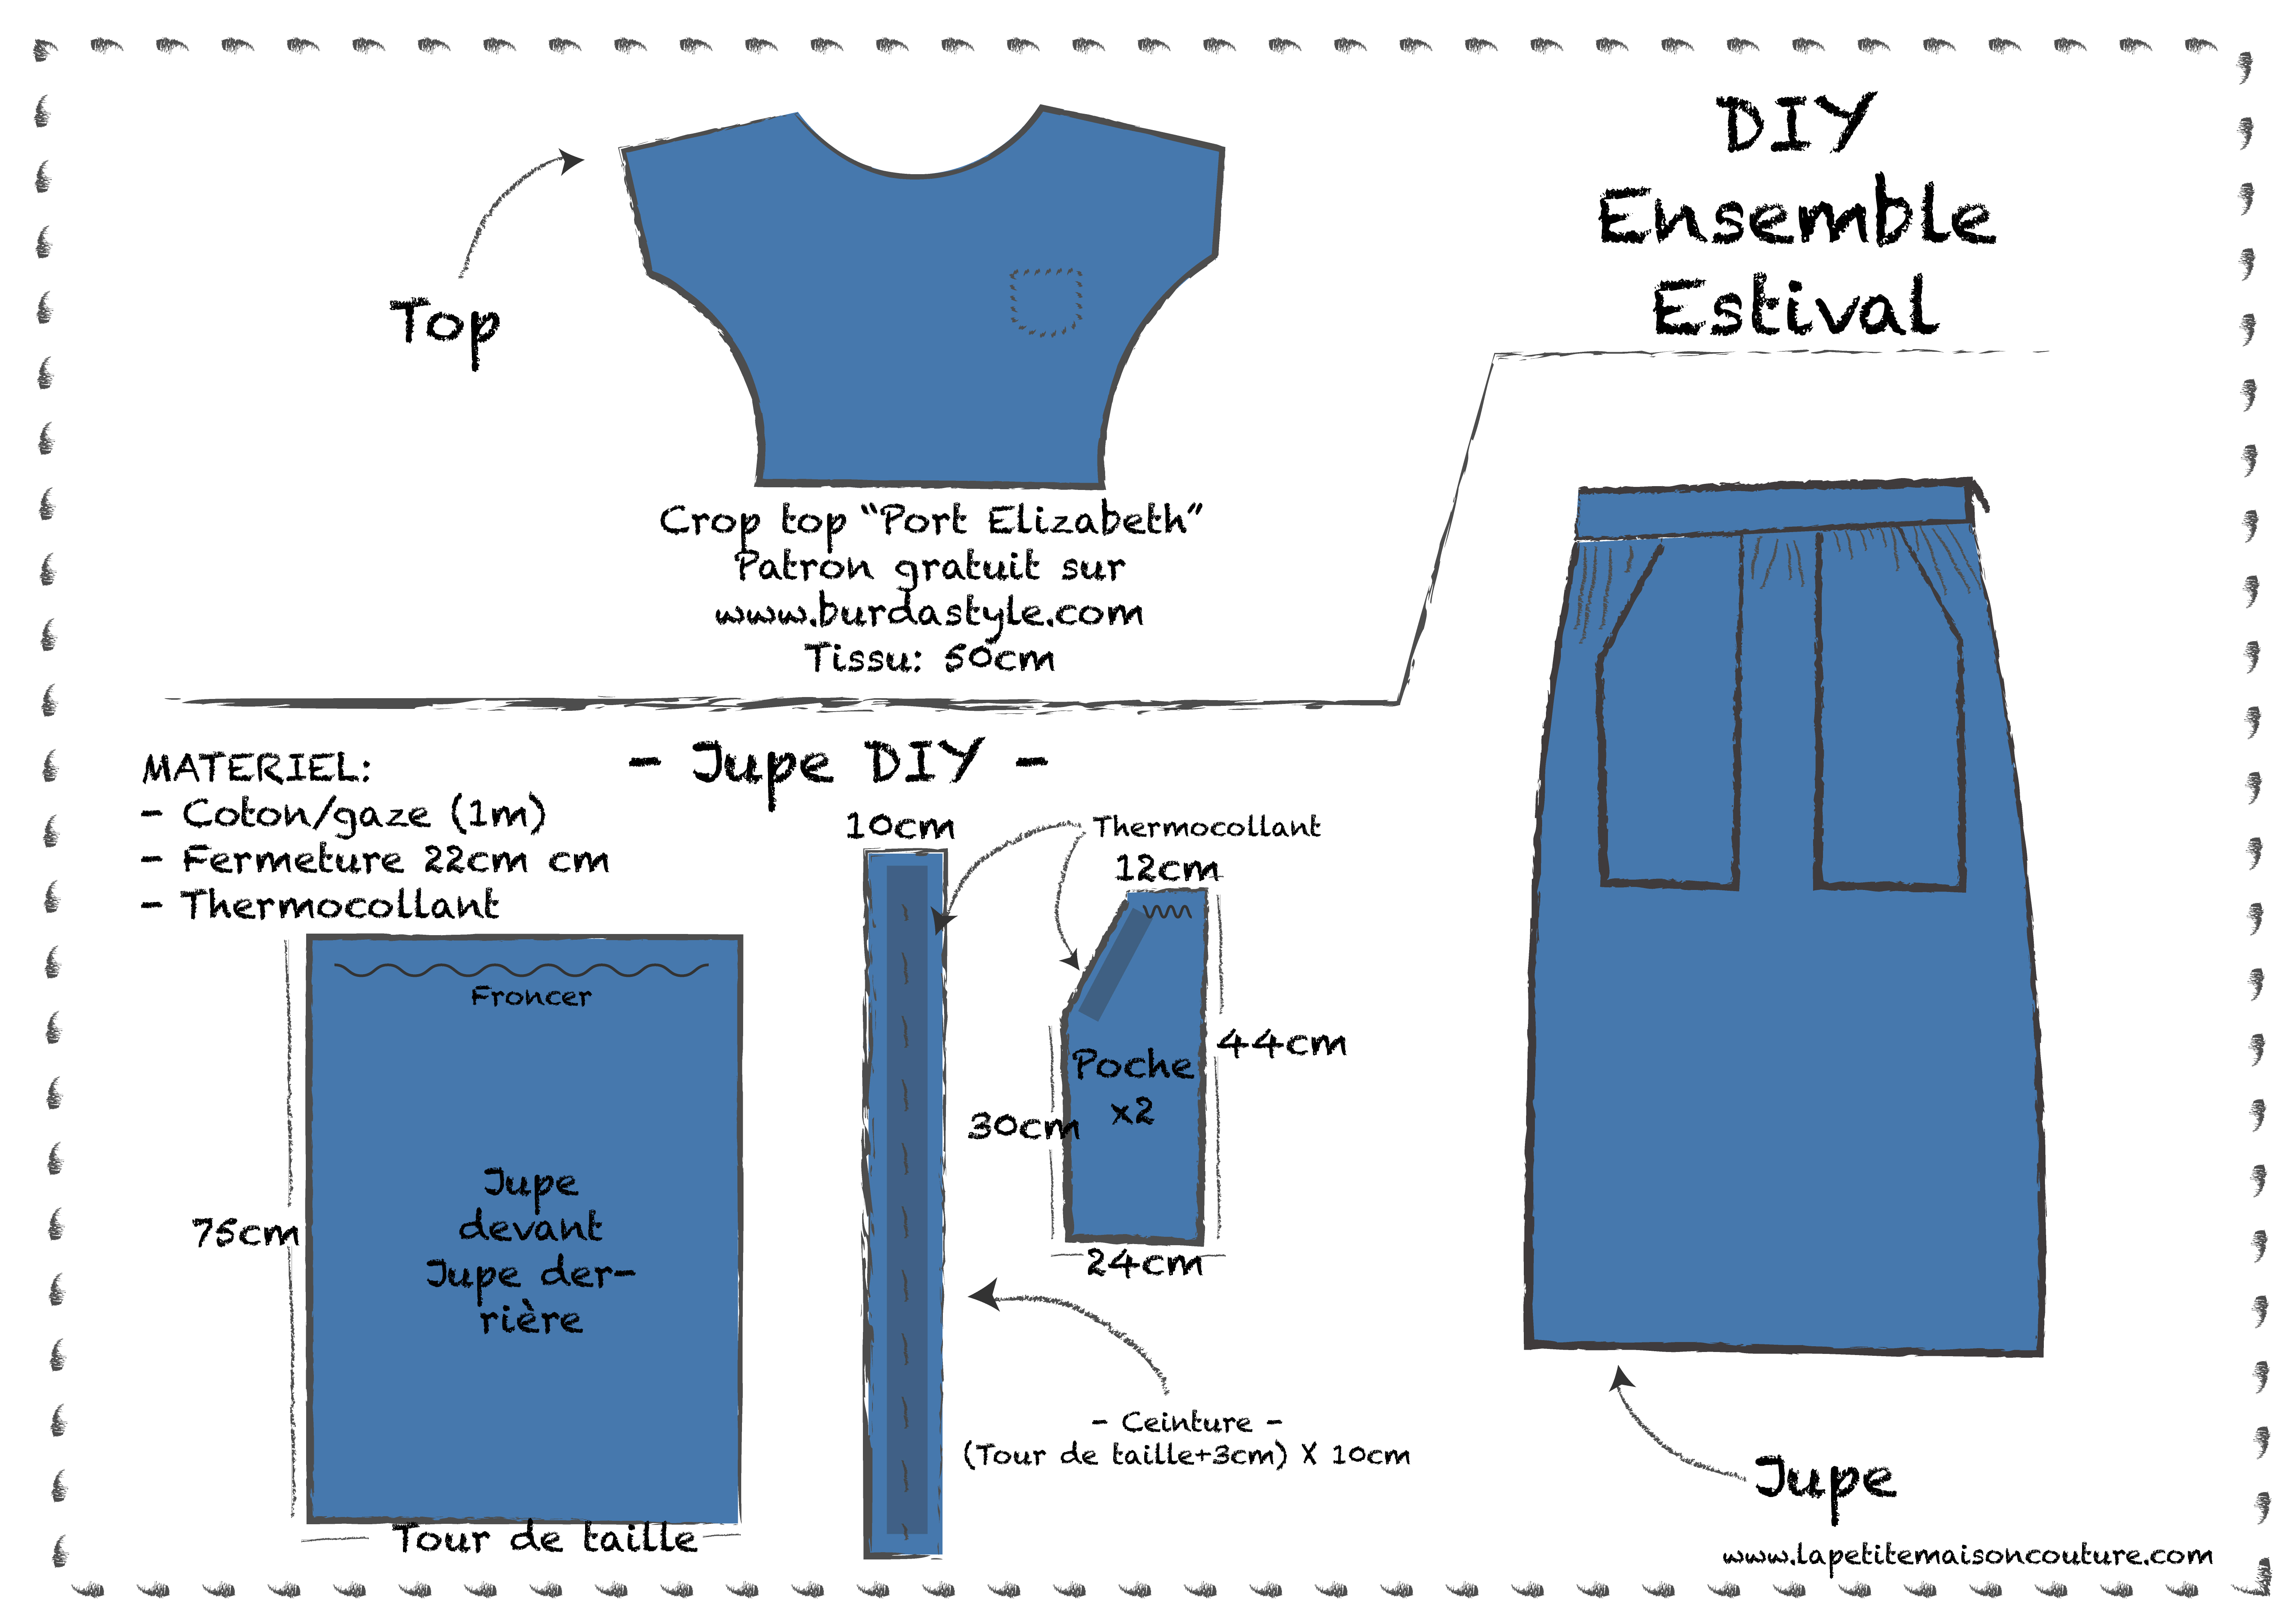
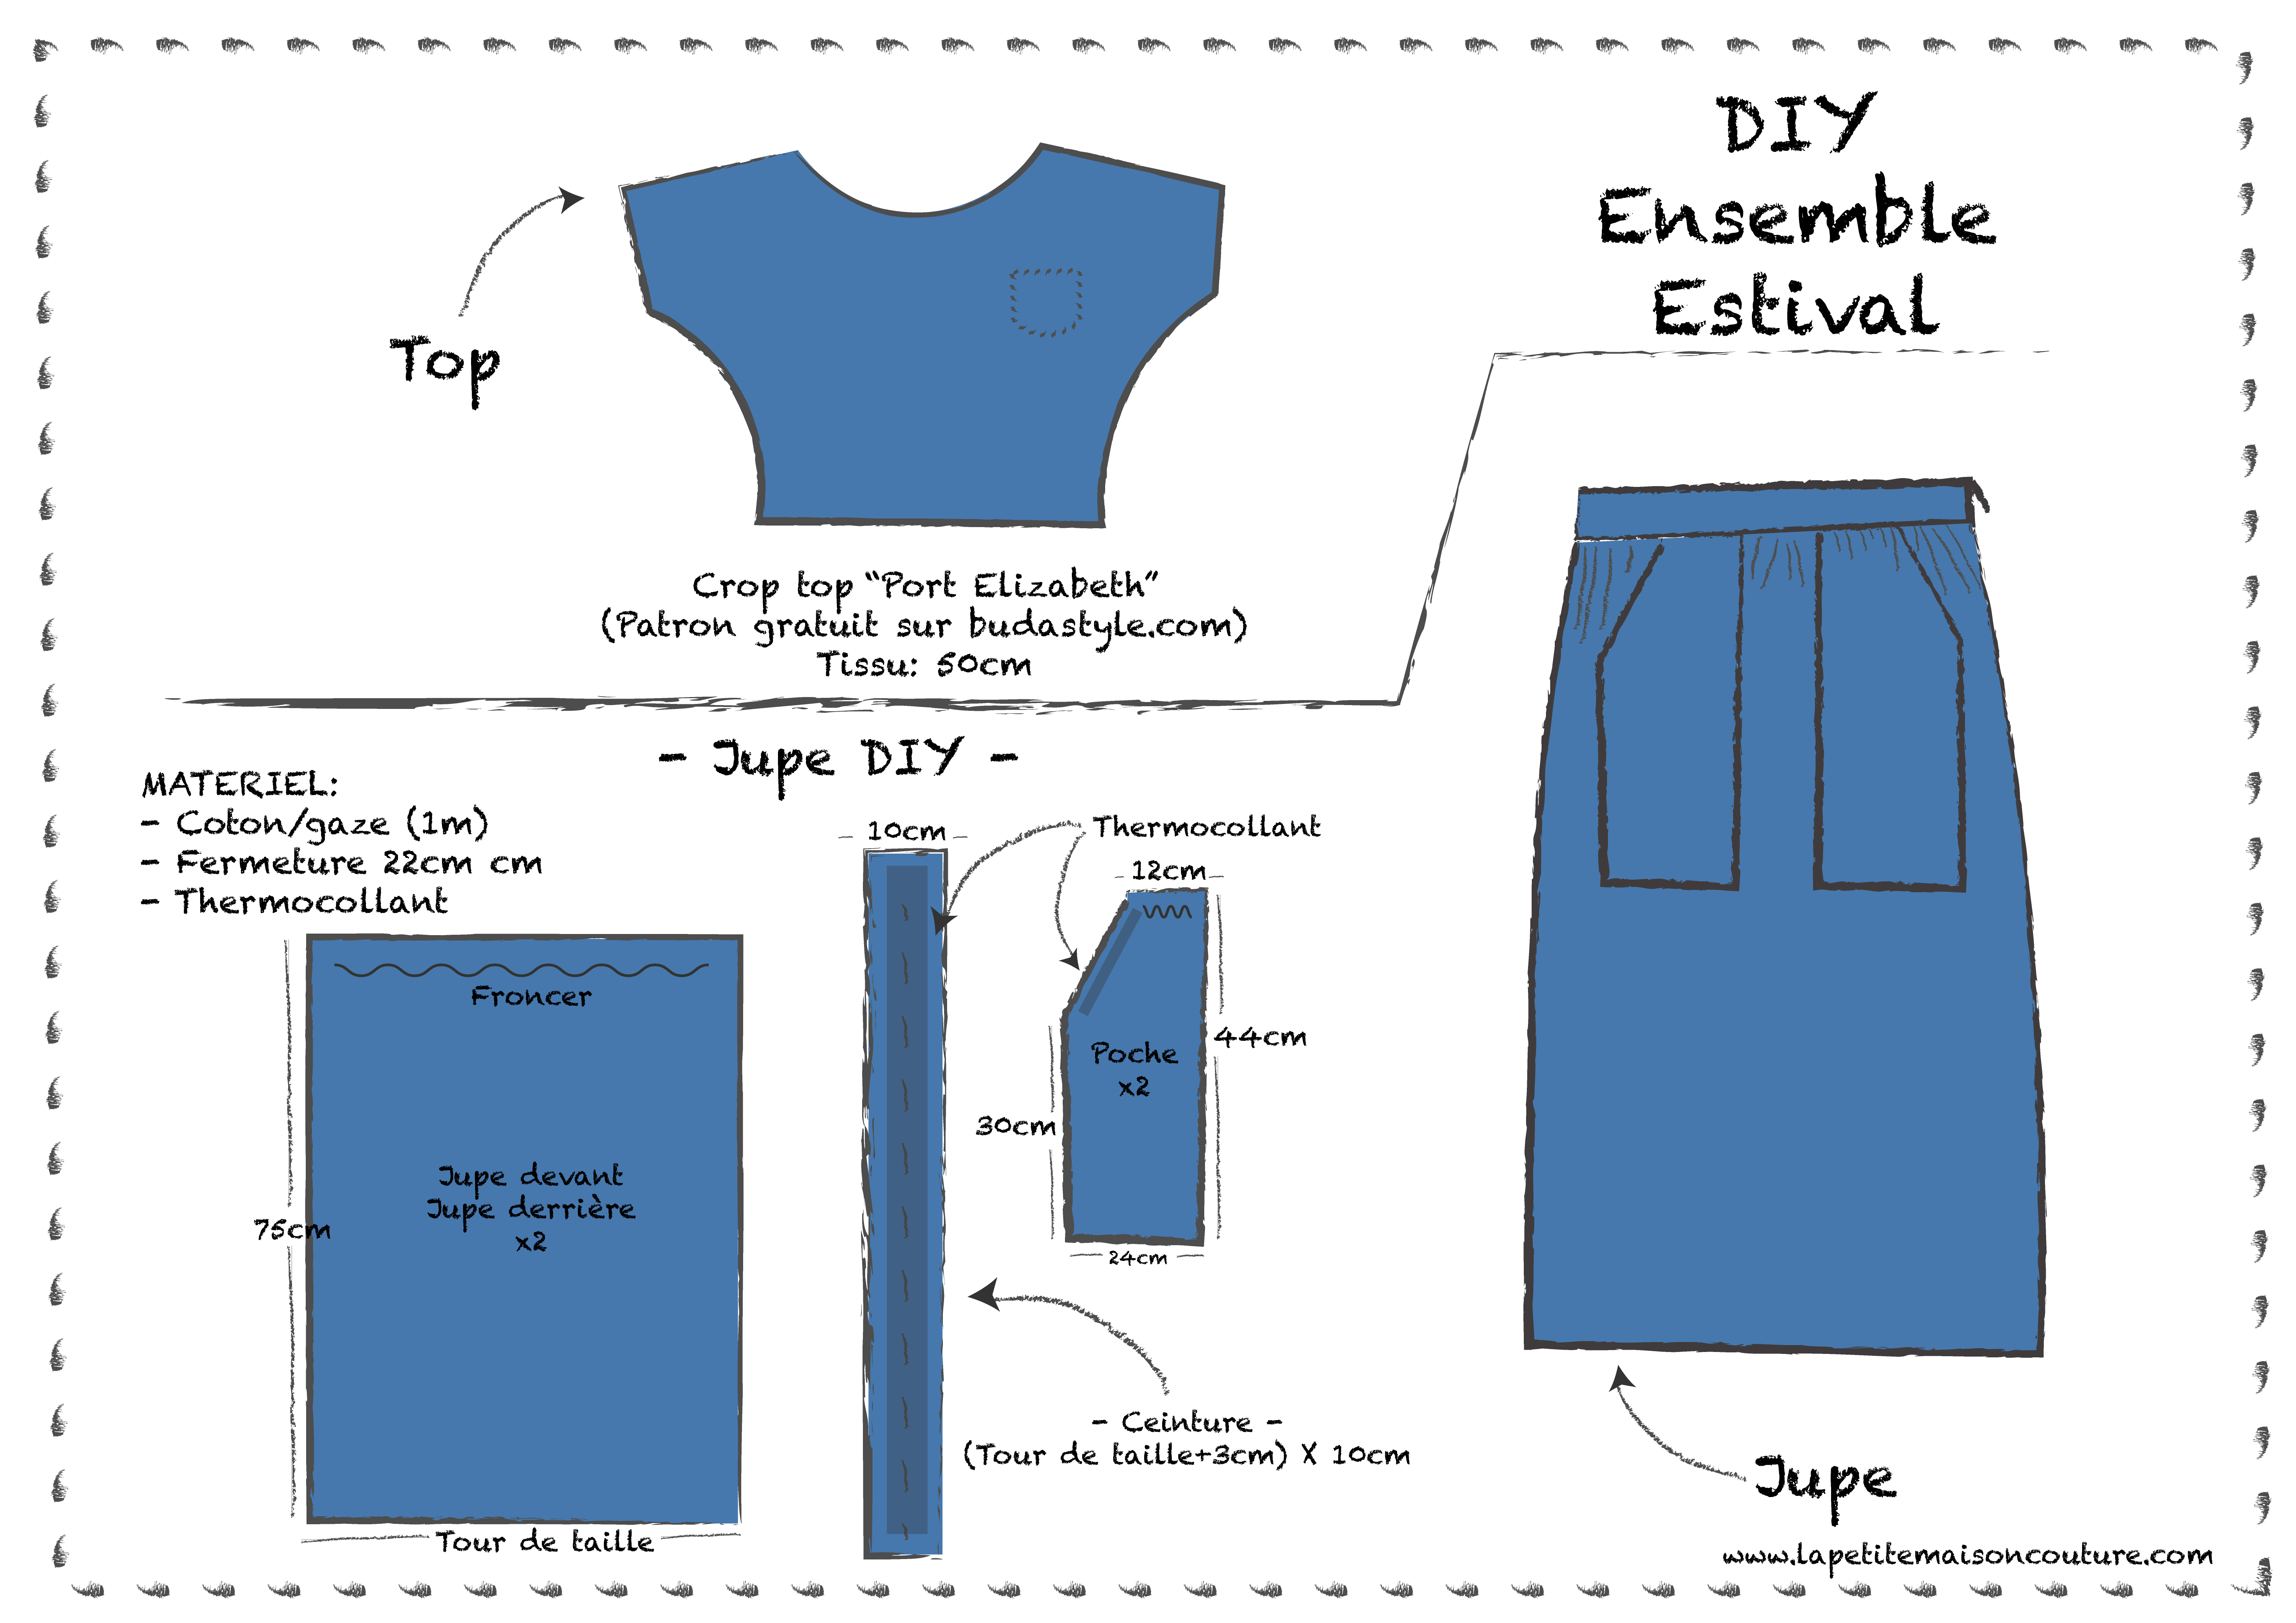
The only dimension that changes here is the waist measurement. You’ll need to know your waist measurement in order to cut the waistband, skirt front and back.
Ex. Waist measurement: 79 cm.
Waistband dimension: 10×82 cm
Dimension for each skirt panel: 75×79 cm
Steps:
1. Cut the pieces
2. Ideally finish all pieces with a serger, or sew with a zigzag stitch or cut with pinking shears.
3. Prepare the waistband by interfacing the waistband piece with medium-weight interfacing.
4. Reinforce the pocket openings with a thin strip of interfacing
5. Sew the pockets to the fronts by aligning the top edges of the pockets with the top edge of the skirt front. Take care to place the pockets 5 cm on either side of the center fold line (so 10 cm apart from each other). Here I’m using contrasting thread so the pockets are visible.
6. Assemble front and back pieces on the right side.
7. Gather the entire width until you get the same dimension as the waistband.
8. Assemble waistband and skirt
9. Install the invisible zipper. Hem.
In this tutorial I mainly wanted to give you a style and dimensions, rather than technique. I’m of course available if you have any questions about the technique or construction.
I hope you enjoyed this tutorial. See you soon!