

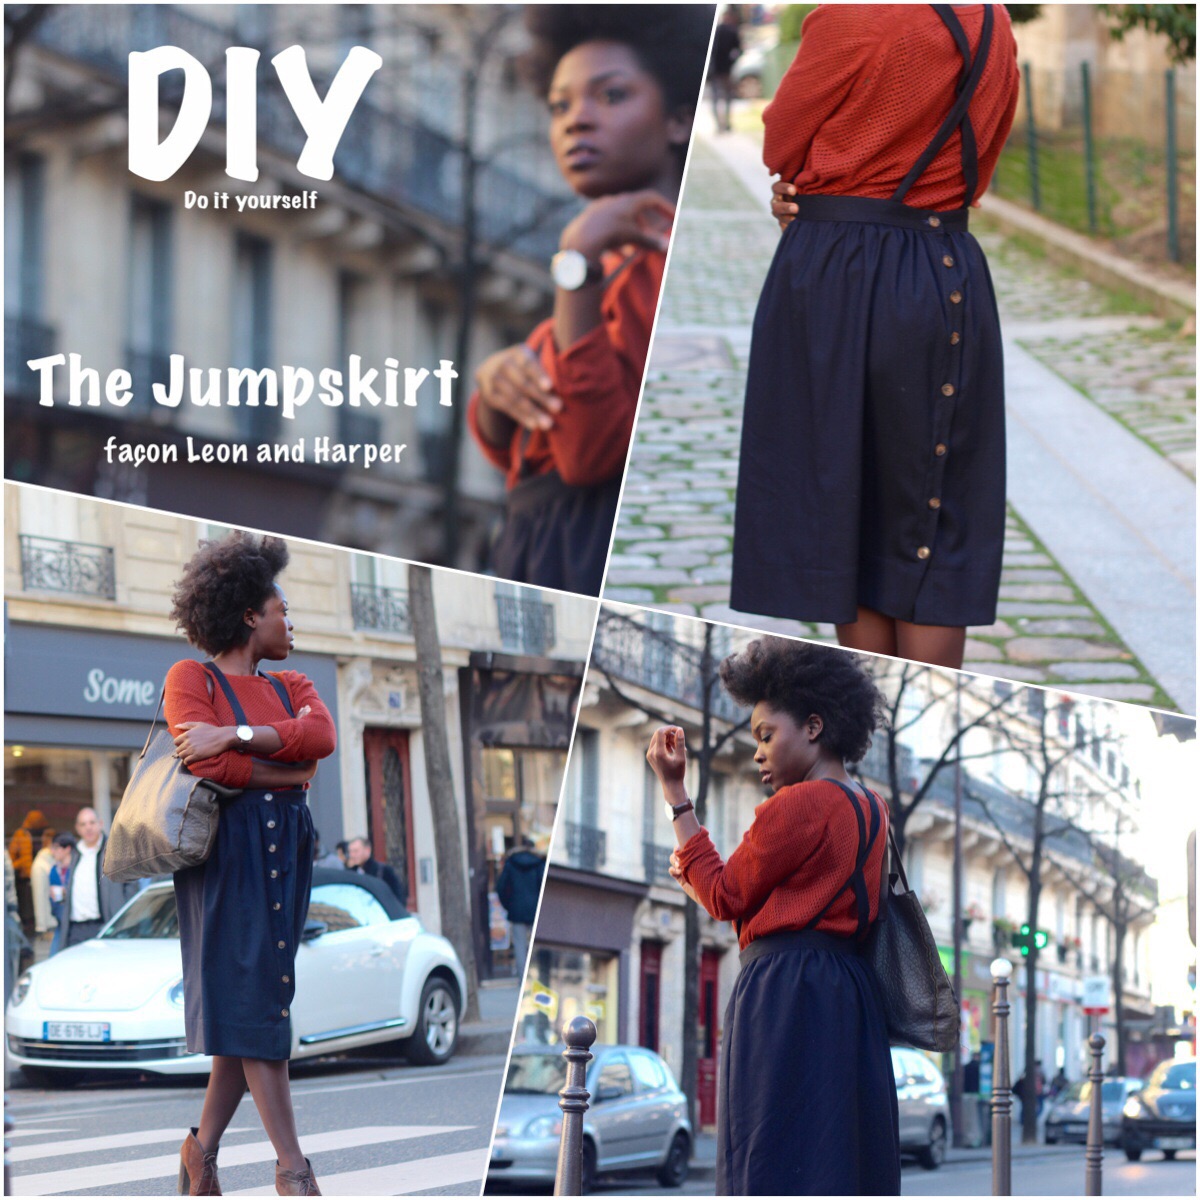
Today I’m sharing a DIY with you, still as part of the 4 Christmas DIYs we started 5 days ago. As I mentioned, until Christmas I’ll be sharing a relatively easy gift-idea project every 5 days. Today, it’s this skirt that will be the subject of a tutorial at the end of this post—but first I need to tell you about this skirt!
I saw this skirt at Leon and Harper a few weeks ago and I fell in love with how many different styles it offers. First, the straps: where there are straps, there’s happiness! Here, the straps can be crossed (in front or in back), uncrossed, or removed if for some reason you’re not in the mood to wear straps. Next, the skirt can be worn with the buttons in front or in back. I prefer them in front for a casual look like here, and buttons in back for a chic look with a light top, pumps, jewelry, and a clutch. Finally, whether you wear it with a T-shirt, a sweater, a shirt, a tank top, flats, pumps, ankle boots, sneakers, open-toe shoes, or Birkenstocks, the result will be different—but the style, I’m telling you, will always be guaranteed.


So, convinced? I’ll hand it over to you now. Just one thing: don’t forget that quality fabric = a beautiful finish. Over to you!
Main materials:
- Fabric: 1.5 m (wool found at Bennytex)
- Fusible interfacing: 15 cm
- 8 buttons, 1.5 cm–2 cm in diameter (found at Fil 2000)
- 4 buttons, 0.5 cm in diameter
- thread
STEP 1: TAKE YOUR MEASUREMENTS
Take your measurements and write them down:
- Your waist measurement (here 80 cm)
- Desired skirt length (here 75 cm, including a 10 cm hem)
STEP 2: CUTTING THE PIECES
- The skirt waistband:
Waistband length: waist measurement (here 80 cm) + 5 cm seam allowances = 85 cm
Waistband width for all sizes: 4 cm + 2 cm seam allowances = 6 cm
>>>So I cut 2 fabric pieces + 1 interfacing piece, each (here 85 cm) x 6 cm
- The skirt:
Back skirt piece x 1: your waist measurement (here 80 cm) x length 75 cm
Front skirt piece x 2: 1/2 your waist measurement (here 40 cm) x length 75 cm
>>So I cut a total of 3 pieces from the fabric.
- The straps:
For all sizes, seam allowances included, cut 2 pieces from the fabric, each: 120 cm x 8 cm
STEP 3: MAKING IT
STEP 3.1. The skirt waistband:
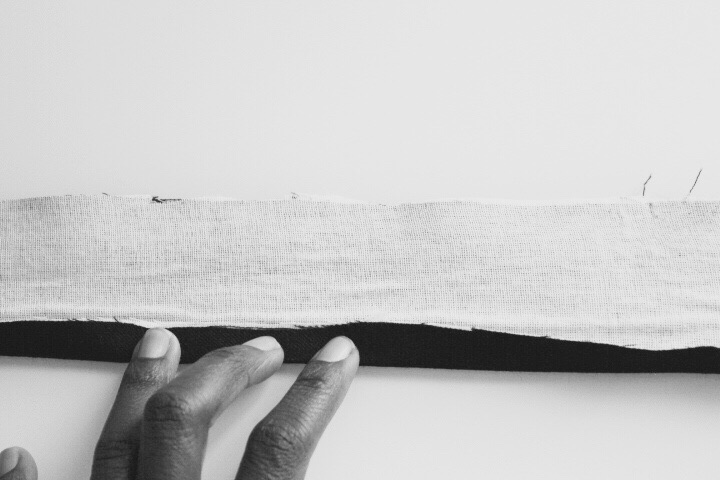
-Apply the fusible interfacing to the wrong side of one waistband piece. Using an iron, press a 1 cm fold along the lower edge of that same piece.
-Pin the 2 strips together, right sides facing, and sew a wide “U”, stitching 1 cm from the edge as follows: width, the unpressed length, and finish with the width. You can round the corners as you sew.
The length you previously pressed must remain open. Press the seams you just sewed to set them. Trim the excess seam allowance you just created. One side of the waistband is longer than the other—this is normal.
-Turn the waistband right side out and press, keeping the fold you made earlier tucked inside.
-Set aside.
STEP 3.2. The skirt
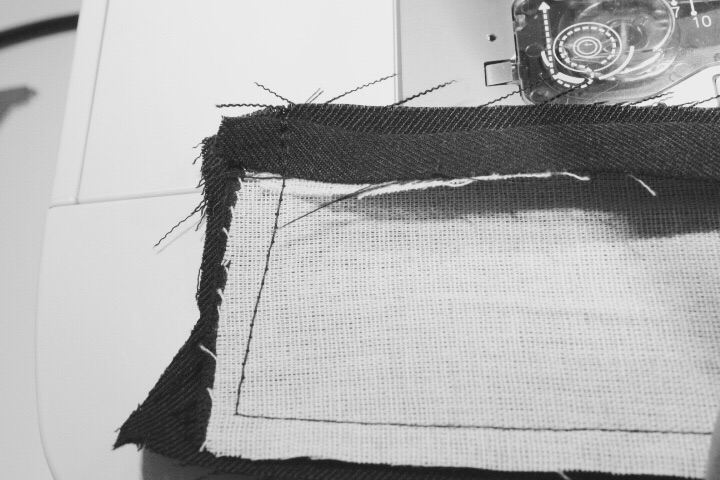
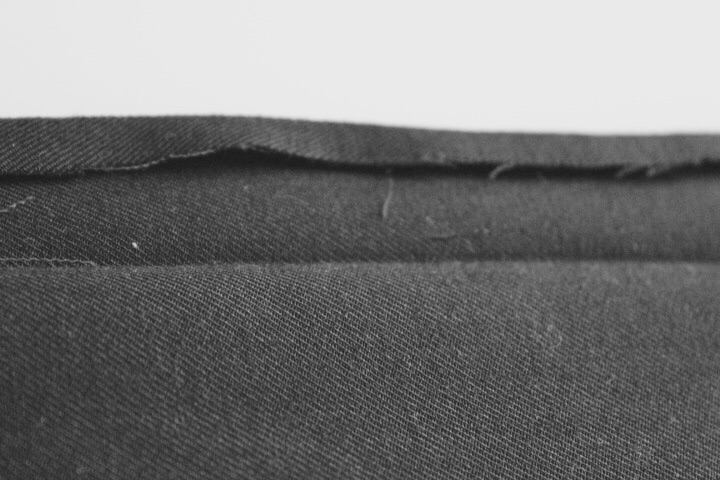
-Finish the raw edges of the skirt pieces.
-Pin the front skirt pieces to the back piece, right sides together (these are the sides that measure 75 cm). Stitch. Press the seam and press the seam allowances open. You now have a single rectangle that measures 160 cm x 75 cm here.
–Button plackets: Take one of the two sides (75 cm) and, using an iron, press a 1 cm fold to the inside (wrong side). If your fabric has no right or wrong side as is the case here, the direction of the fold doesn’t matter.
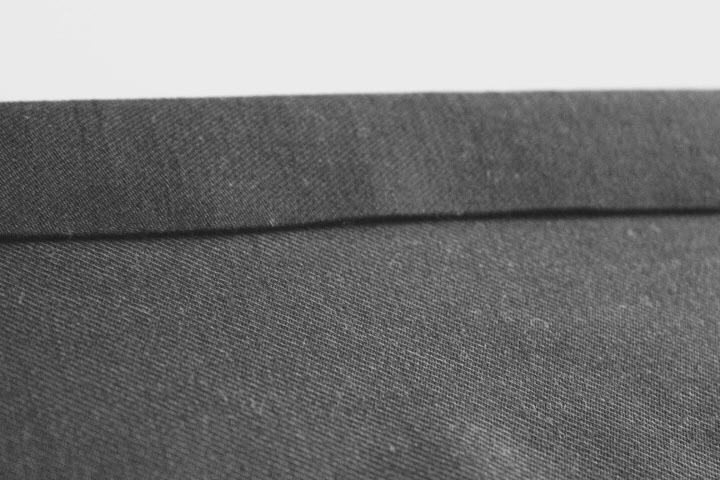
Make a second 3 cm fold, folding in the same direction so that the first fold is hidden. Pin, and stitch 2 mm from the fold you just made.

Repeat on the second 75 cm side.
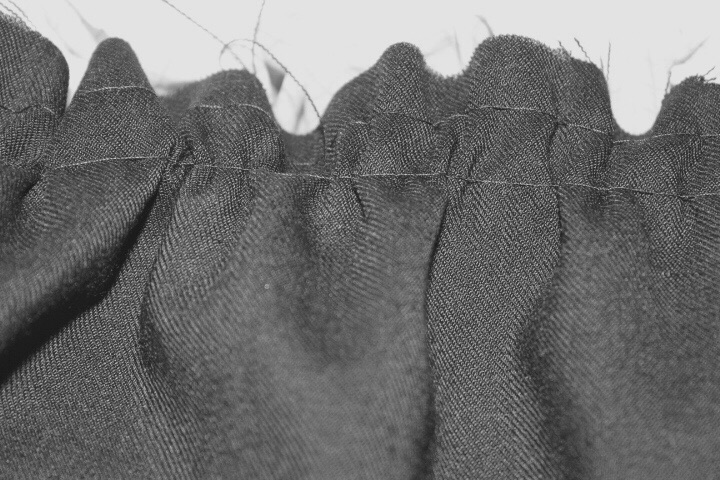
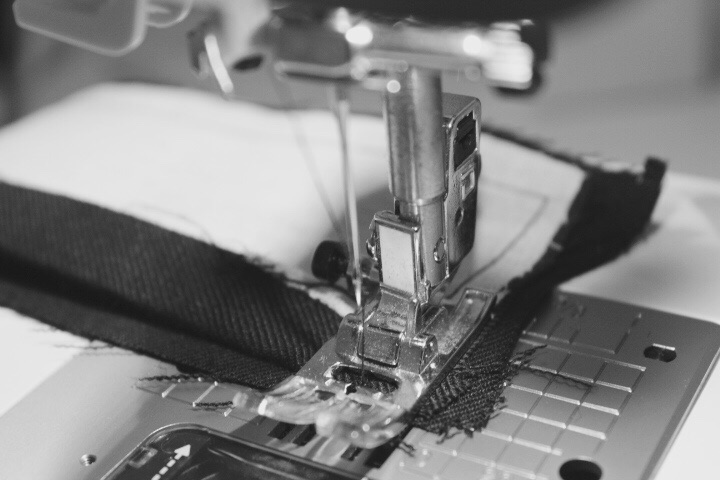
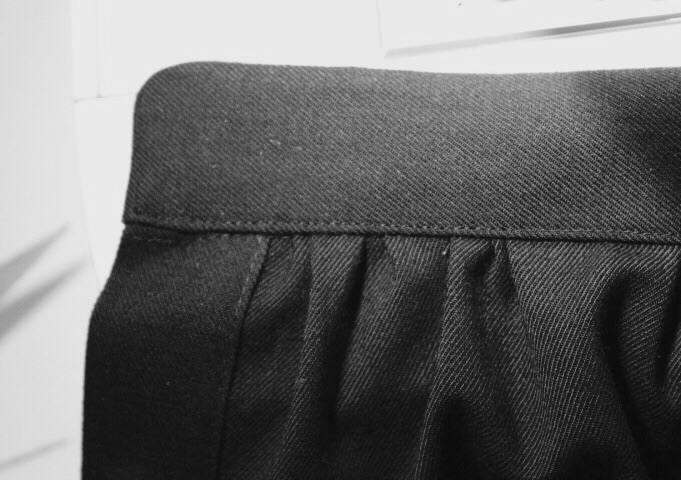
-Prepare the gathers: Now take the full width and sew one row with the longest stitch (5 mm), 1 cm from the edge. Sew a second row. To create the gathers, pull the threads on each side while sliding the fabric along the threads. Gather until you reach the same length as the finished waistband.
Tie off the threads on both sides to keep the gathered length, and secure the gathers with a standard straight stitch that will go through the rows.
Girlfriend tips: 1. Before sewing your rows, leave 10 cm of thread at the beginning and 10 cm at the end so you can pull and create your gathers. 2. Don’t backstitch, because the fabric needs to be able to move along the threads. 3. Do not gather the button placket you just created.
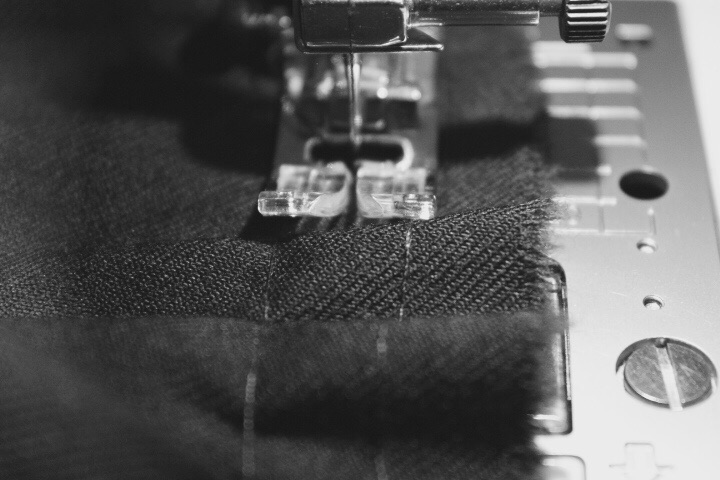
-Assemble skirt and waistband: Place the skirt with the wrong side facing you. Align raw edges to raw edges, waistband right side against skirt wrong side. Pin and stitch at 1 cm. The edges should match up. Trim the excess (0.5 cm) from the seam allowances.
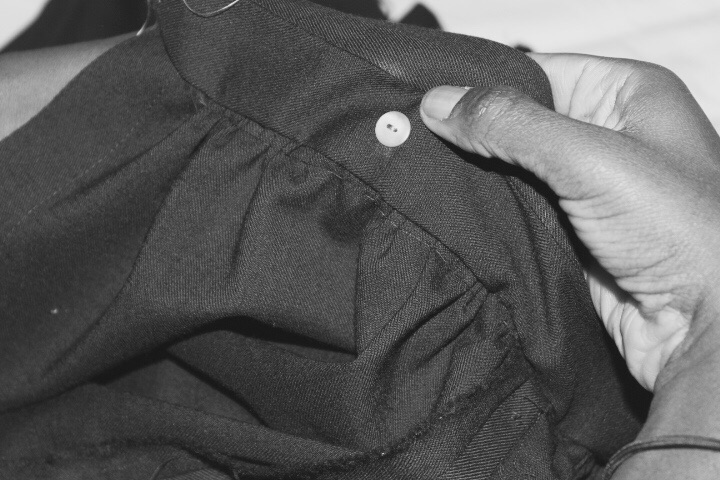
- The inside buttons for the straps: You need to sew the inside strap buttons before closing the waistband. To know where to sew them, the best way is to pin the skirt around you. Position the meeting point of the waistband edges in front or behind you (the non-interfaced side against you). Mark where you want to attach your straps. (Warning: check that this positioning works for wearing the skirt both ways.) Sew the 4 small buttons at each mark (on the non-interfaced side). Here I marked: 12 cm–19 cm–23 cm–12 cm.
Now turn the skirt so the right side is facing you and fold the waistband up so the interfaced side is facing you. Tuck the raw edges inside the waistband. Topstitch on the right side 2 mm from the edge. If any gathering threads are sticking out, don’t hesitate to unpick them.
–The hem: Using an iron, press a 1 cm fold to the inside (wrong side), then press another 9 cm fold in the same direction so that the first fold is hidden. Pin, and stitch 2 mm from the fold.
-Making the skirt buttonholes: Make buttonholes every 7 cm. Sew on the buttons corresponding to the buttonholes.
STEP 3.3. The straps
Fold the straps in half lengthwise, right sides together. Press the fold with an iron. Pin and stitch all around 1 cm from the edge, leaving a 10 cm opening so you can turn the strap right side out. Press to set the seam. Turn the strap right side out (I use a chopstick to turn it). Shape the corners and press. Close the 10 cm opening by hand with an invisible stitch.
-Making the strap buttonholes: Put on the skirt and position the straps to determine where on the straps you’ll place your buttonholes. Make the buttonholes.
And there you go… your skirt is now finished. You can choose to make it shorter or longer, in a lighter or darker color; you’re the designer!
I hope you enjoyed this tutorial. Feel free to leave your thoughts or ask me questions if any steps aren’t clear. Do one step each evening and in 3–4 days your skirt will be ready to wear—or to place under the tree. I can’t wait to see your own jumpskirt. See you soon! 😉