

Here’s a post that might interest recycling enthusiasts, a post that will delight sewing beginners, a post that will make your closets and hangers smile, but above all, a post that should make men tremble!
It was with the Fall/Winter collection from Comptoir des Cotonniers that I discovered these removable collars. I thought it was super ingenious, practical, and easy to make. Tuck it under a sweater, and only you know what’s going on underneath.
MATERIALS
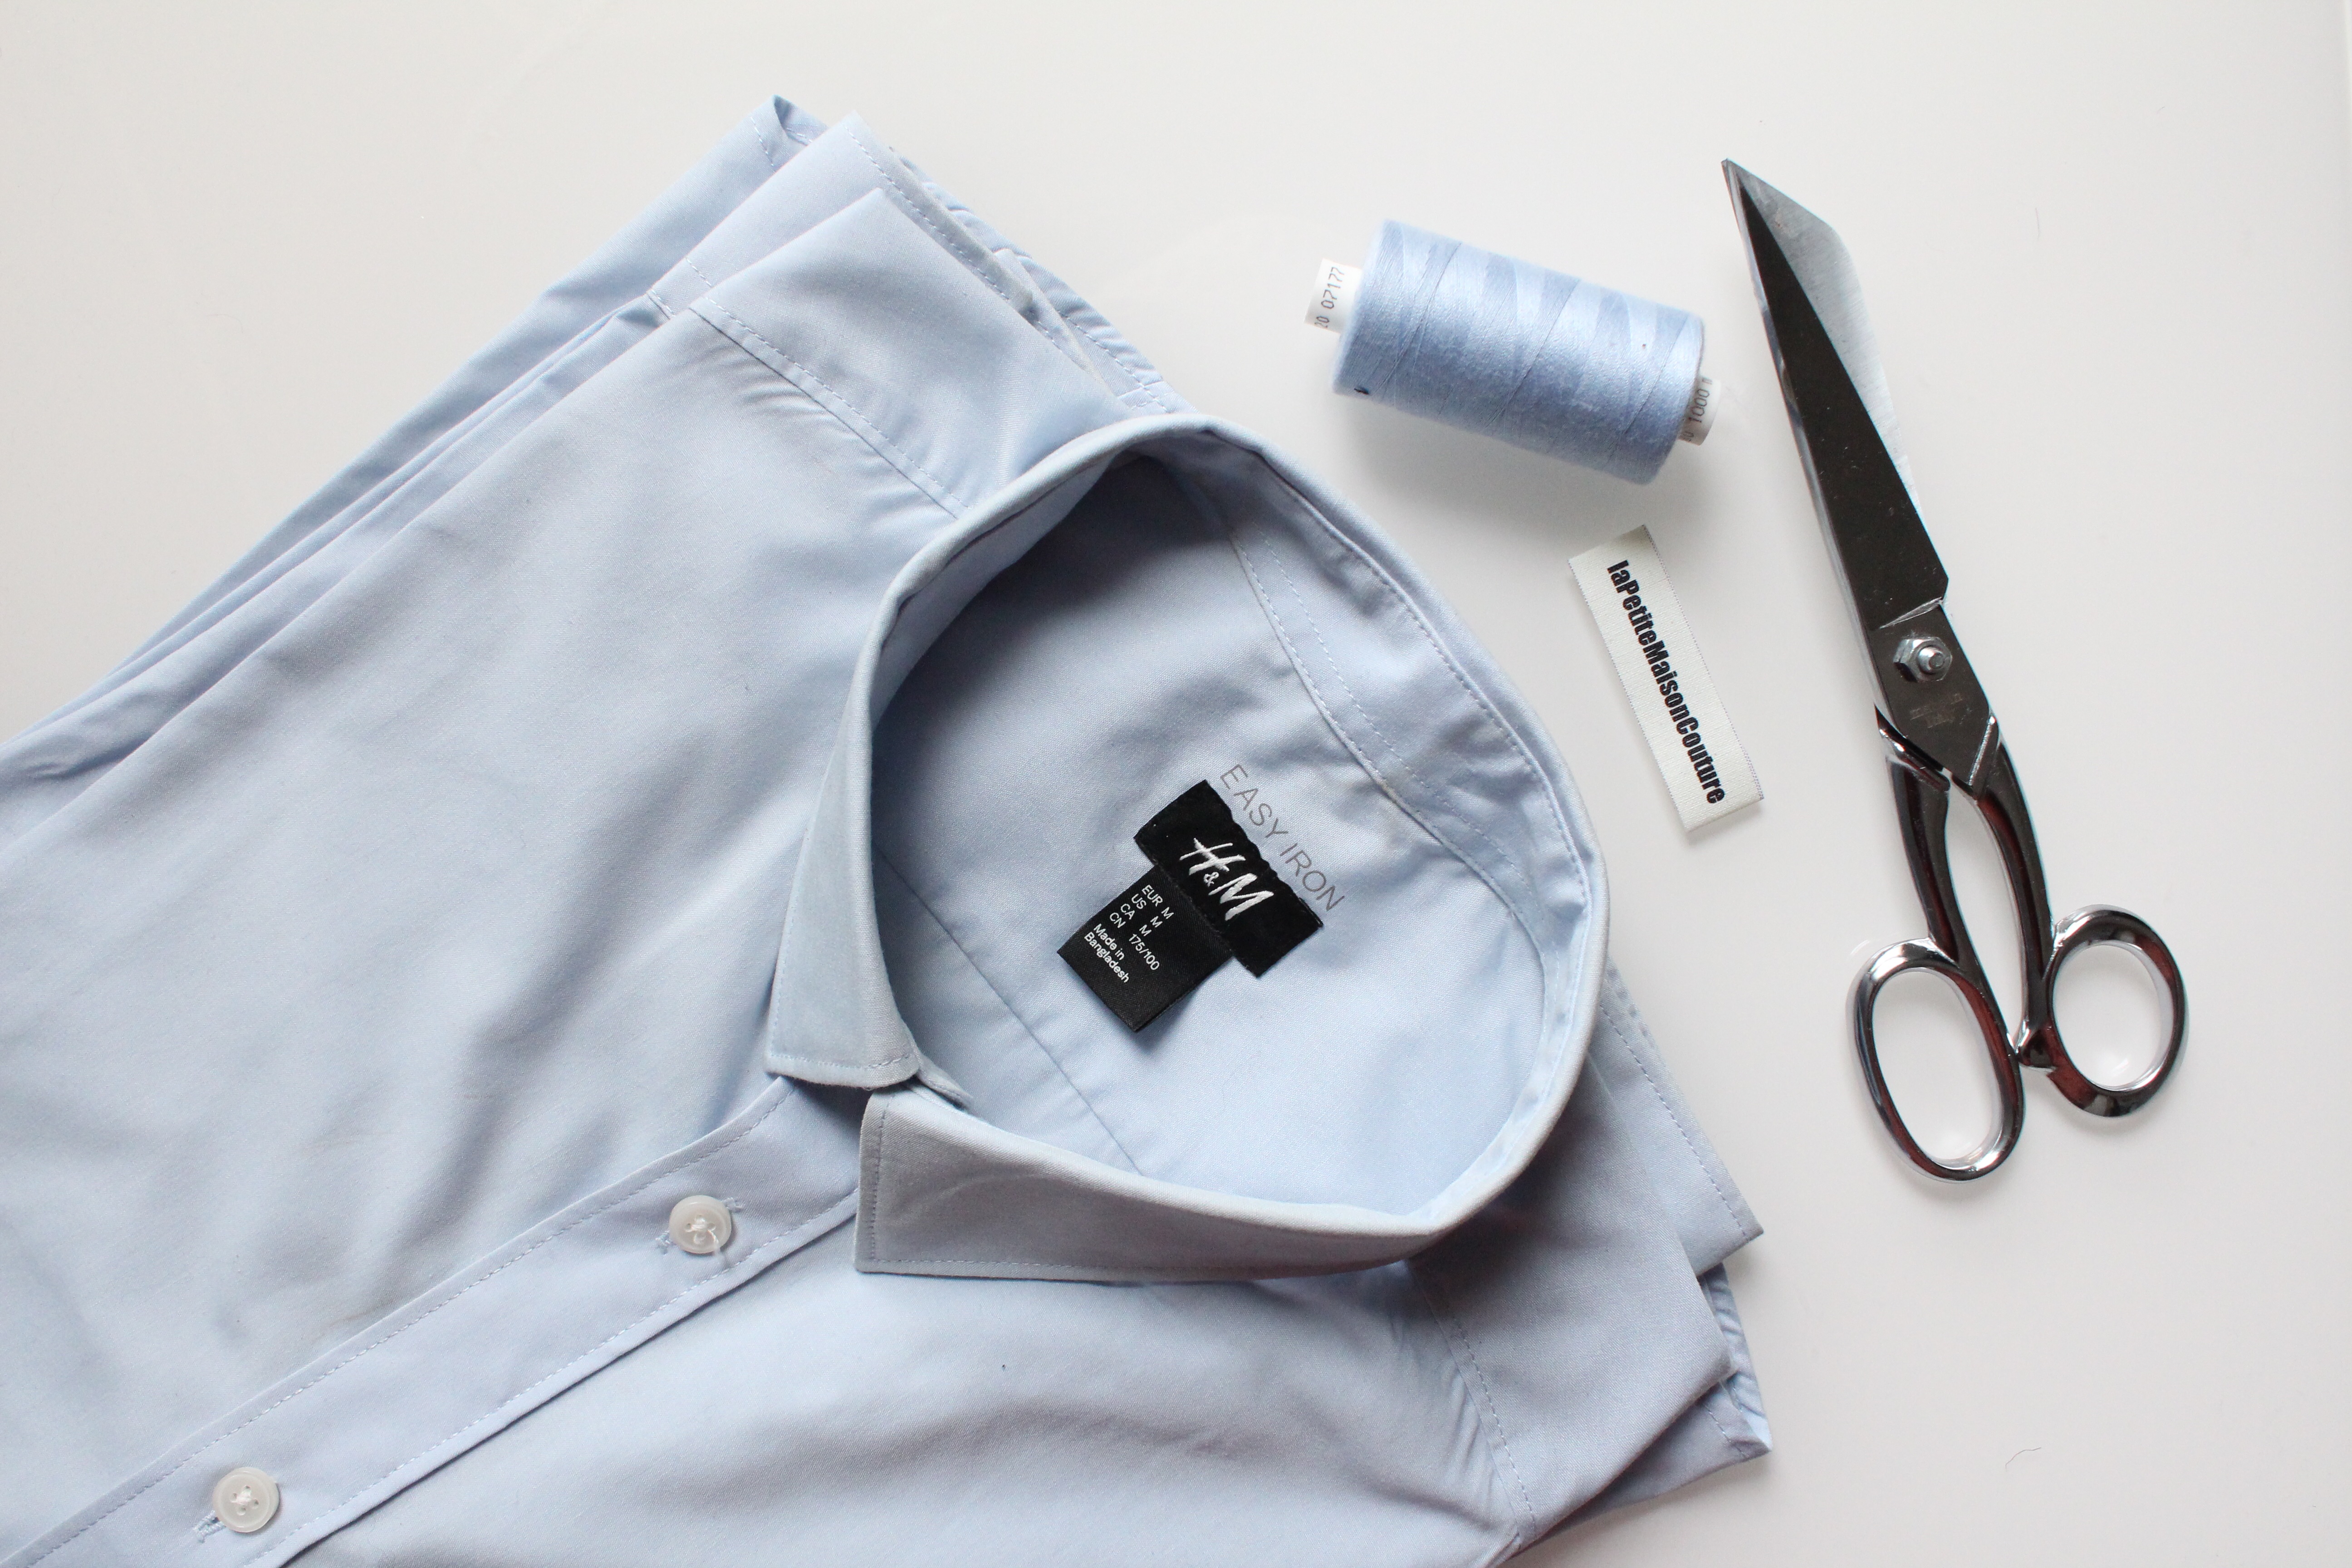
- Shirt (men’s or women’s, as long as it fits well at the neck)
- Thread
- Scissors
- Label (optional but useful if you want to give it as a gift)
STEP 1: Cut the Front Panel
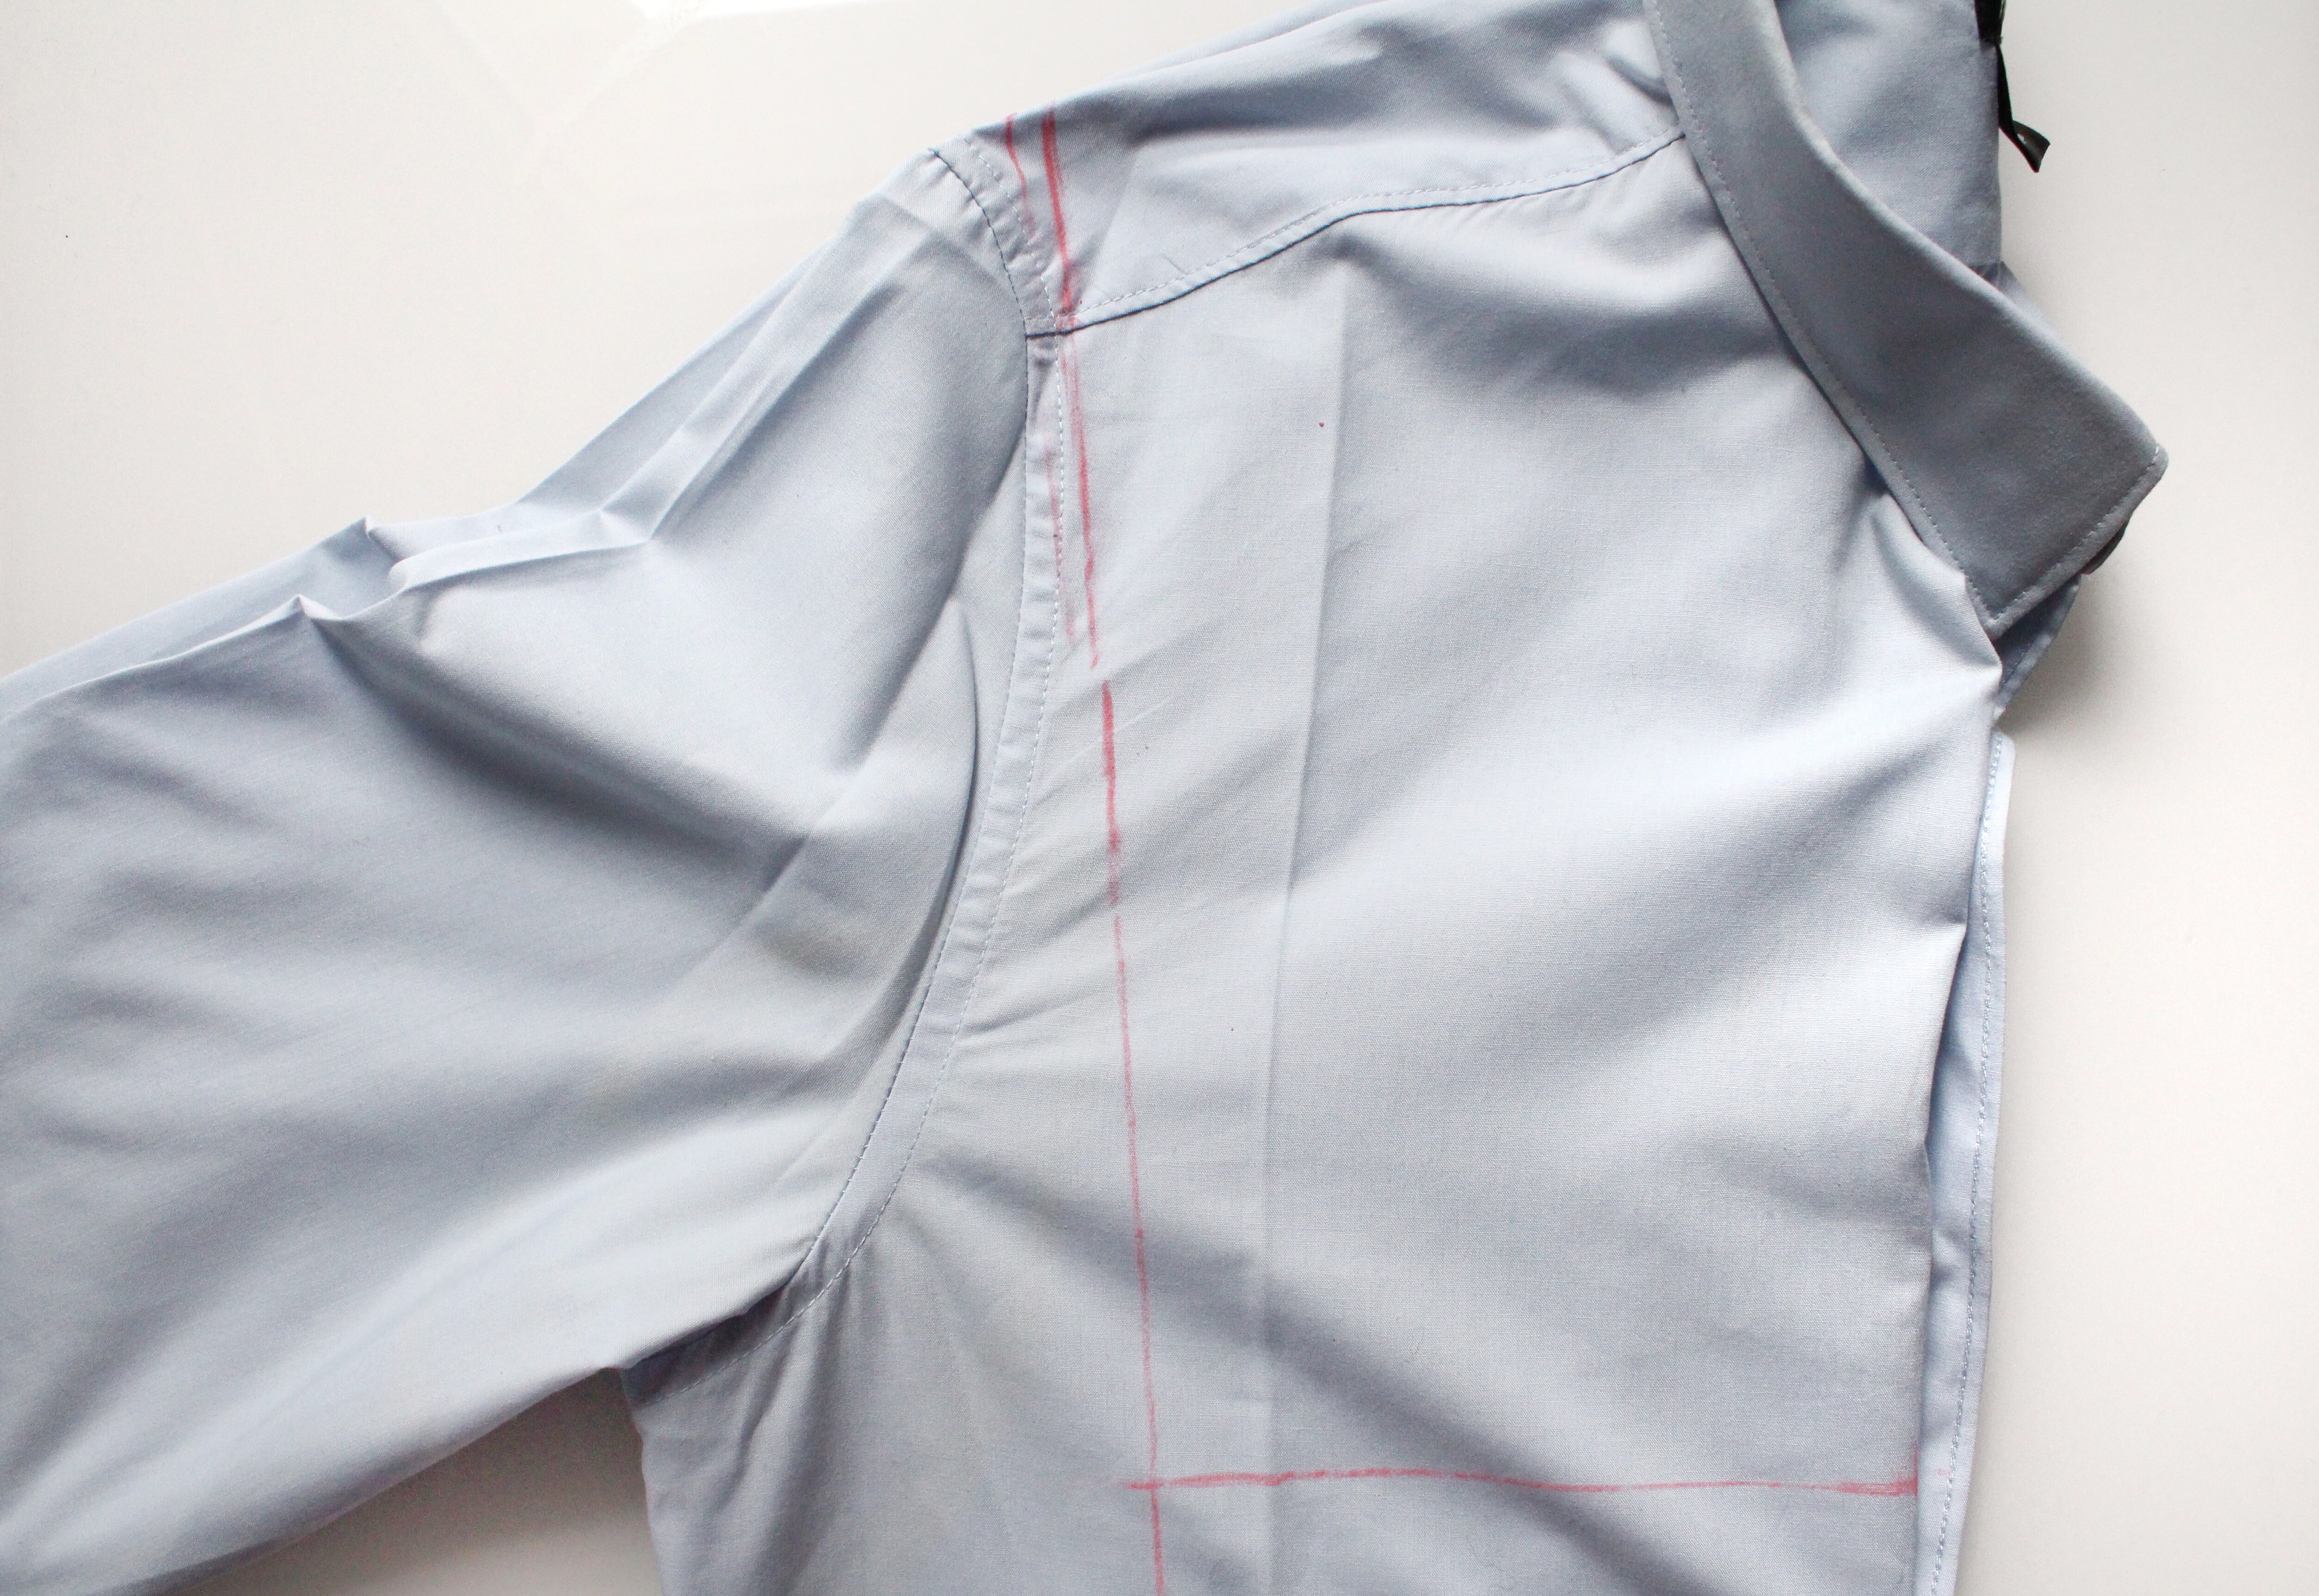
Fold your shirt in half lengthwise, making sure the shoulder seams line up.
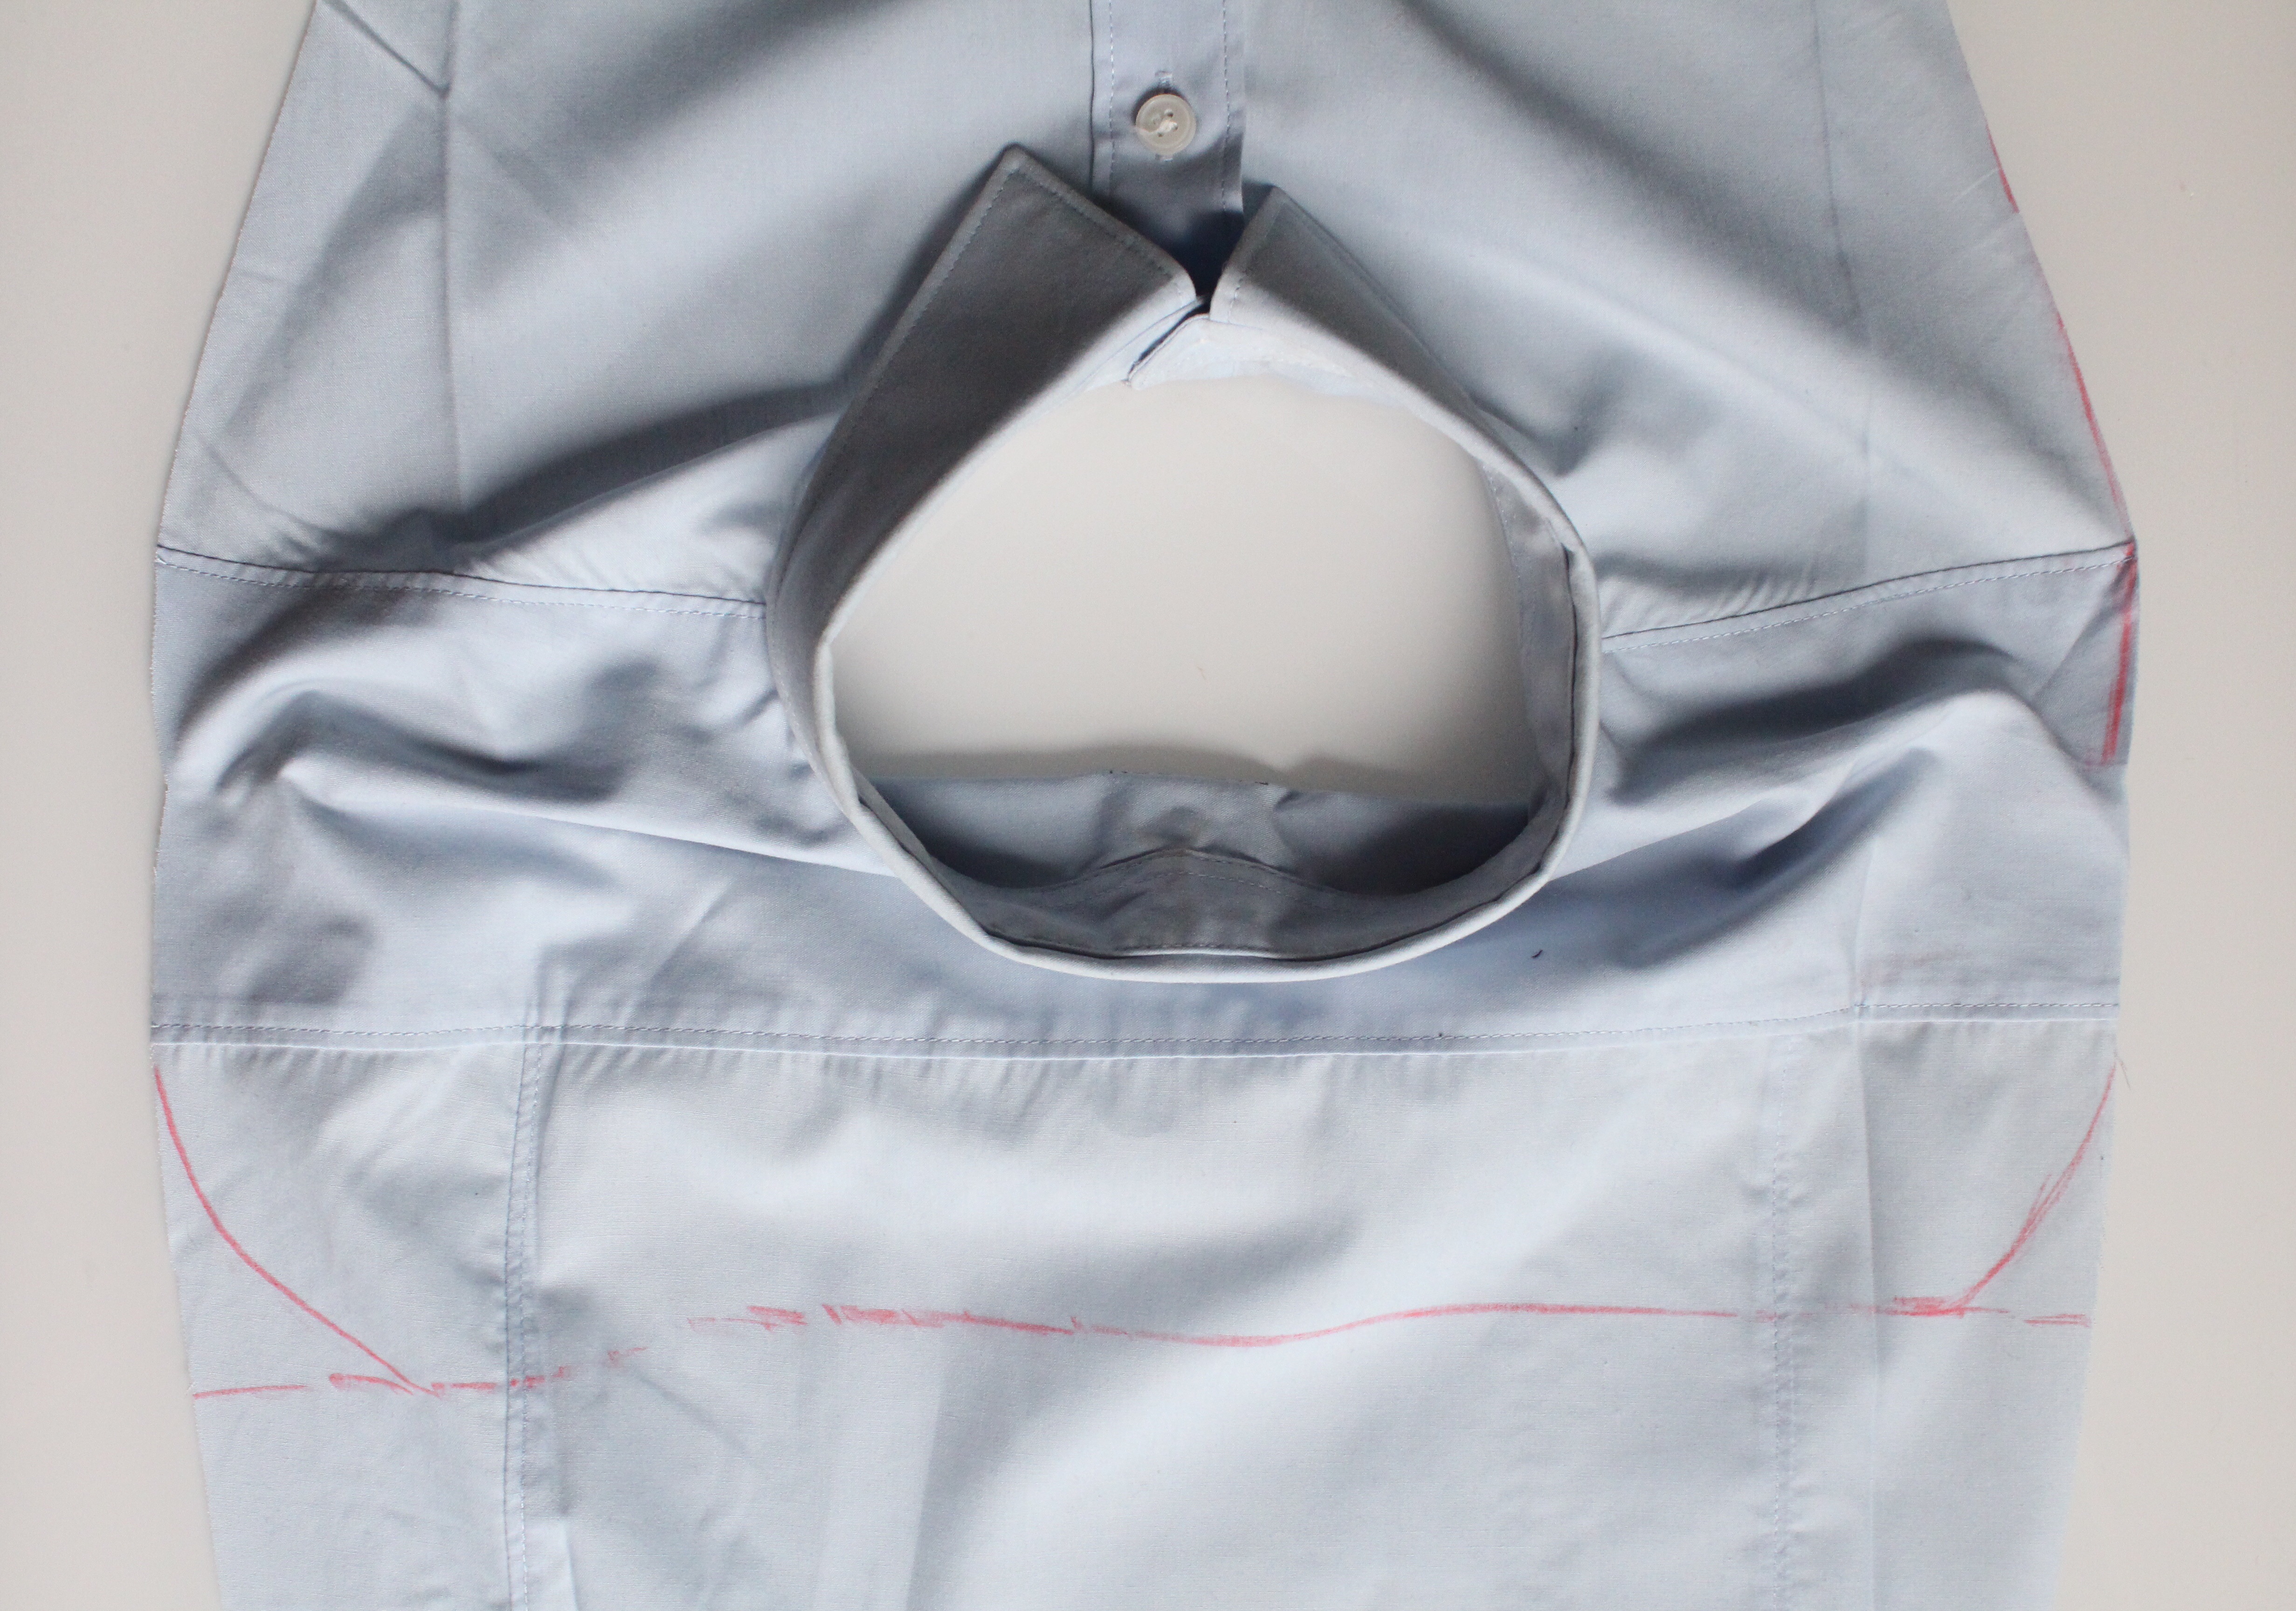
Draw two perpendicular lines: one starting from the shoulder seam going down, and the other from an imaginary point between the 3rd and 4th button (or between the 4th and 5th button, your choice).
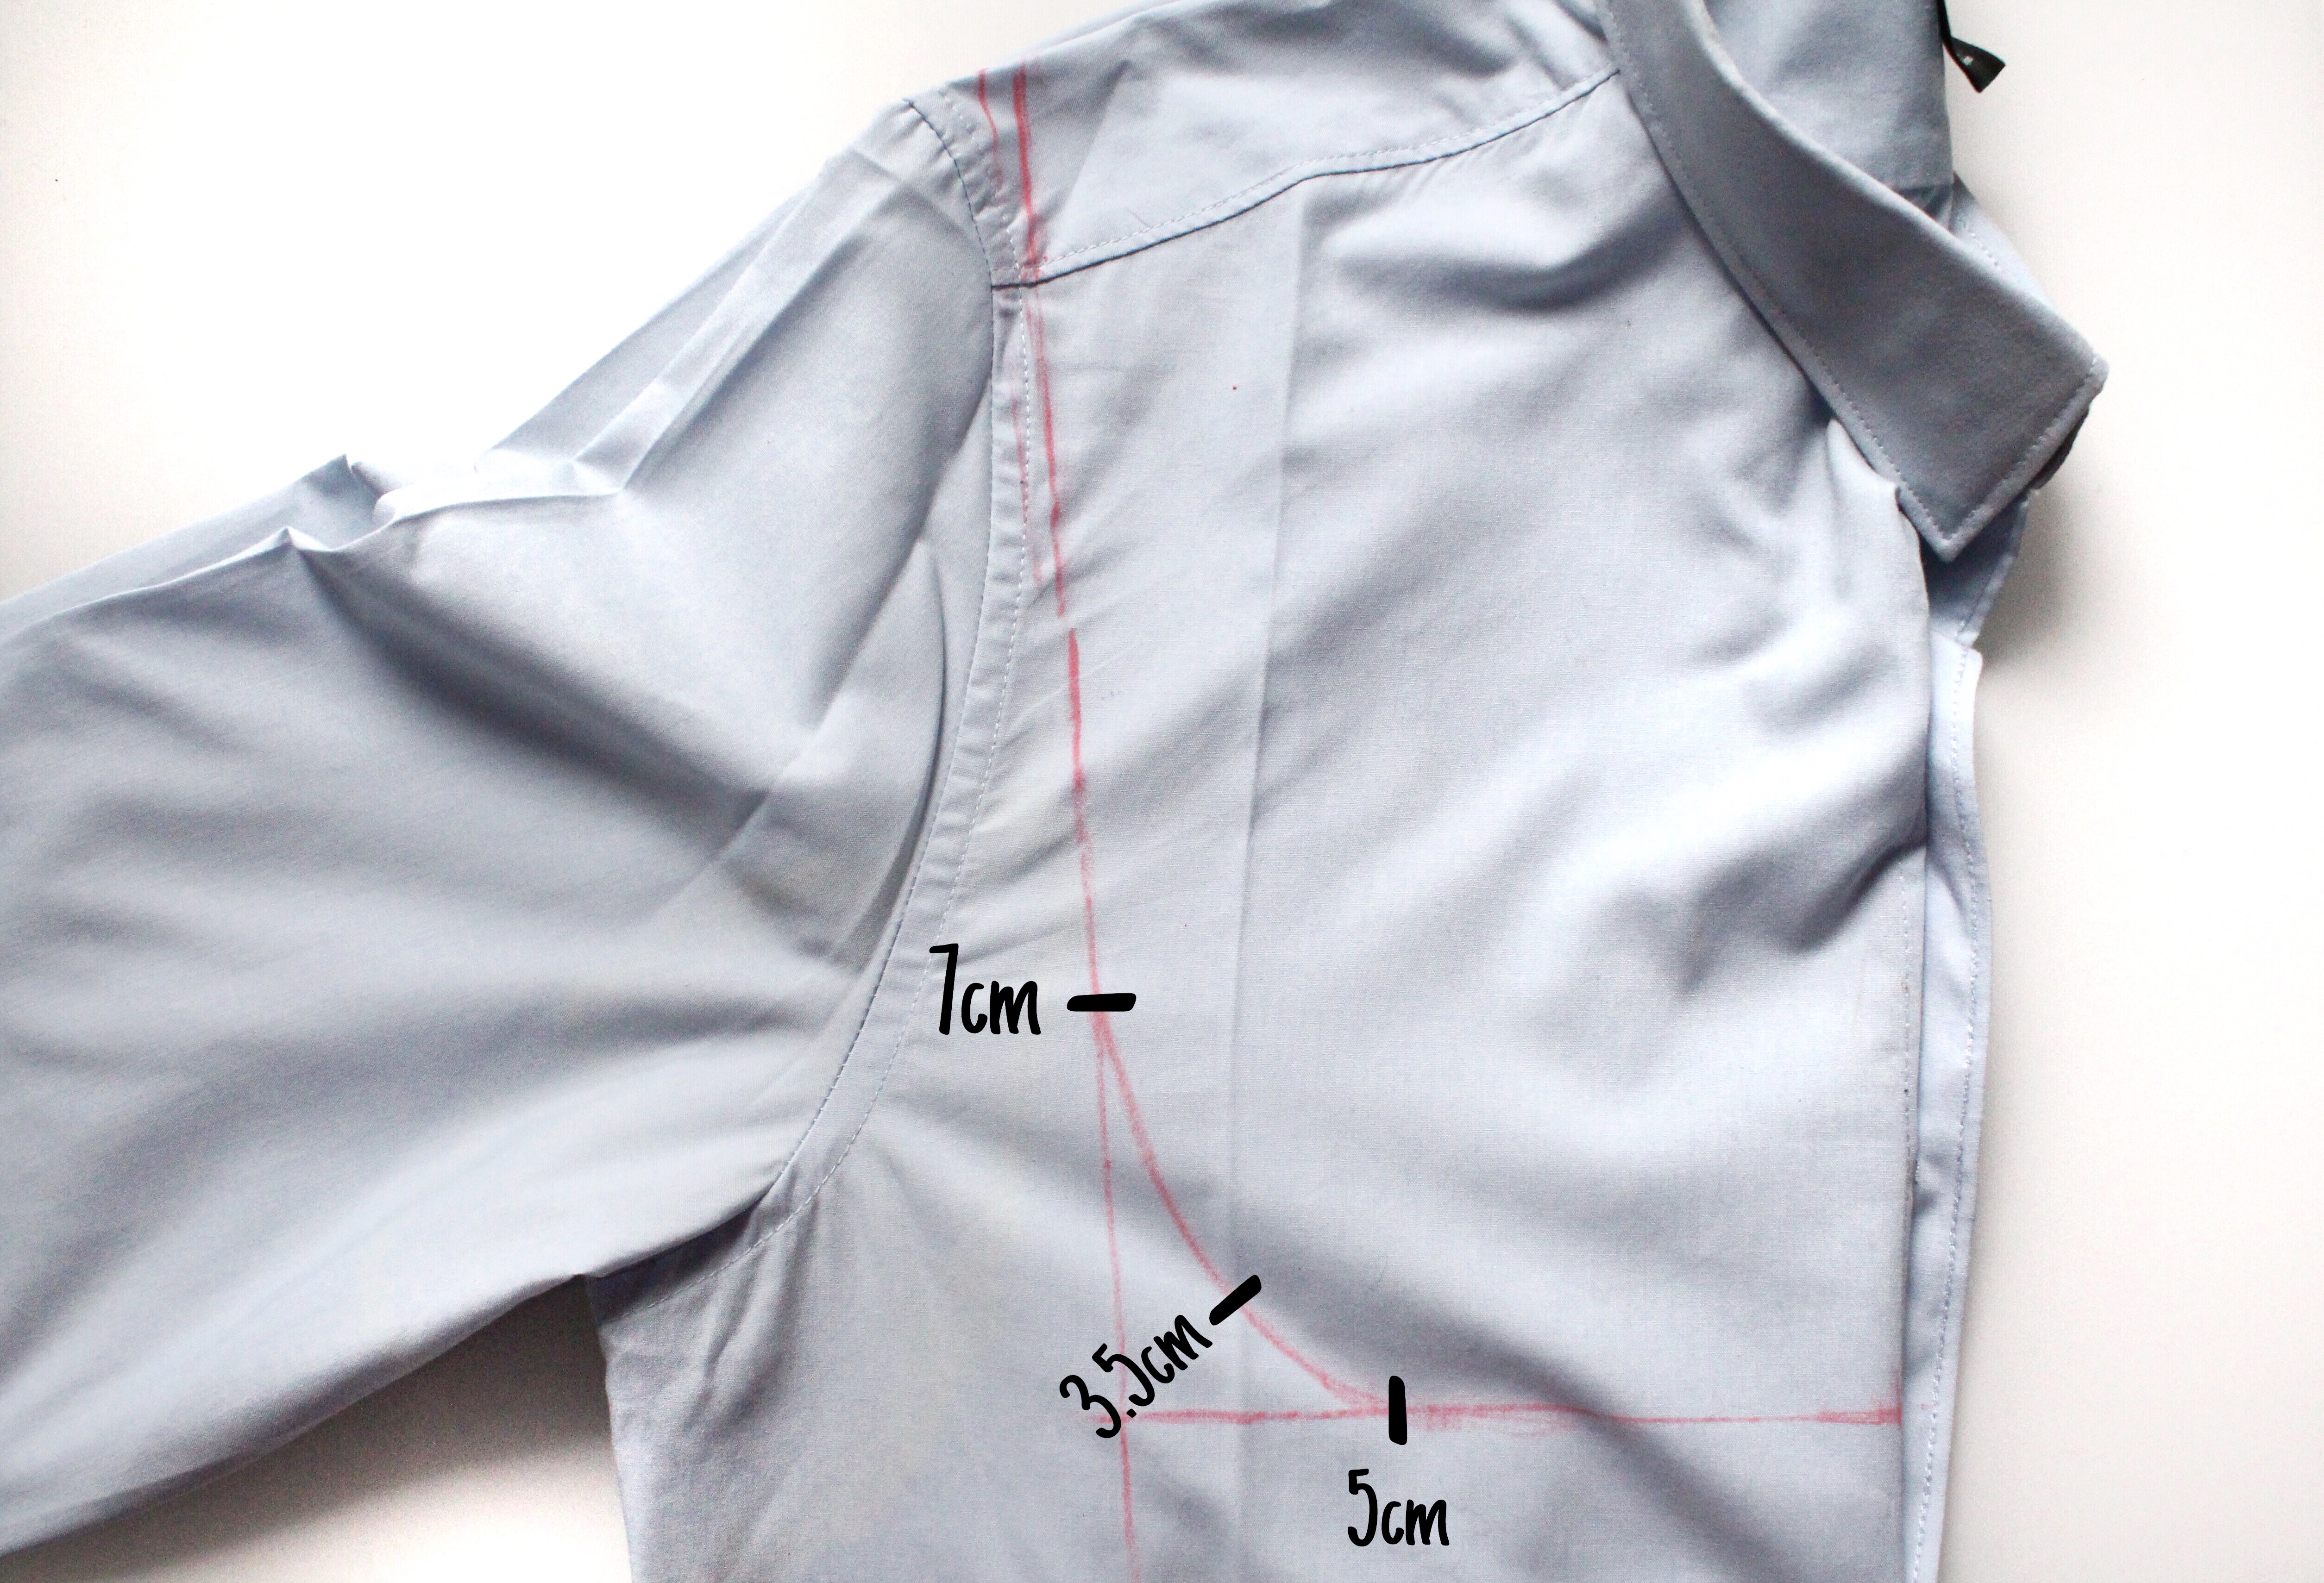 Connect them by drawing a freehand curve, or mark points on each axis as shown in the image above. Connect them with a curve that passes 3.5 cm from the intersection point of the axes. Cut.
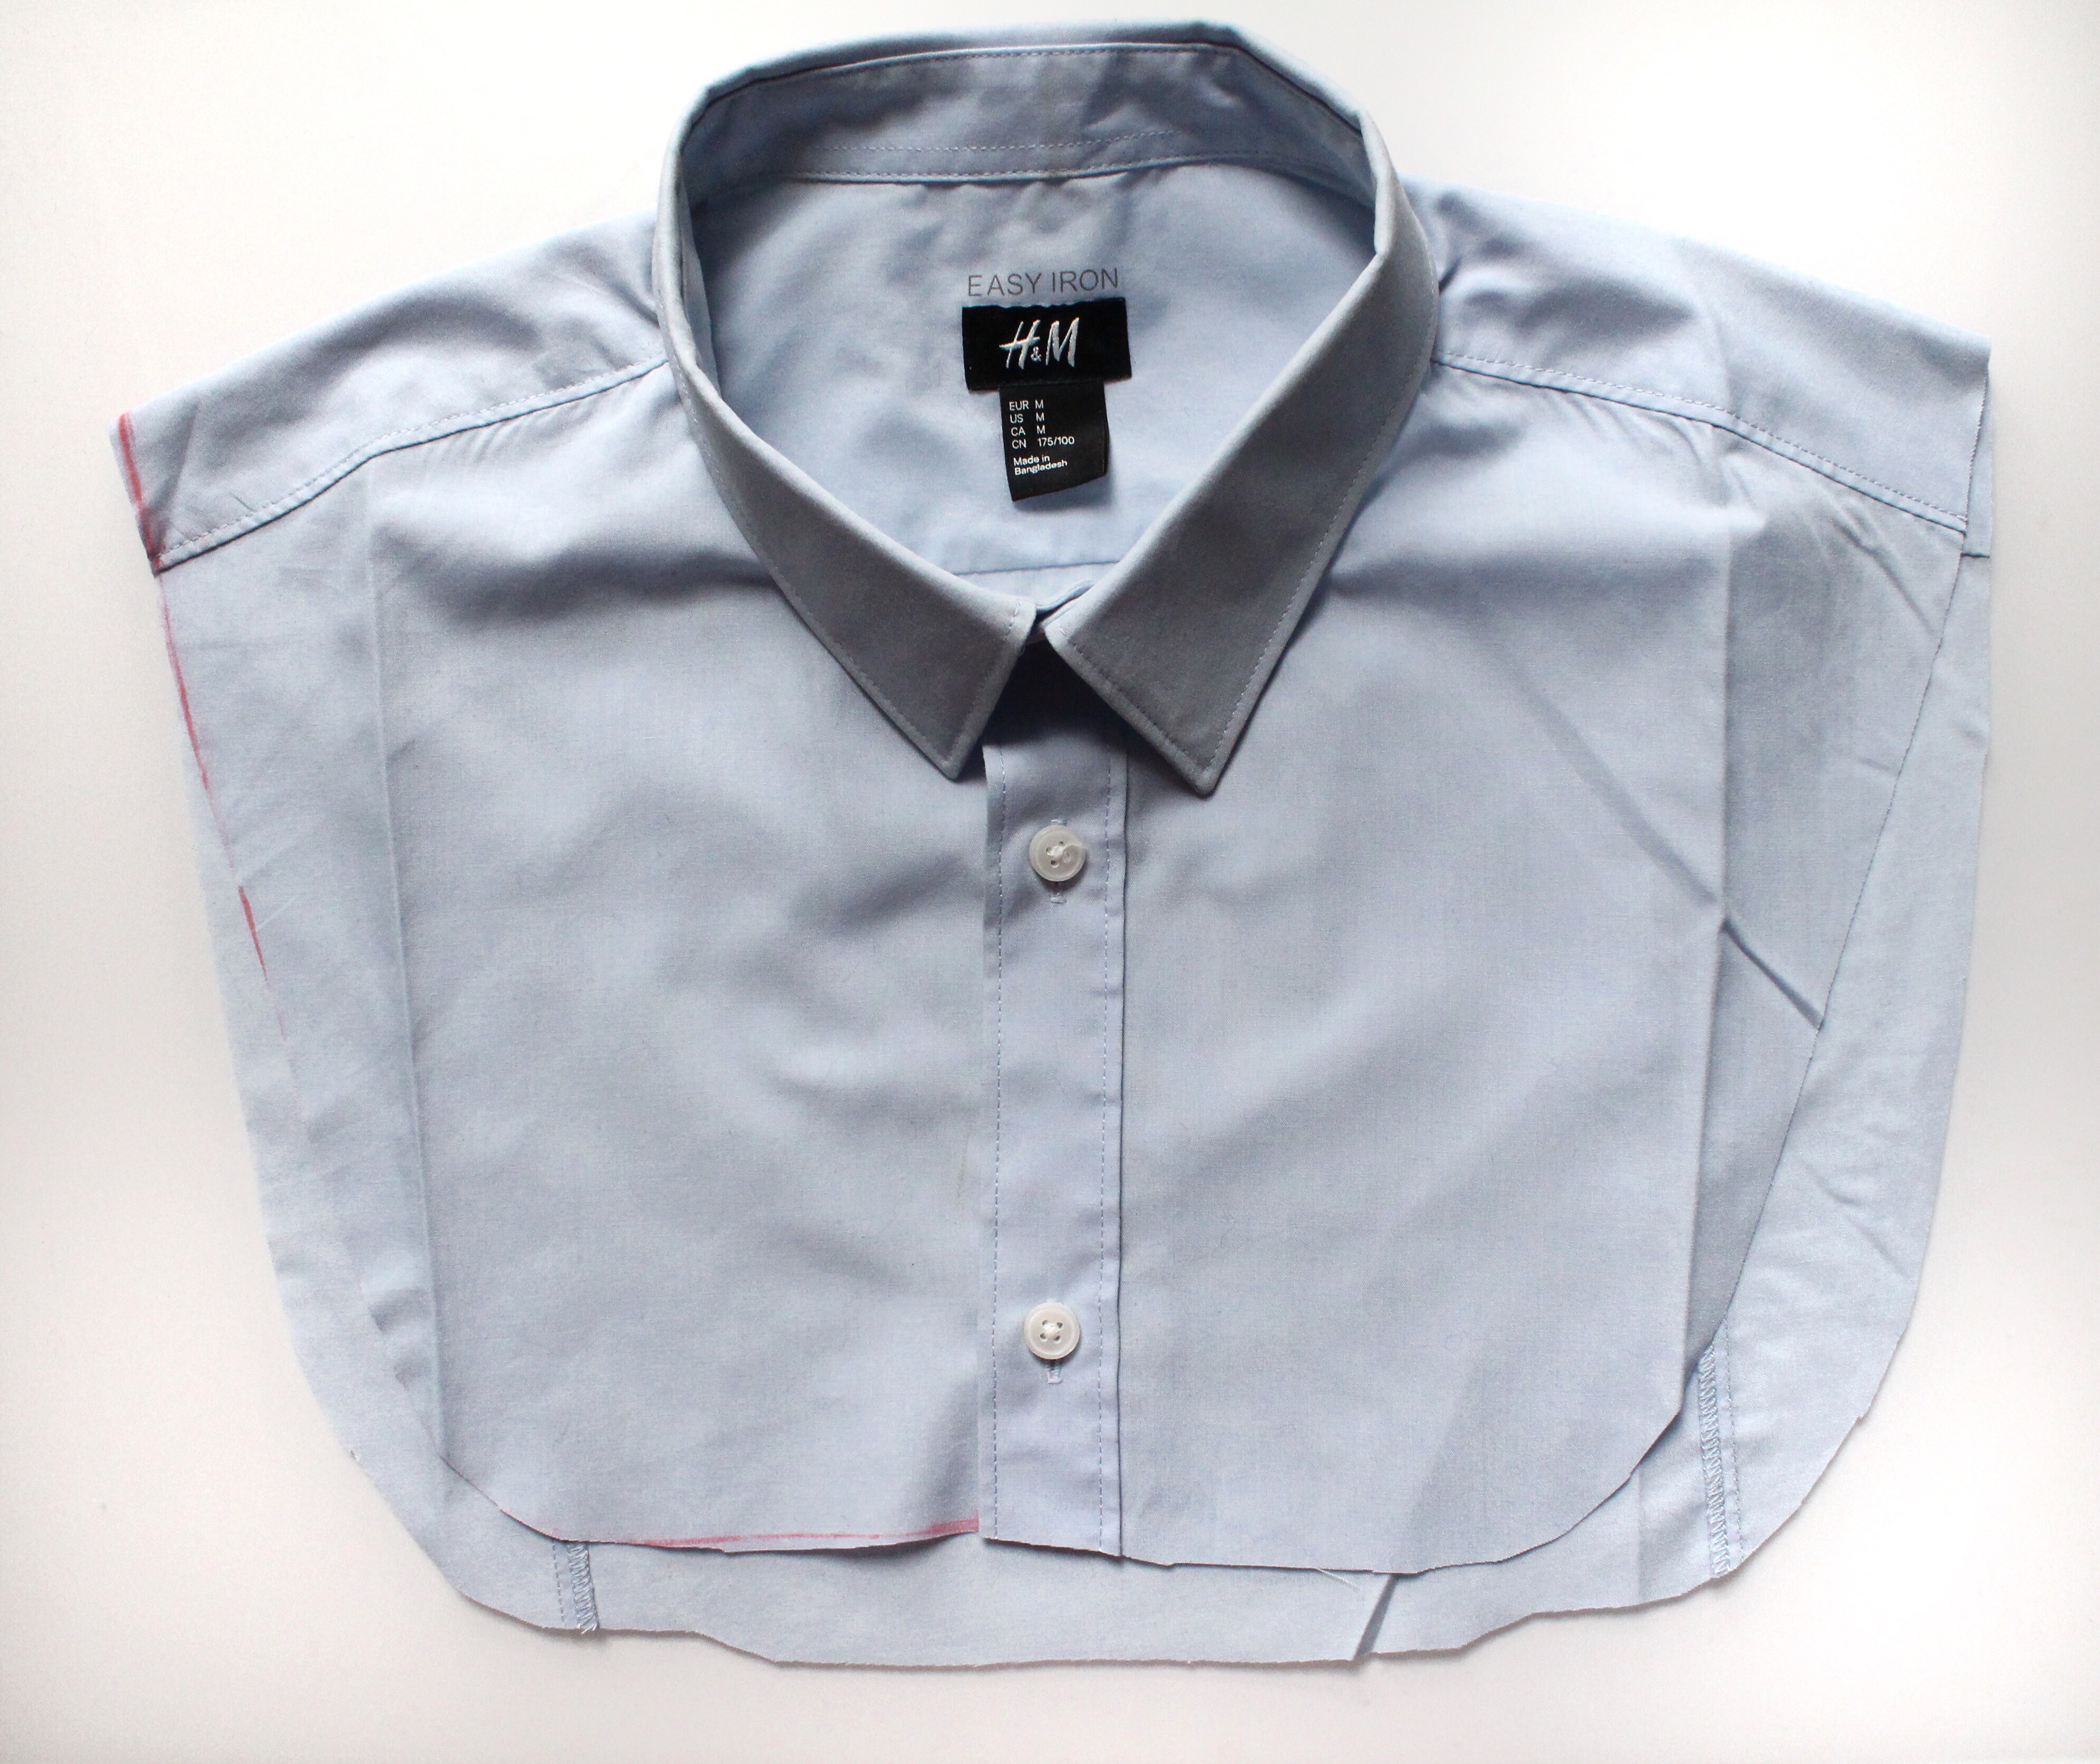
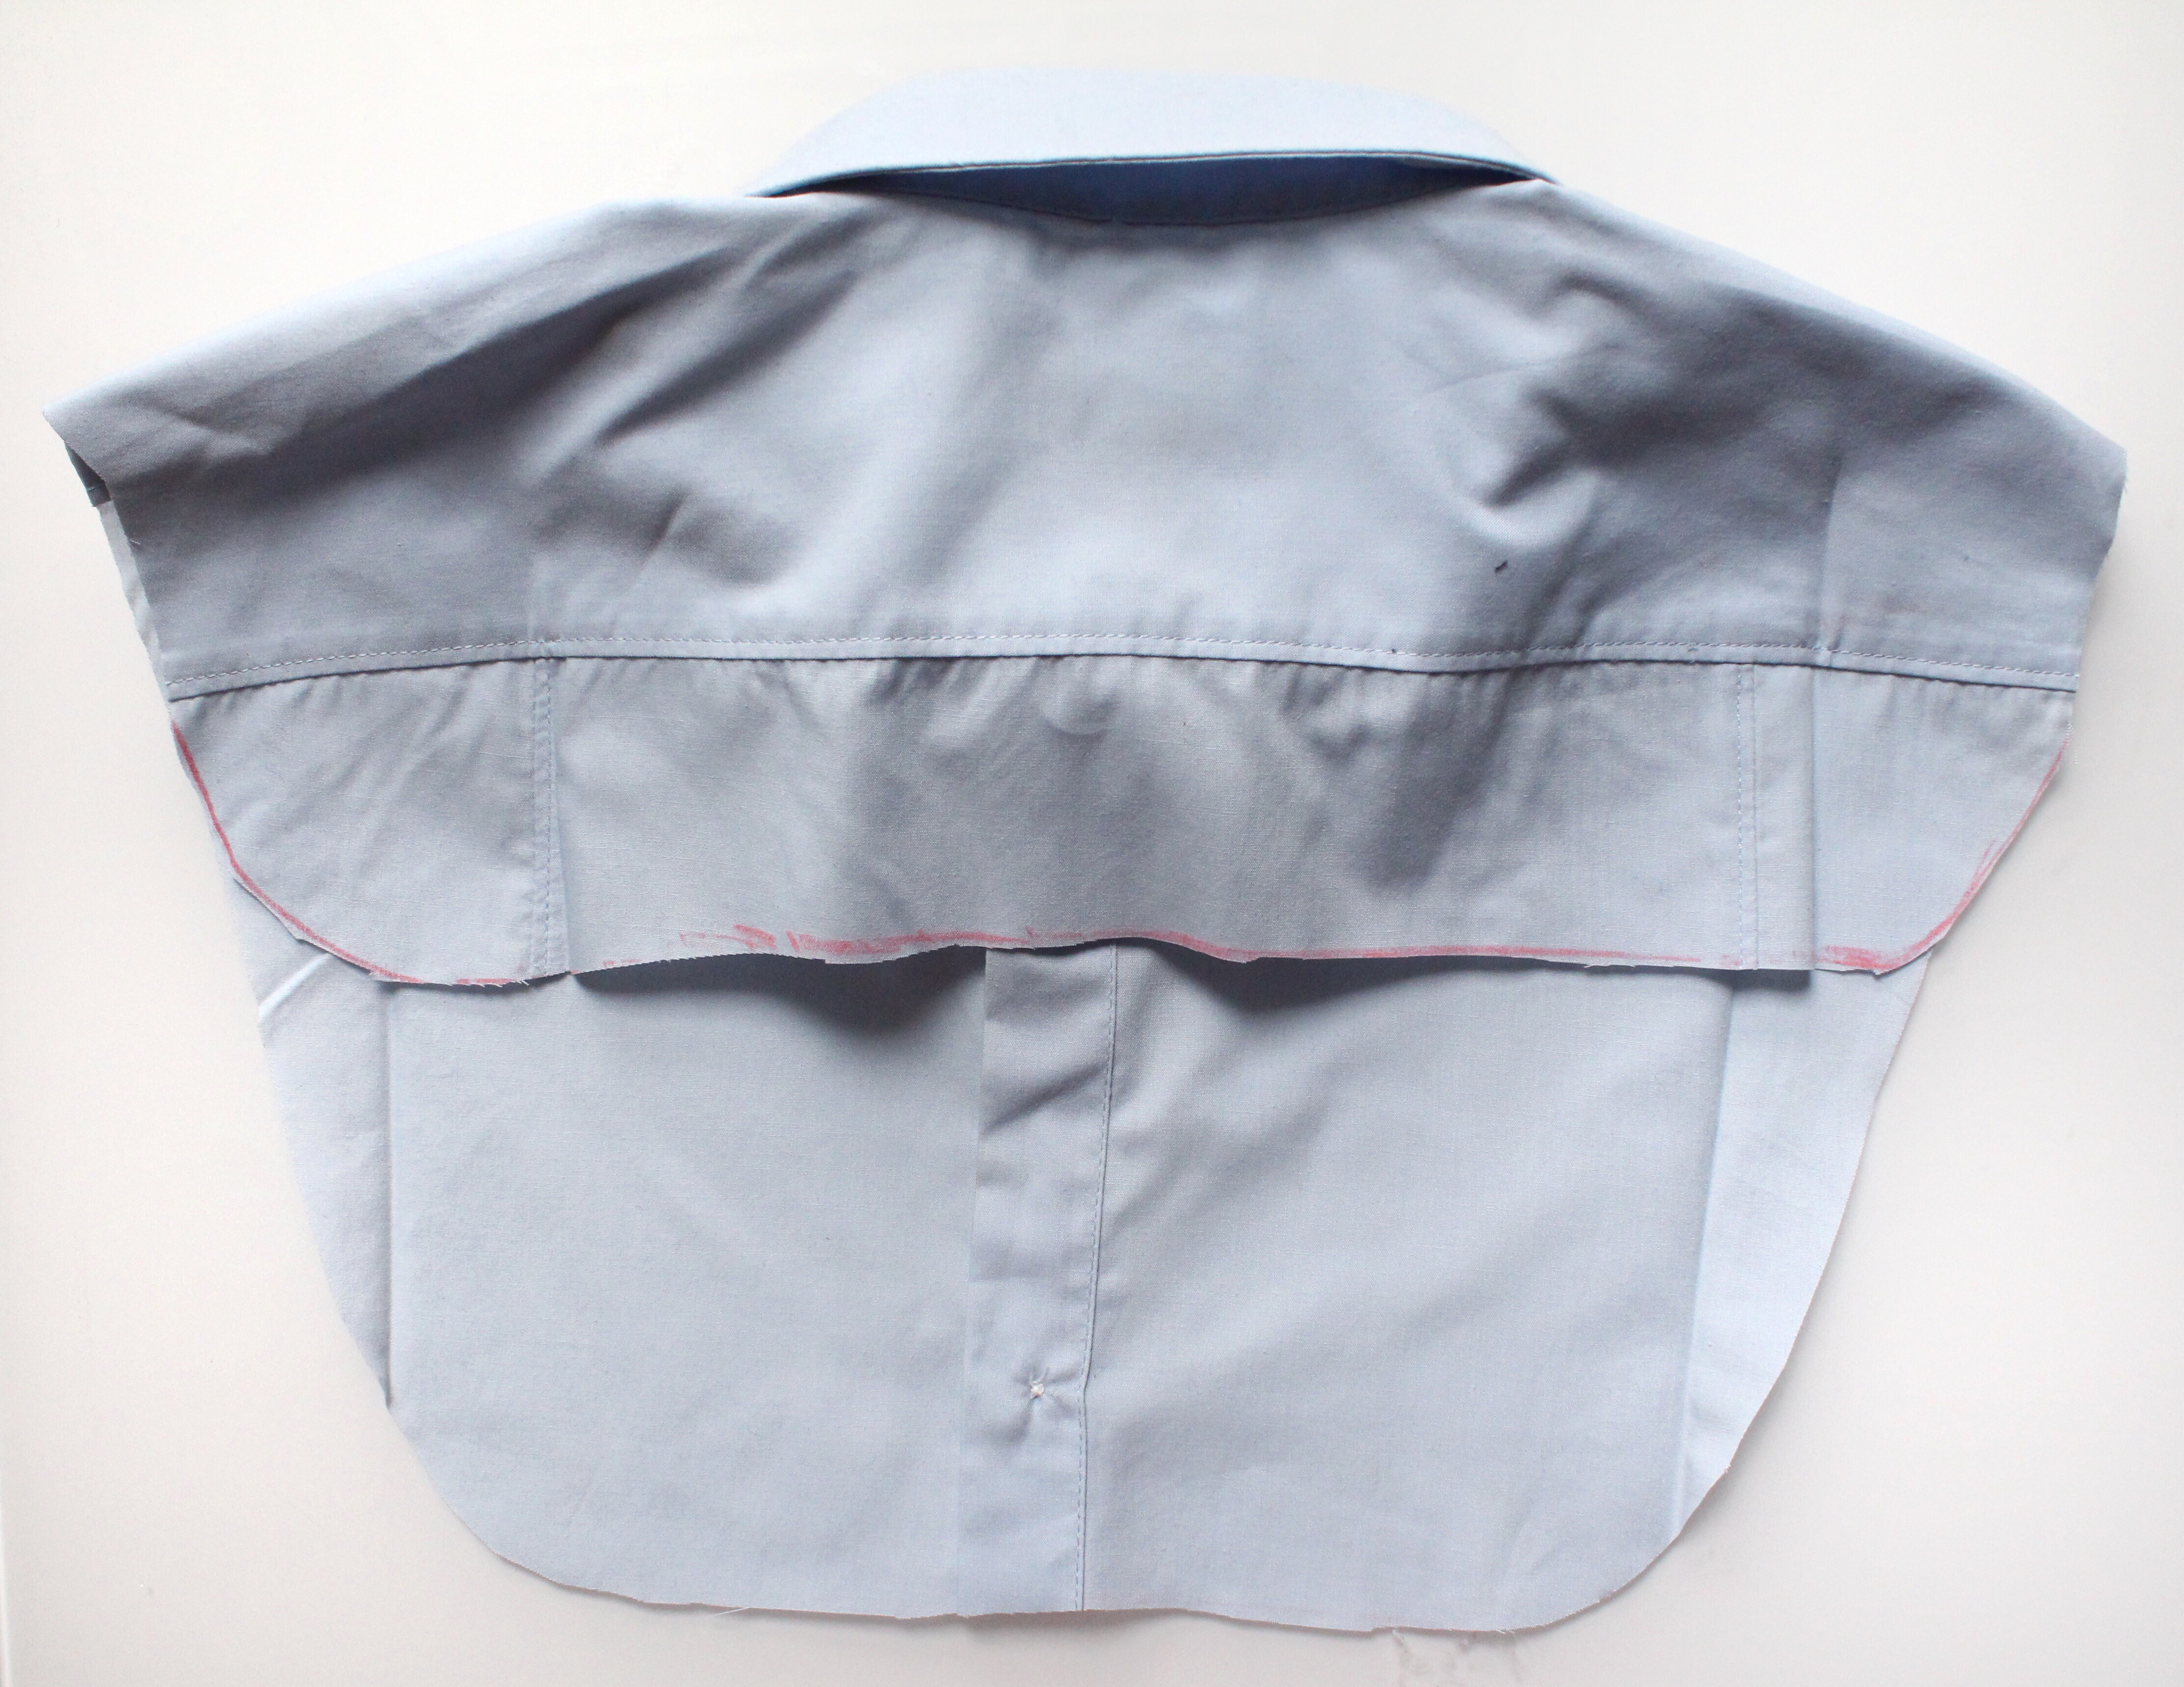
STEP 2: REDUCE THE BACK LENGTH
The length in the back isn’t very useful, so reduce it to keep only 15 cm of length in the back.
STEP 3: FINISHING
Your collar is almost finished. For finishing the edges, here are 4 options: finish the edges with a serger, make a mini hem, use a zigzag stitch, or use fray-check glue (ideal if you don’t have a sewing machine). That’s it, you’re done. A visible collar with a secret.

—> Also read: “The Dickie Case” on the made
DIY – Dickie – The Secret Collar
This is a post for all avid recyclers out there. A post that will make your closets and hangers happy. But above all, this post is capable of making many men tremble.
It was with the Fall/Winter collection from Comptoir des Cotonniers that I discovered this removable collar. I immediately thought this was an amazing and super easy to make idea. Just hide it under a sweater and you’re good to go!
YOU WILL NEED:
- A shirt (men’s or women’s, just make sure the collar fits)
- Matching thread
- Scissors
- Label (optional but useful if you’re planning to make a gift)
STEP 1: CUT THE DICKIE
Fold the shirt lengthwise. Make sure to match the shoulder seams.
Draw two perpendicular lines: one starting from the shoulder top and the other starting at the middle of the 3rd and 4th button (or between the 4th and 5th button).
Now link the two lines by drawing a freehand curve or make marks on each line as shown in the image and join the marks.
STEP 2: REDUCE BACK LENGTH
The length in the back is not very useful. Thus, reduce the back to 15 cm.
STEP 3: FINISHING
Your collar is now finished. For the finishing touches, here are 4 options: use a serger, zigzag the edges, sew a mini hem, or use some fray-check glue (ideal if you don’t have a sewing machine).